
Are you after having a clean and clutter-free screen on your mac? Well, you can find some people who are pretty clever when it comes to managing top icons. The desktop is playing a significant role in managing folders and apps. So, in this article, you will learn how to hide the desktop icons on macOS Big Sur.
Table of Contents
Why it might be important for you to Hide The Desktop Icons on your macOS?
You may need to briefly delete an icon from the desktop of your Mac, you may be preparing for a presentation or just want to take a snapshot without being interrupted. In both cases, it will take a long time to move the icon to another file. Especially after figuring out how to quickly overwrite the icons on the Mac.
How to Hide the Desktop Icons on macOS Big Sur

You’ll find many ways to hide the desktop icons on macOS Big Sur. You can go for the terminal commands or go for third-party applications. At the same time, here, we will show you 3 different methods to clean up the desktop on Mac.
Method 1. Hide the Icons from Desktop on macOS Big Sur using Mac Finder
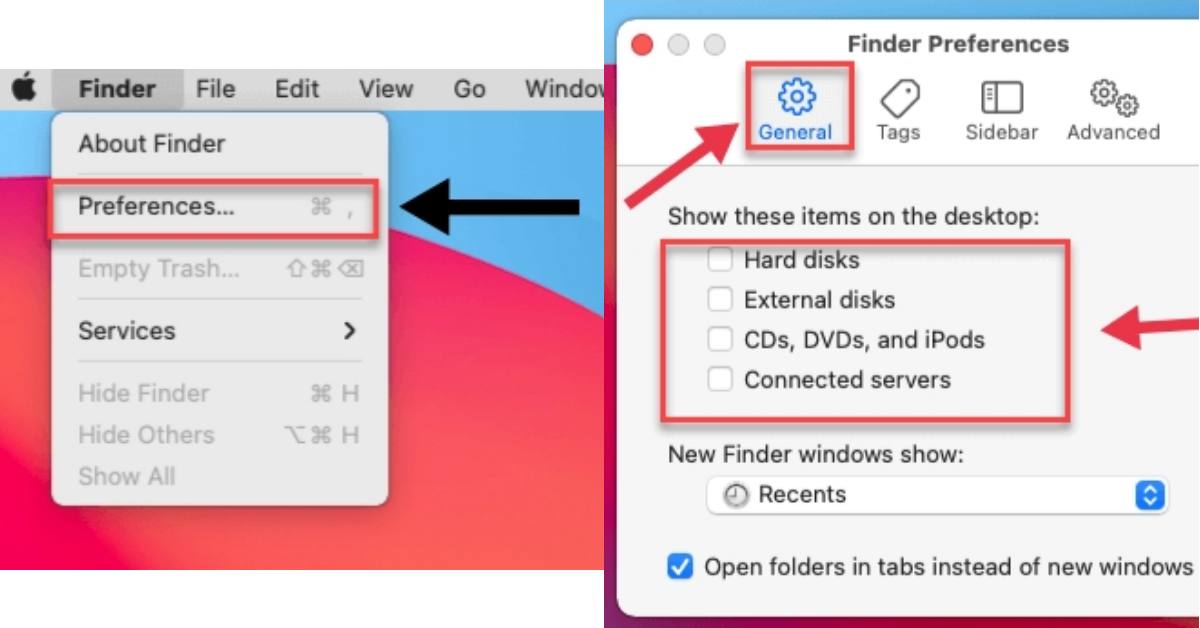
You can also hide the desktop Icons on macOS Big Sur using Mac Finder if you want a simpler approach without getting into the weeds of the terminal. This will not hide all icons; only those that are related to external computers and appear automatically will be hidden: hard drives, external disks, CDs, DVDs, iPods, and connected servers.
- Click Finder on the top right-hand corner and select Preferences
- On the General tab, uncheck all the boxes and you are good to go
Method 2. Hide the Icons from Desktop on macOS Big Sur using Terminal Commands
The first and simple step to hide the desktop icons on macOS Big Sur or earlier is to use the terminal. You already know that Terminal is one of the most powerful applications for Mac. In fact, terminal commands can be used to monitor any part of the Mac.
Note: Remember that you need to capitalize “F” in “Finder” otherwise, the terminal would say that no matching processes were identified.
- Open Terminal from Applications > Utilities or open the Spotlight and then search for Terminal.
- Now, type the below command and press enter.
defaults write com.apple.finder CreateDesktop false
- After that, use the following command in the Terminal to restart Finder.
killall Finder
- Once you’re done, the desktop icon will be hidden.
However, To show the desktop icons back you can follow the following commands:
- Type the below command and press enter.
defaults write com.apple.finder CreateDesktop true
- Restart Finder with the following command.
killall Finder
Method 3. Hide the Icons from Desktop on macOS Big Sur using HiddenMe App
Running the above command is not a difficult task, but if you want to hide the desktop icons on a regular basis, we recommend using a third-party app called “HiddenMe“. HiddenMe is a very basic program that allows you to hide all items on your Mac screen using keyboard shortcuts and mouse clicks.
- Go to App Store and install the HiddenMe app.
- Once installed, open the app.
- Now, tap the HiddenMe icon on the menu bar and click on the Hide Desktop Icons.
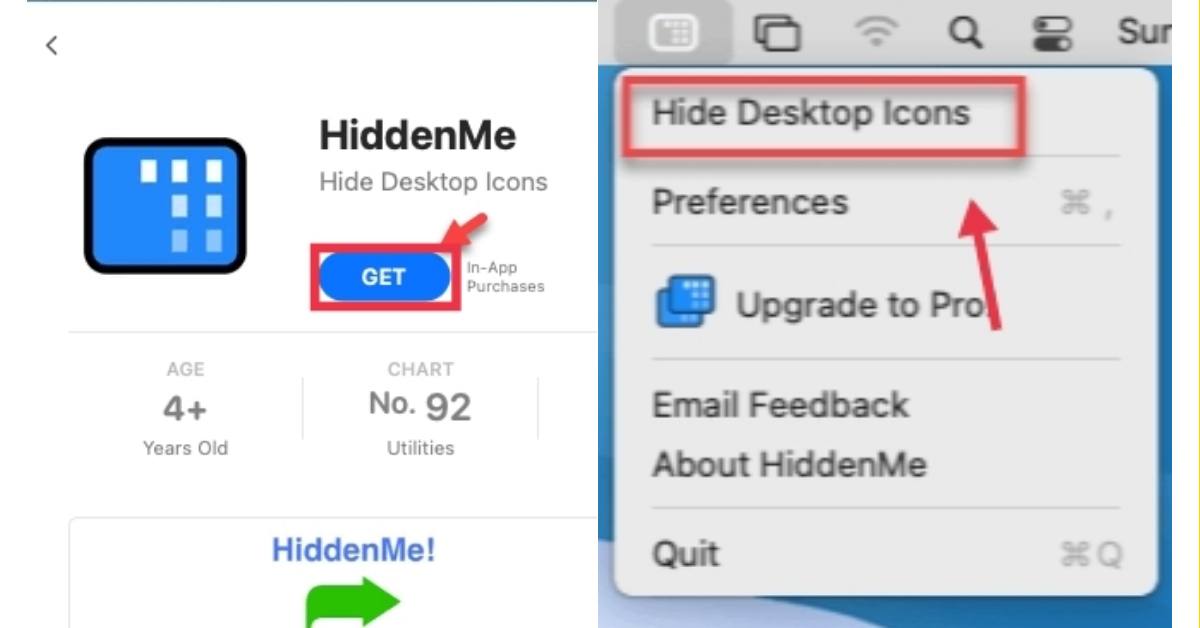
To show desktop icons later, you can simply click on the HiddenMe icon in the menu bar, and click on Show Desktop Icons.
Final Words
So the end. This is how you hide the desktop icons on macOS Big Sur. By following one of the above methods, I guarantee that no one can break your balance and embarrass you about your digital hygiene practices. You can now clean up your desktop with its best powers and organize it with just a few keystrokes when the time comes.
Read more: