Sometimes you want to give or sell your Macbook, but what will happen to your data? Don’t worry because you can easily reset or erase your data from your Mac, as demonstrated in this Techschumz article.
Note: Remember that, unlike the iPhone, you can’t directly reset your Mac, so you need to back up your data, unlink your apps, sign out of your iCloud account, and reinstall your Mac to reset your Apple Macbook completely.
Table of Contents
Back up Data on your Mac
To reset your Mac without data loss, you need to back up your data, so you do not lose it. Even if you erase your data from your Mac, all your data, such as photos, documents, and other files, will be automatically saved in your iCloud account.
Back up your Mac using Time Machine
You can use the time machine on your macOS Monterey to back up your data, and here is how to do it.
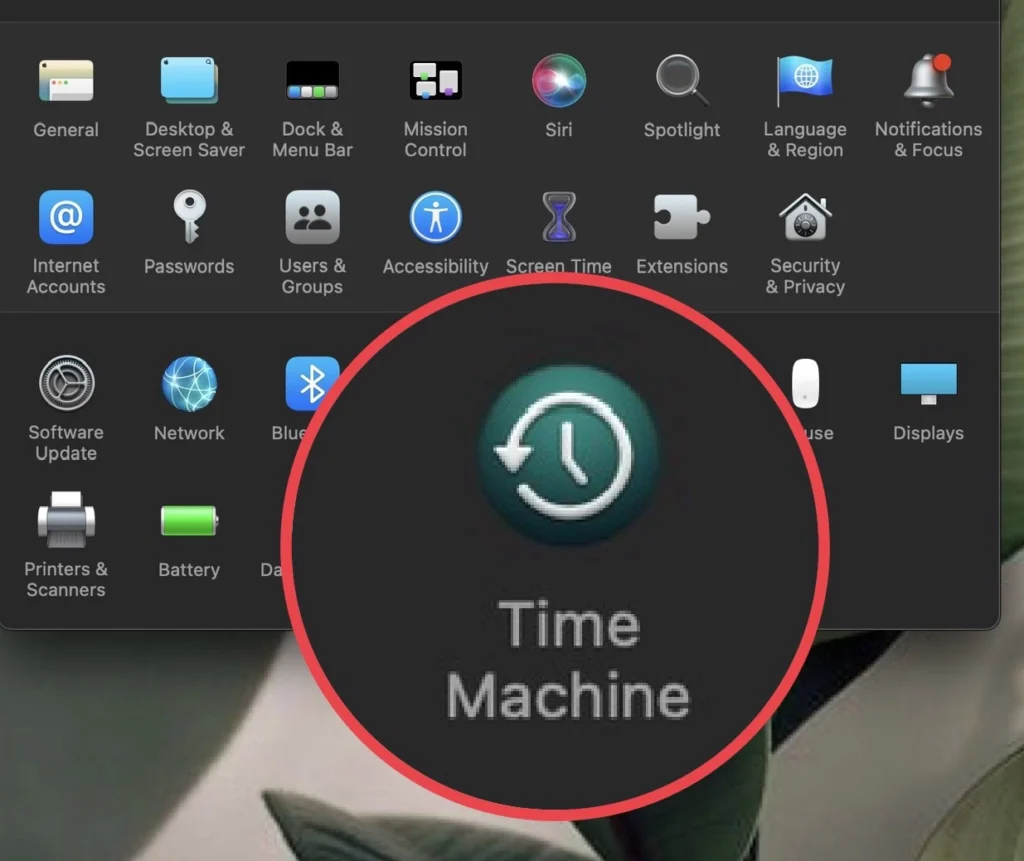
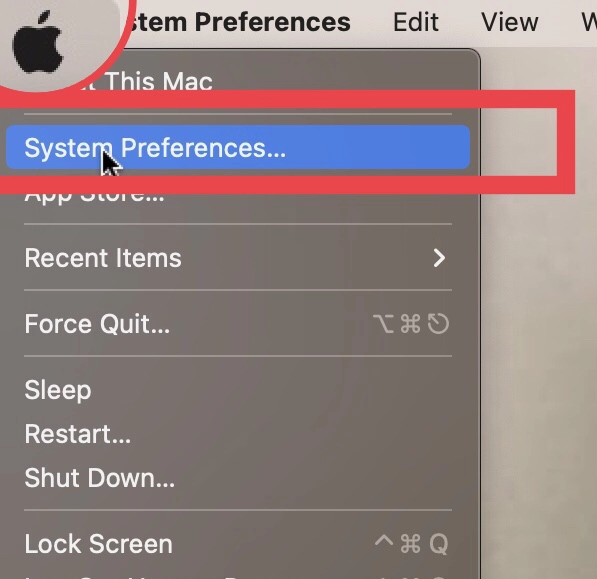
Step 1. First, connect an external disc to your Mac, tap “” in the menu bar, and select “System Preferences.”

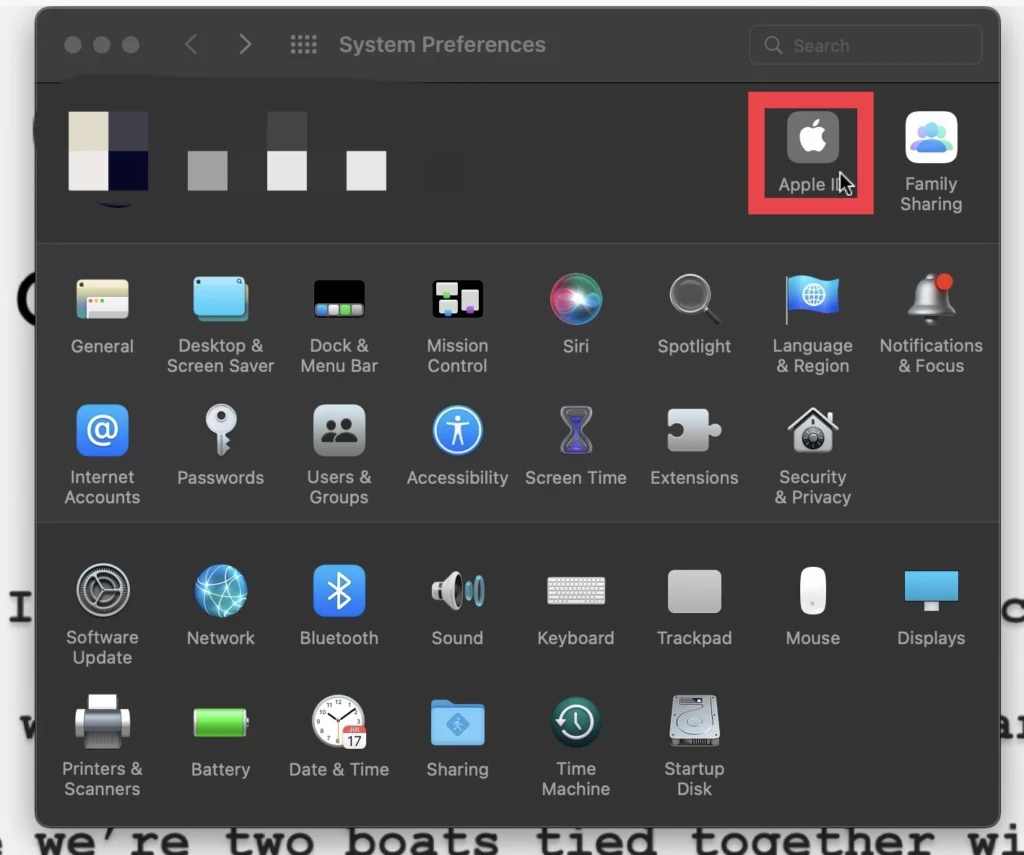
Step 2. In the system preferences menu, select “Time Machine” beside “Sharing.”
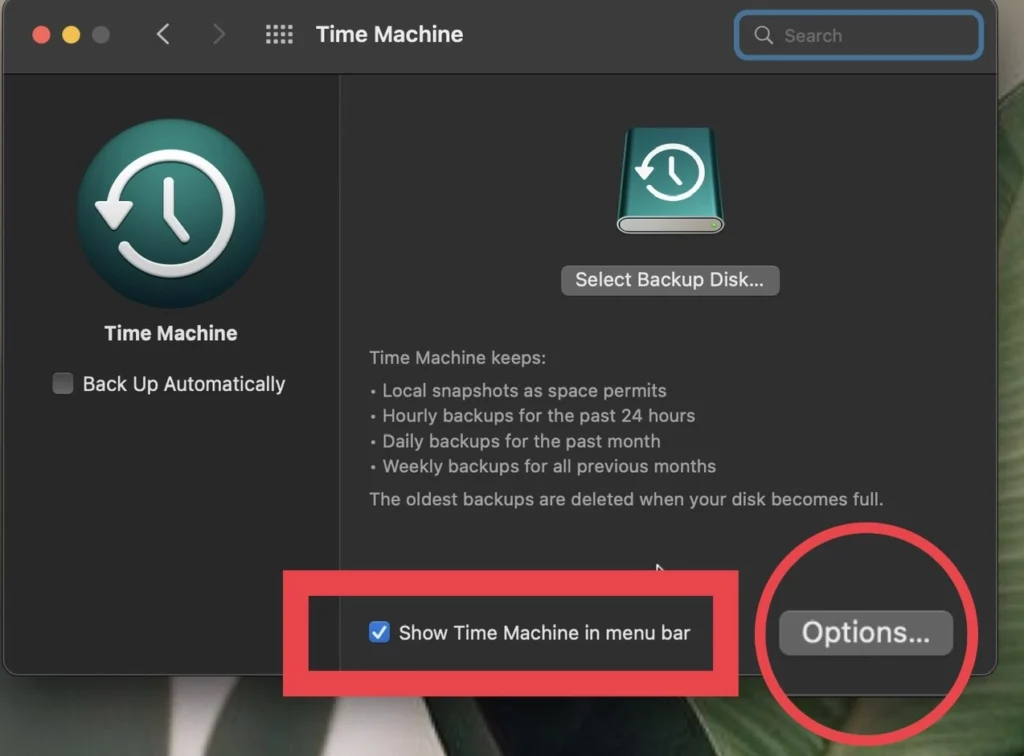
Step 3. Then tap on the “Show Time Machine in the menu bar” option to add it to the menu bar.
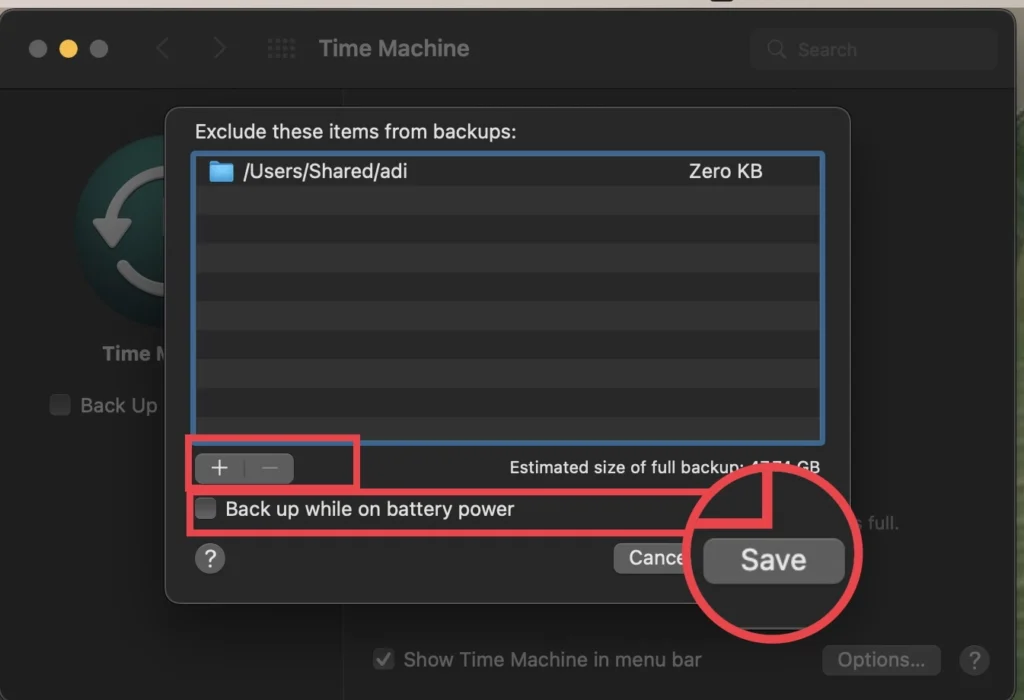
Step 4. You can exclude the folders you don’t want by tapping the “Options” button.
Step 5. Then select the folder and tap on the minus sign (-), and if you want to back up data on battery power, tick “Back up while on battery power.”
Step 6. Now tap the “Save” button to save the changes.
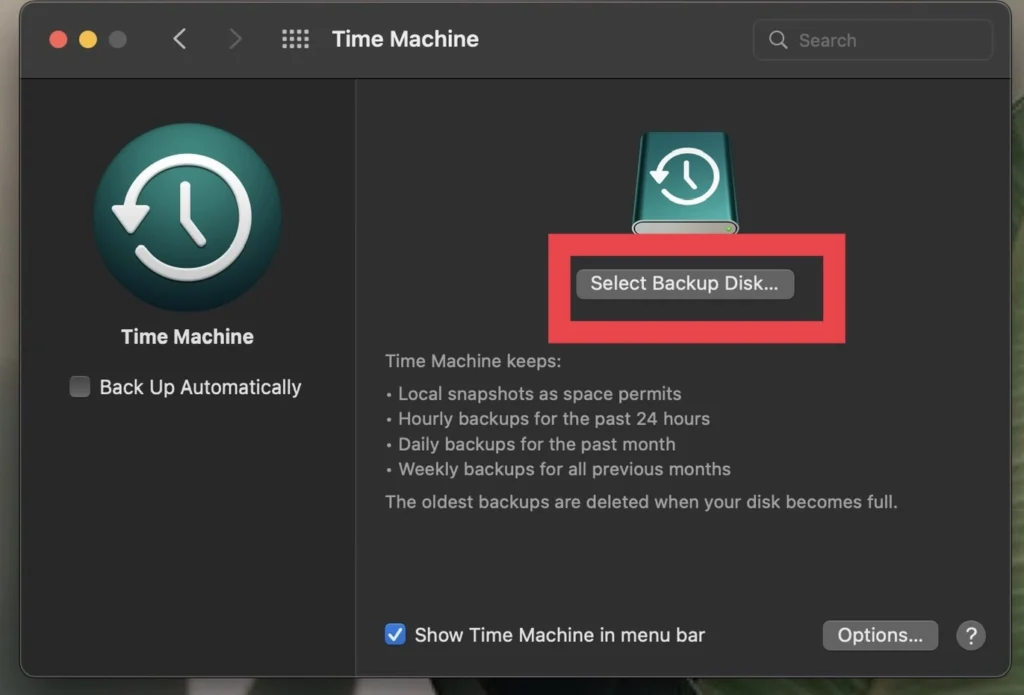
Step 7. And finally, tap on “Select Backup Disk” and select the disc to which you want to back up your data.
Deauthorize your iTunes account on Mac
Then you would need to unlink the iTunes app on your Mac, and to do so, follow the guidelines below.
Step 1. Open the “iTunes” app on your Mac.

Step 2. Then, tap “Account” from the menu bar and select “View my Account.”
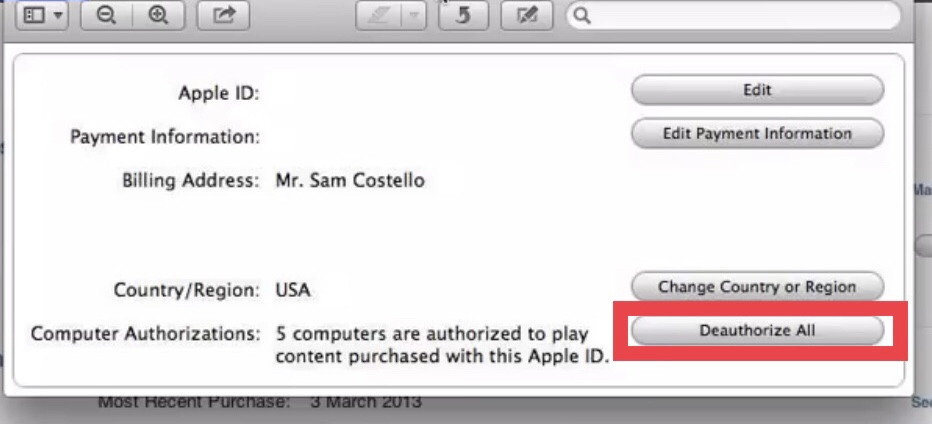
Step 3. Now select the “Deauthorize All” option.
Step 4. Then, for confirmation, tap “OK.”
Sign out of iCloud
Next, sign out of your iCloud account and make sure that your data from other apps will be removed too.
Step 1. Tap the “” icon in the menu bar and select “System Preferences.”
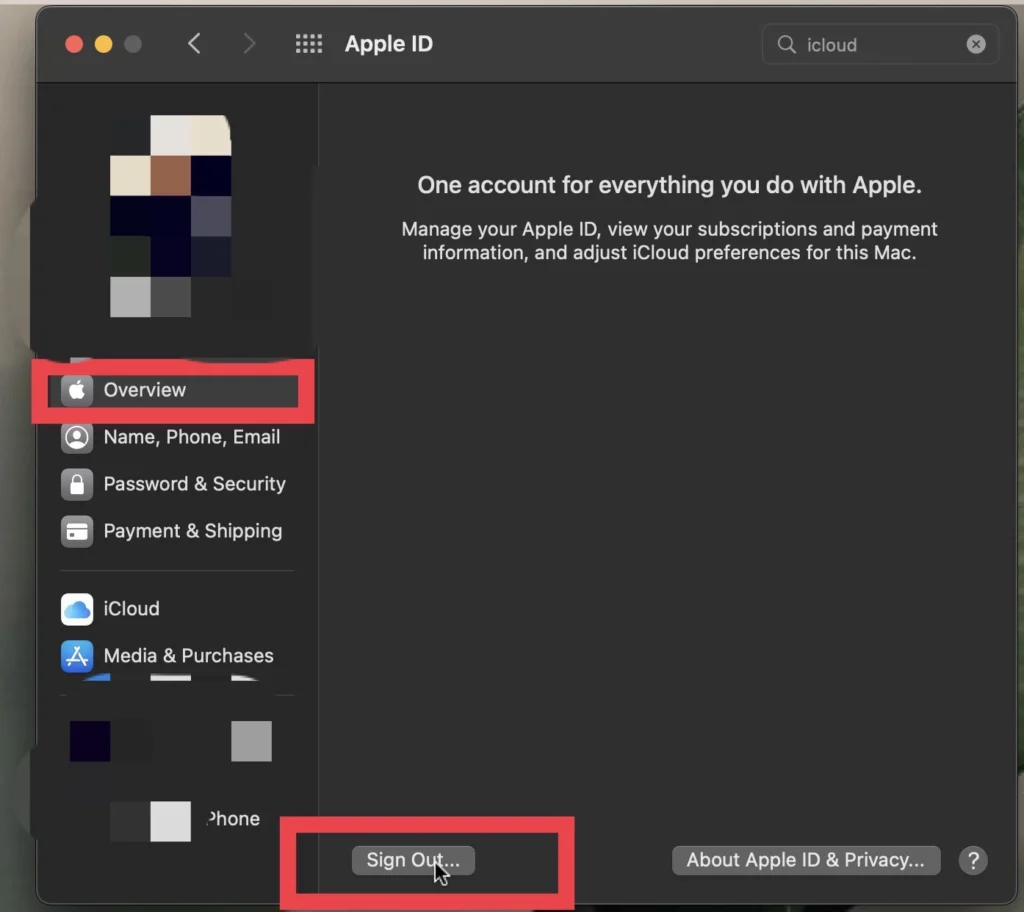
Step 2. Next, tap “Apple ID” beside your account profile in the system preferences.
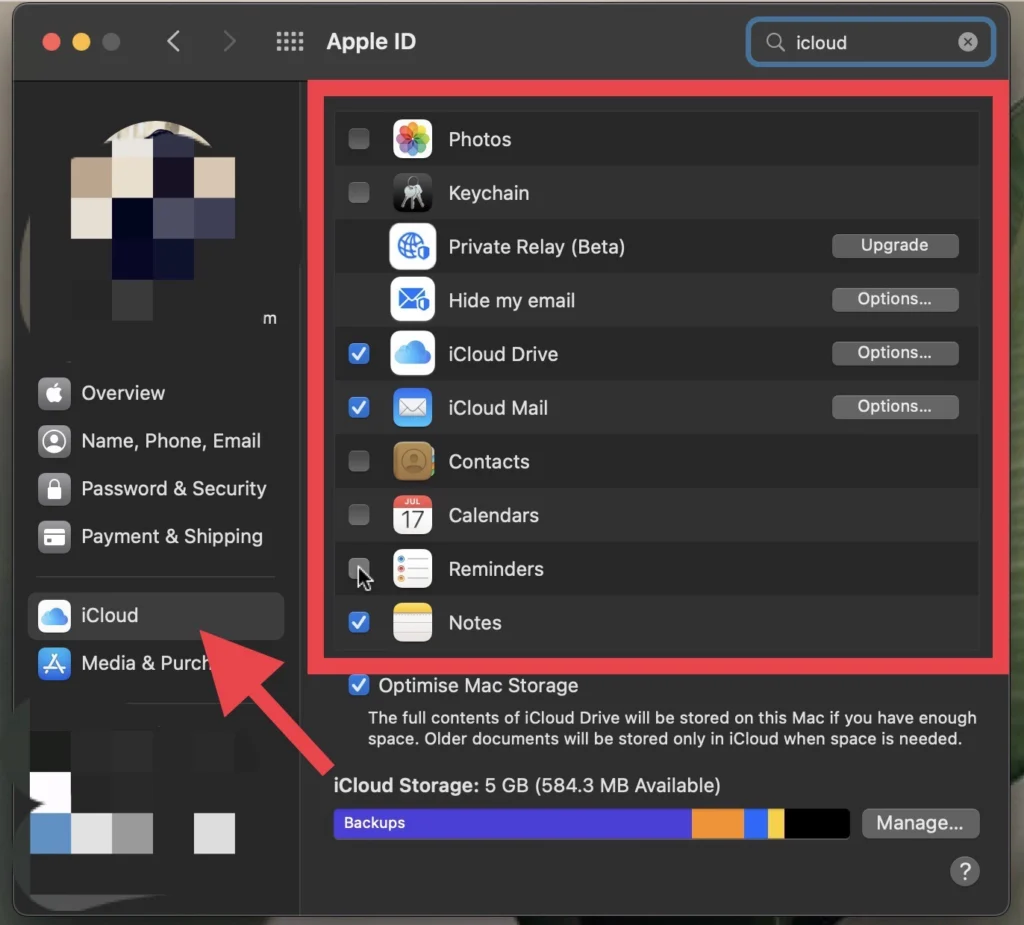
Step 3. Ensure that all the “Apps” are selected.
Step 4. And finally, tap on “Overview” and “Sign Out” from your iCloud account.
Erase and reset your Mac
To reset and reinstall your macOS Monterey, follow the instructions listed below.
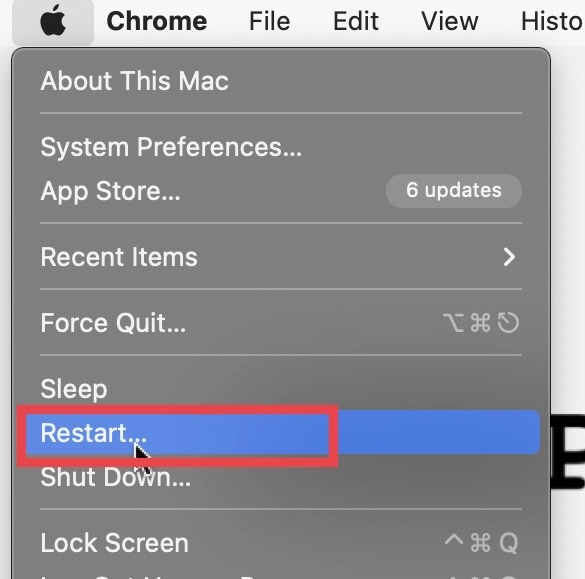
Step 1. Click on “” and select “Restart.”
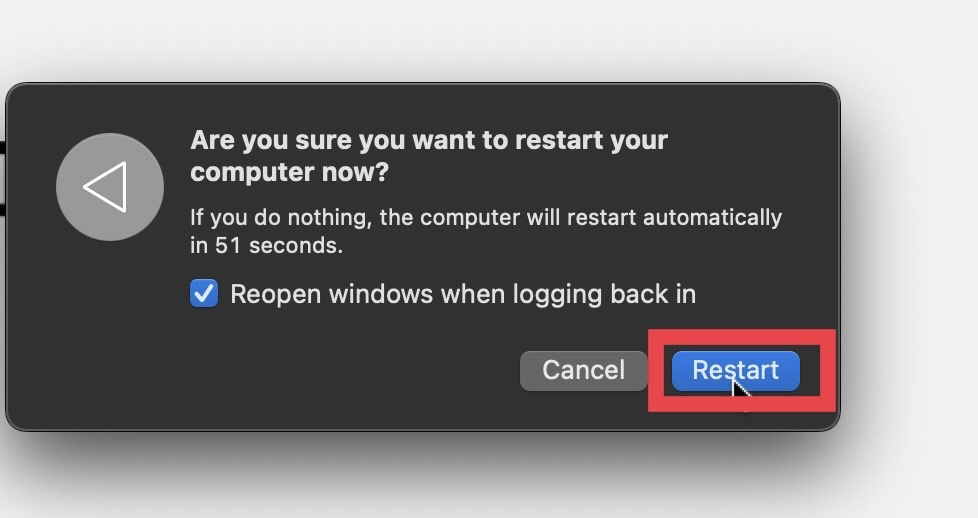
Step 2. Now tap on “Restart” for confirmation.
Step 3. Then hold on to the “Command” and “R” buttons when your Mac switches on.
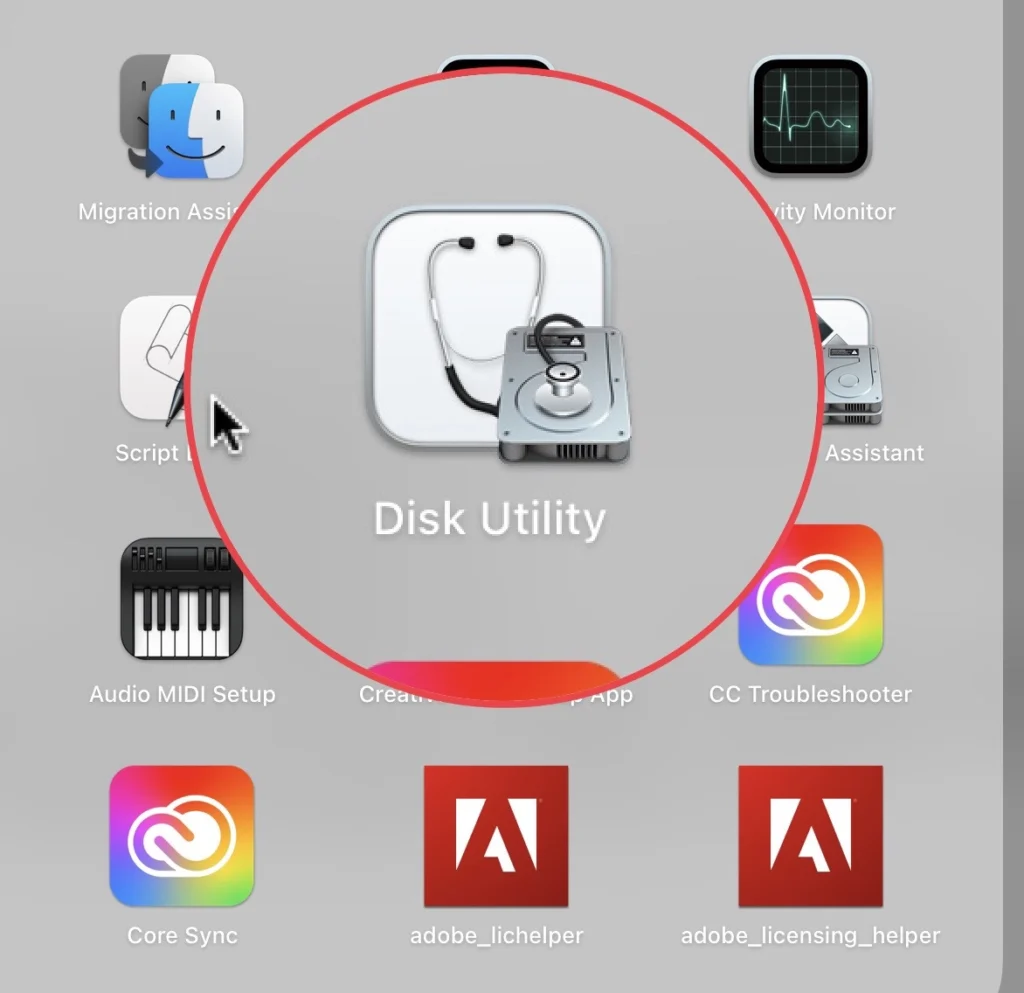
Step 4. Now the macOS Utilities screen will appear; select “Disk Utility.”
Step 5. Select “Macintosh HD” as the system drive and “APFS” as the format, then click “Erase.”
Step 6. Then tap on “Erase” for confirmation.
Step 7. And finally, tap on the “Command” and “Q” keys to shut down your Mac.
There you go. You’ve completed a factory reset on your macOS Monterey.
Final Words
These steps are to erase and reinstall your mac before selling to keep your data safe and out of access for unauthorized people. Finally, use the space provided below to share your suggestions and questions.
Read also:
How To Pair Nothing Ear 1 Earbuds With Your Mac
How To Install MacOS Monterey On VMware On Windows 10 PC Or Laptop