The latest iPhone, the iPhone 15, has come with lots of customization, and among all the customizations is the auto lock screen timeout, which can be increased or decreased in the iPhone settings. The steps to change the lock screen timeout period are outlined in this Techschumz article.
The auto-lock screen feature in the iPhone is a useful tool that helps conserve battery life and enhance security by automatically locking the screen after a certain period of inactivity. By adjusting the auto-lock screen timeout period, users can personalize their iPhone experience to suit their preferences and needs.
Table of Contents
Increase the auto-lock timeout period on an iPhone 15
Increasing the auto lock screen timeout for the iPhone is a simple process that can be done in just a few steps.
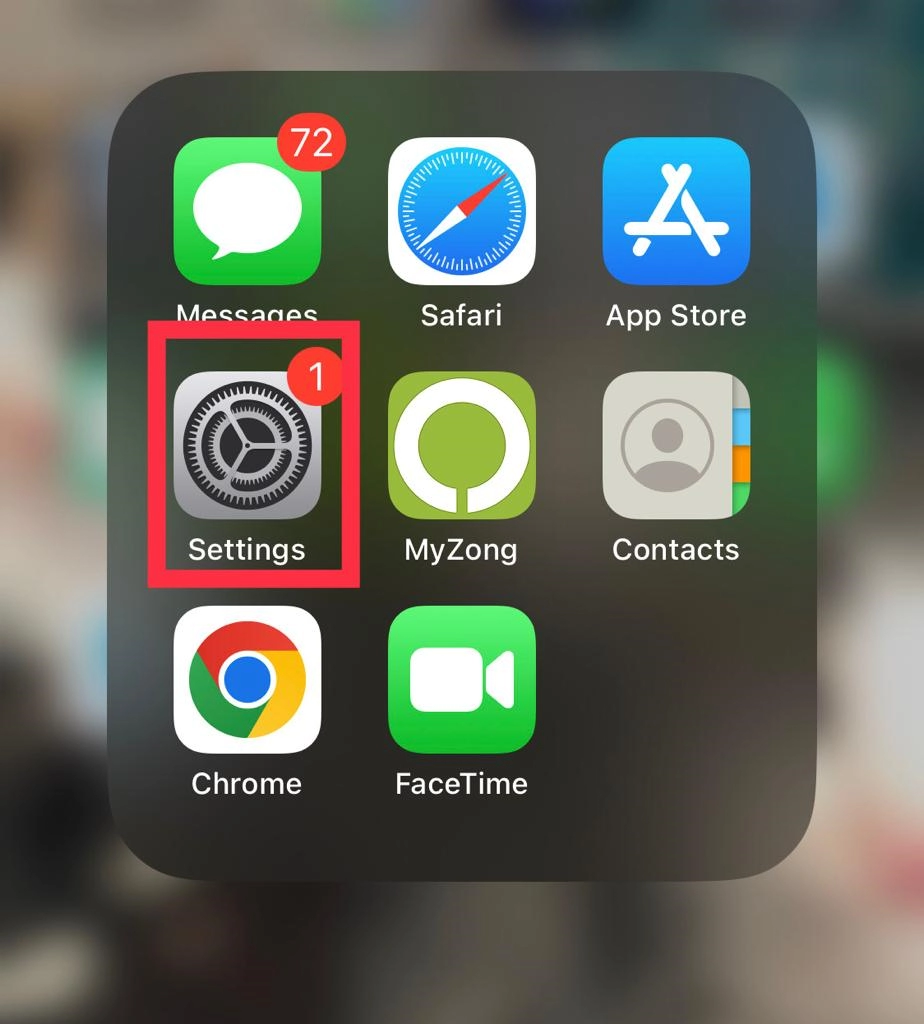
Step 1. Navigate to the “Settings” app.
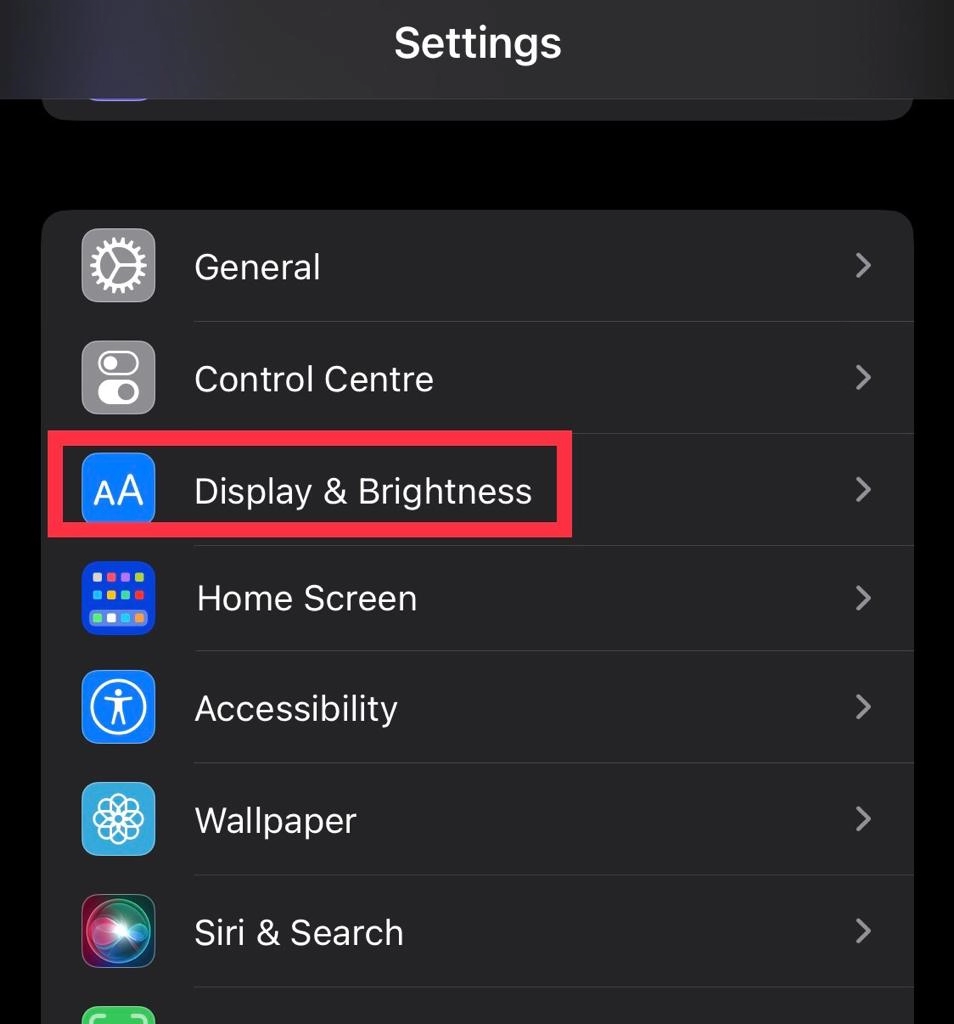
Step 2. Then tap on “Display & Brightness.”
Step 3. Next, go to the “Auto Lock” menu.
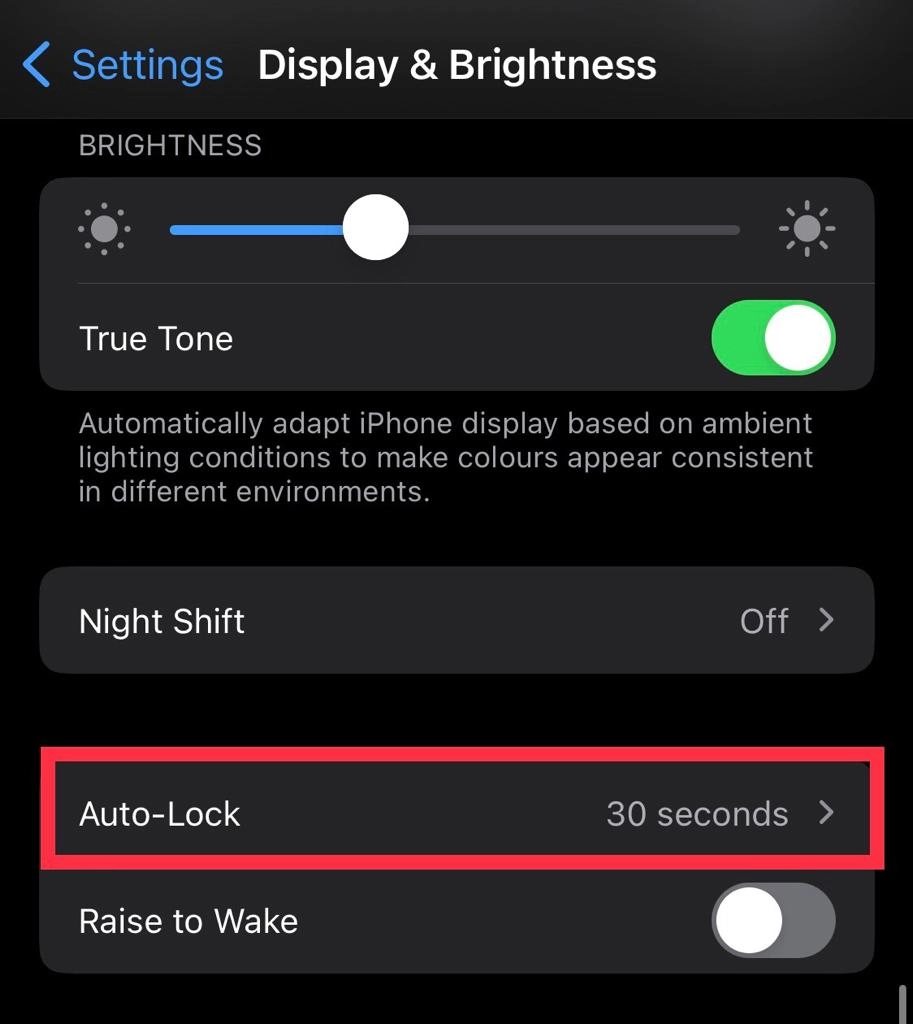
Step 4. Now you can see the range from “30 sec -5 min.”
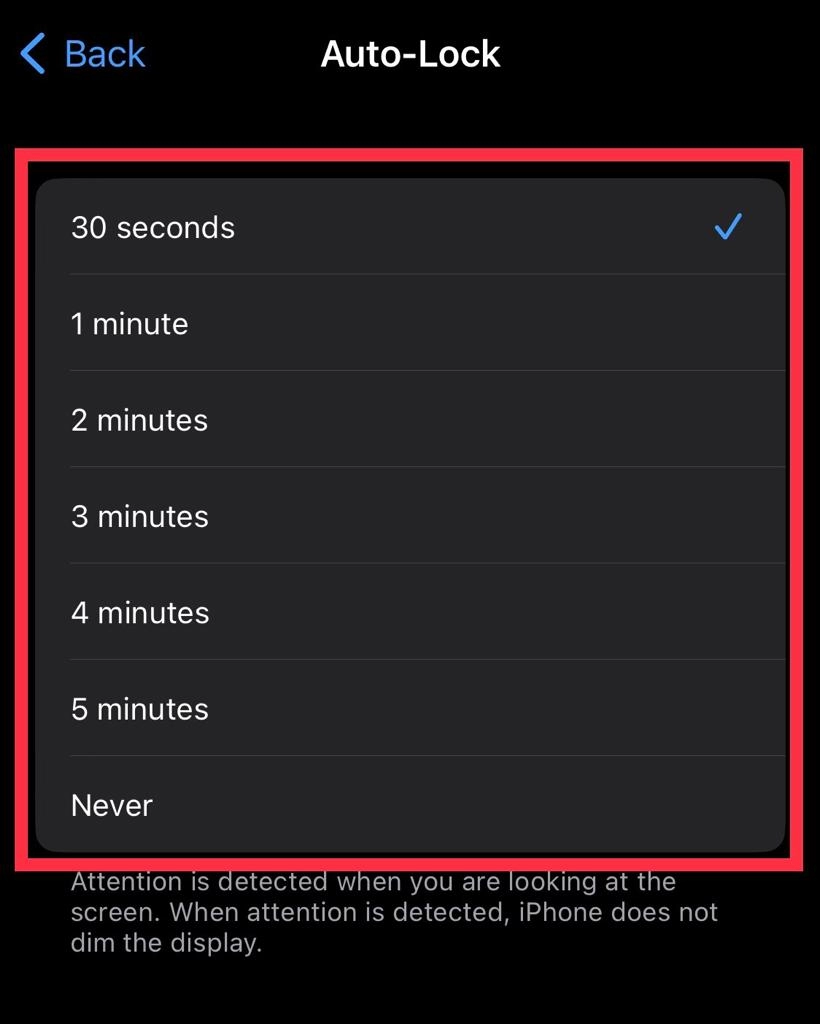
Step 5. Finally, choose “Timer” as your preference.
Decrease the auto-lock period for the iPhone 15
Decreasing the auto lock screen period is good for the iPhone because it helps conserve battery life and prevent unauthorized access to your device. To decrease the auto-lock period, follow the steps mentioned below.
Step 1. Open “Settings” and select “Display & Brightness.”
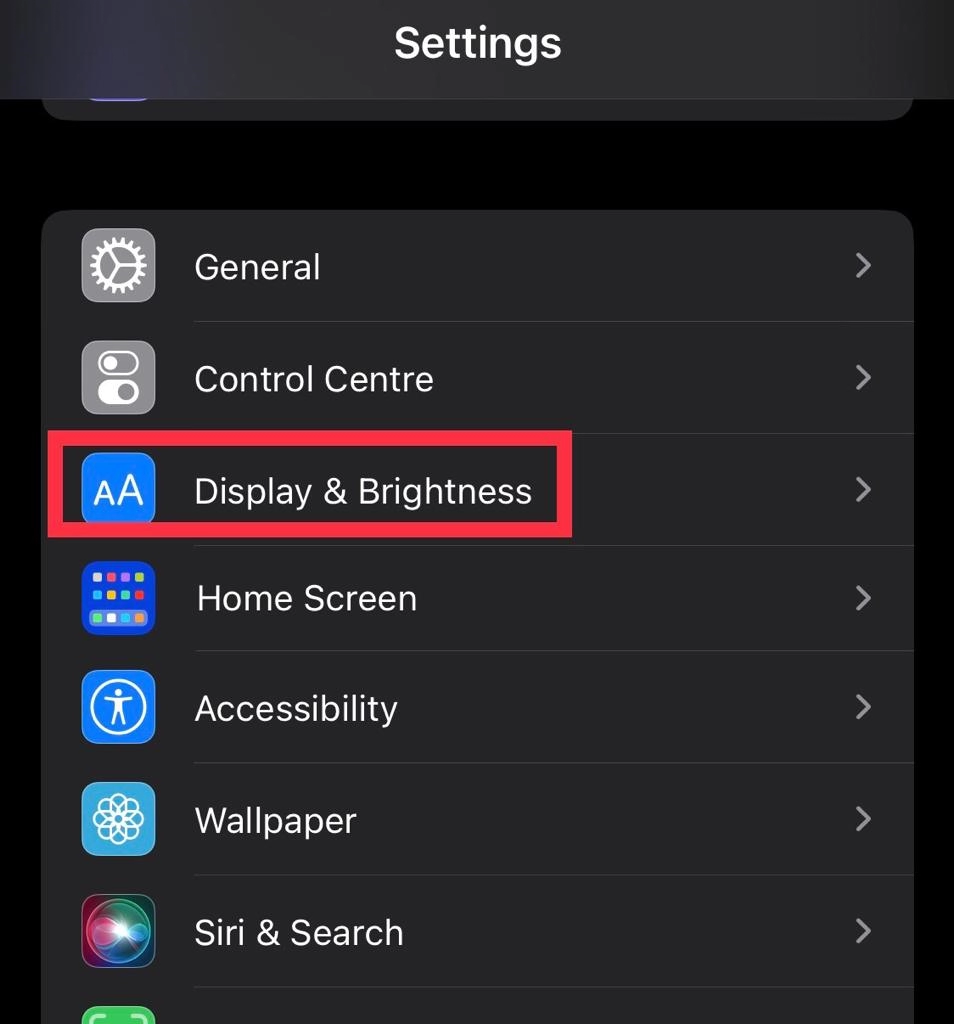
Step 2. Then tap on “Auto-lock.”
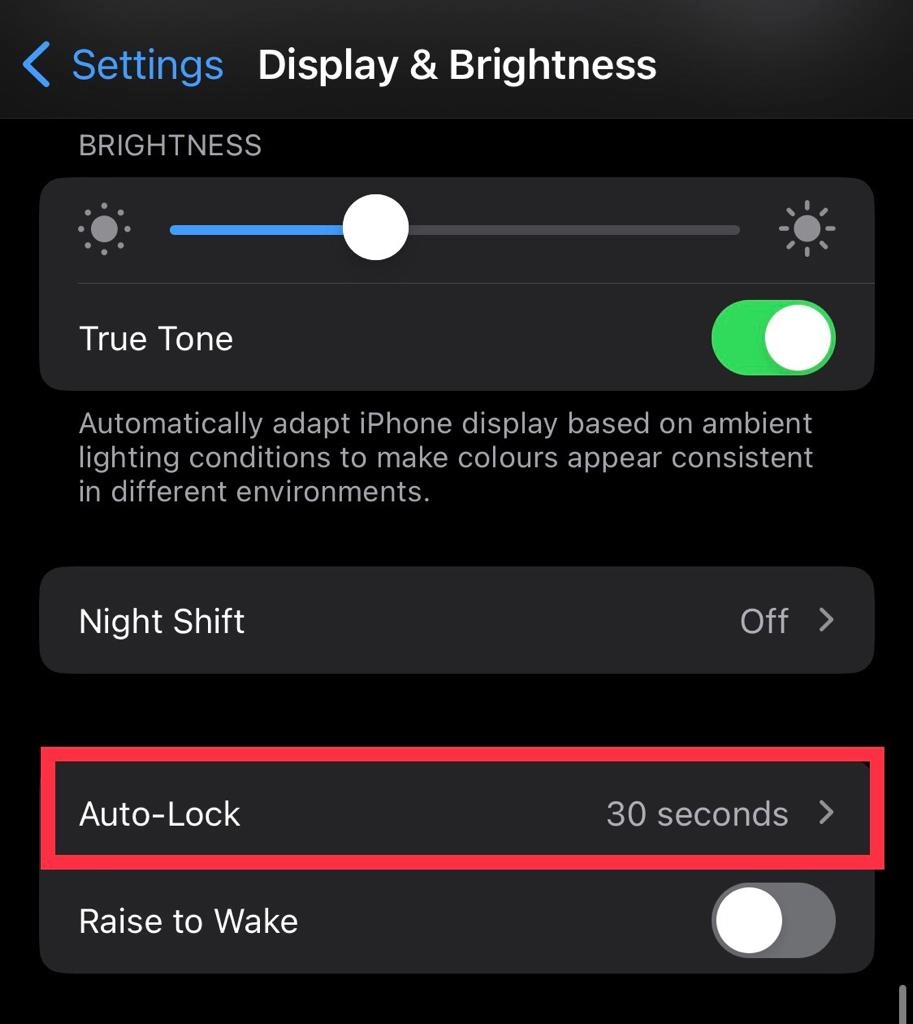
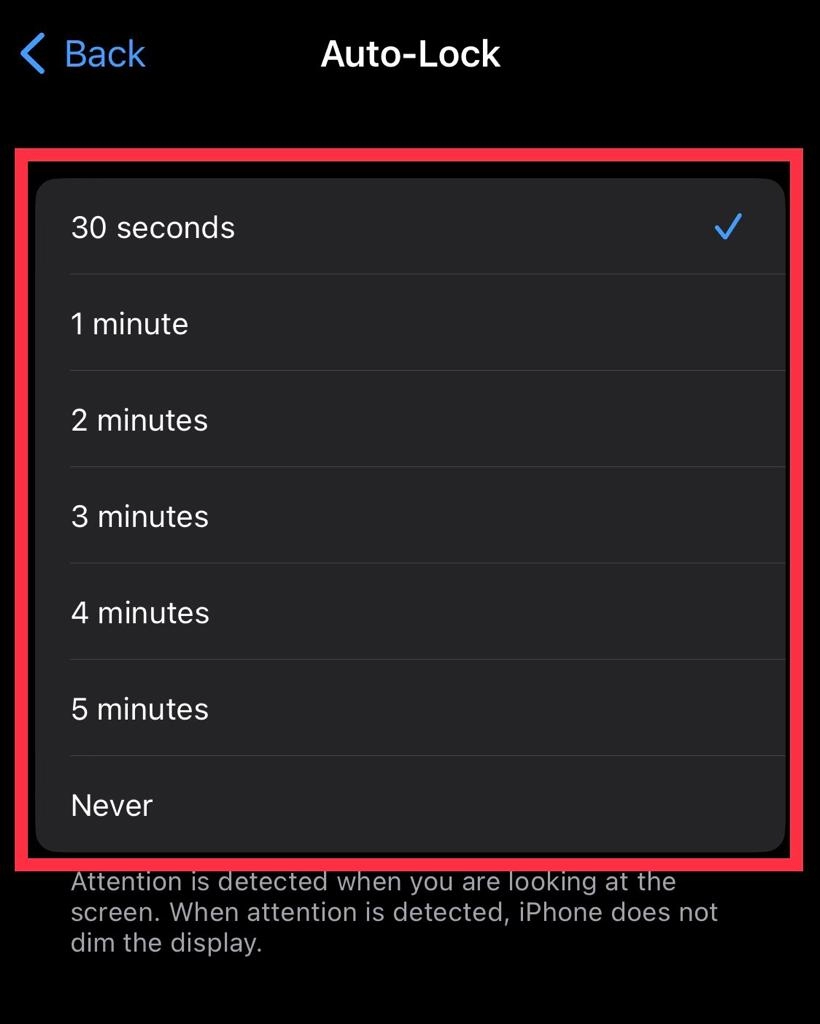
Step 3. Now decrease the “Timer” for the auto lock screen timeout.
Final words
You now know how to modify the iPhone’s screen auto-lock timeout, and you may guarantee the safety and battery life of your iPhone 15 by selecting a lower auto-lock duration. Lastly, please feel free to leave any comments or questions in the space provided below.
Read also:
How To Change Device Name On iPhone 15
How To Pair Old Apple Watch With iPhone 15, 15 Pro, and 15 Pro Max
