Many people rely on or like to use captions for audio or video content, but this feature is not available on every media website. If you are one of those people and have a Windows computer, then there’s a feature for you. It is called “closed caption,” and it is included in Windows 11, which can be quite useful for you. In this guide, we’ll show you how to enable and use closed captions on a Windows 11 PC or laptop, and also, how to change its default settings.
Table of Contents
What is Closed Captions in Windows 11?
Closed captioning is a feature that allows you to read the words spoken in the audio section of a movie or television show. When closed captioning is enabled, the captions are often shown at the bottom of the screen. Closed captions are often used by those who have hearing disabilities, as well as by viewers who prefer to read rather than listen to the audio component of a video. On Windows 11, the default caption style is white text on black. You can, however, modify the font and color of the text and background through the Settings app. Below, we’ll show you how to do that too.
Turn on and use closed captions on a Windows 11 PC
As with Windows 11, closed-captioning is pre-installed and ready to use. In Windows 11, if the video supports closed-captioning, the text will be shown when the feature is turned on.
To turn on closed captions on a video on Windows 11 that is now playing, right-click or tap-and-hold anywhere on the video. At the bottom of the screen, a menu bar will emerge. A “CC” symbol will be shown if closed captioning is available.
You can also disable closed captions if you don’t want to see them. Tap or click on the “CC” symbol to turn off or disable closed captions.
You can also change the language of the closed captions by choosing the language in which you want to see them.
How to change closed captions settings on Windows 11
White text on black, medium size, and the default font are the default caption styles on Windows 11. If you don’t want to go with the default, you can easily modify it from the Settings app to your liking. The steps to change the Closed Caption settings in Windows 11 are listed below.
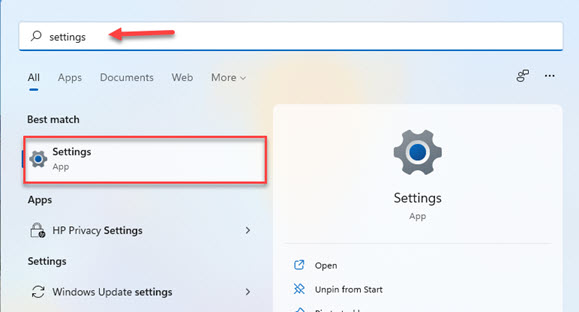
Step 1. To get started, head to the Windows Settings app by searching for it in the Start Menu. Alternatively, you can simply use the “Windows + I” shortcut keys on your keyboard.

Step 2. In Windows Settings, click “Accessibility” on the left menu, and on the right pane of your screen, scroll down and select “Captions“.

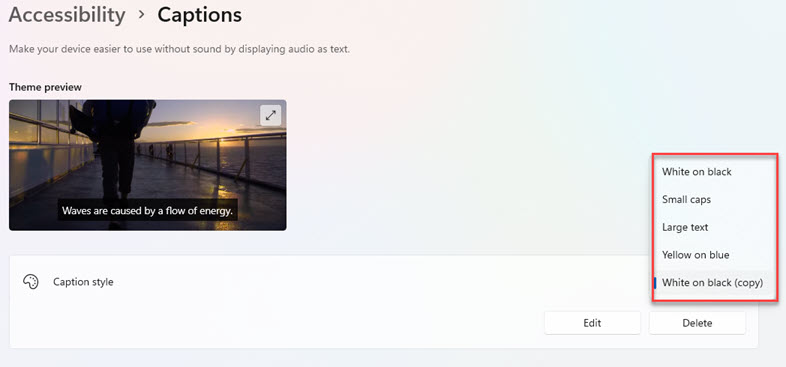
Step 3. Select a caption style in the Captions settings window. White on black is the default setting. However, there are also yellow on blue, small caps, and large text to choose from.

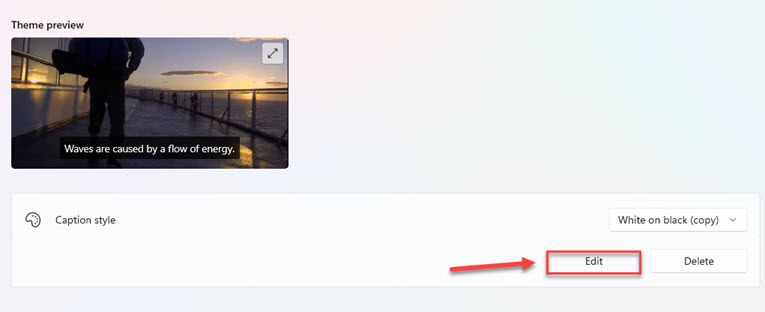
Step 4. If you don’t like the font color of your present closed caption setup, if the font size is too small or too large, or if the font style is difficult to read, you can change it. Click the “Edit” button to edit the caption styles.

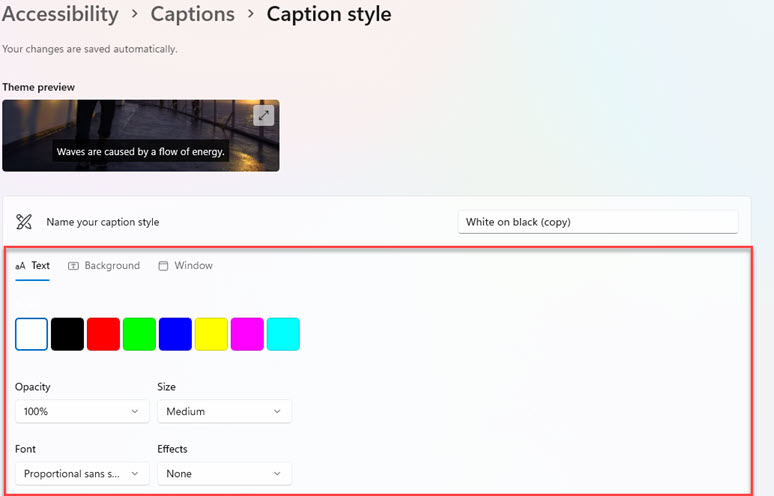
Step 5. Now, you can change the text and background colors, fonts, transparency, caption size, window color, and other options. Select your desired caption style.

Step 6. When you’re done, just save your work and exit. The color and style you saved will be used the next time closed captions are shown.
Final Words
That’s all! This guide showed you how you can enable and use closed captions on a Windows 11 PC and how to change the default closed caption settings based on your preferences or current mood. Lastly, we hope this guide has been useful to you and you have found your answer here. If you encounter any questions, please leave them in the comments section below.
Read Also:
