Are you having trouble reading Safari’s tiny fonts on your Mac or your iPhone? Don’t worry, in this guide, I’ll show you how to enlarge the small fonts automatically in Safari on Mac and iPhone. It’s easy to make the small fonts larger in Safari by default with a quick change in Safari’s settings.
Table of Contents
Safari
Safari is a web browser, developed by Apple, based on the WebKit engine, that is known for its simplistic and minimalistic interface. Individuals of Safari can benefit from fast and uninterrupted internet browsing, making it a suitable competition to other popular browsers like Mozilla Firefox and Google Chrome.
Safari was first released on the desktop in 2003 with Mac OS X Panther, a mobile version that has been bundled with iOS devices since the iPhone’s introduction in 2007. Safari is the default browser on Apple devices. A Windows version was available from 2007 to 2012.
How to Enlarge the Small Fonts Automatically in Safari on Mac

If you are a Safari user on Mac, you can increase the font size in Safari using a keyboard shortcut, ‘Command+Plus (“+”)‘, and to decrease it you can use ‘Command+Minus (“-“)‘ on a website-to-website basis. But if you don’t want to mess around with those settings for every site, Safari lets you increase the font size and it will be applied automatically to all the websites you visit.
This is similar to the Page Zoom feature in Safari. While the zoom feature enlarges both the content and the text, the font size feature keeps the original page formatting and doesn’t affect the media on the page.
Follow the Below Steps to Make the Small Fonts Larger in Safari on Mac
Step 1. To get started, open the Safari browser on your Mac.
Step 2. Tap on “Safari” in the top menu bar.
Step 3. Select “Preferences” from the drop-down menu.
Step 4. In Safari Preferences, tap on the “Advanced” tab.
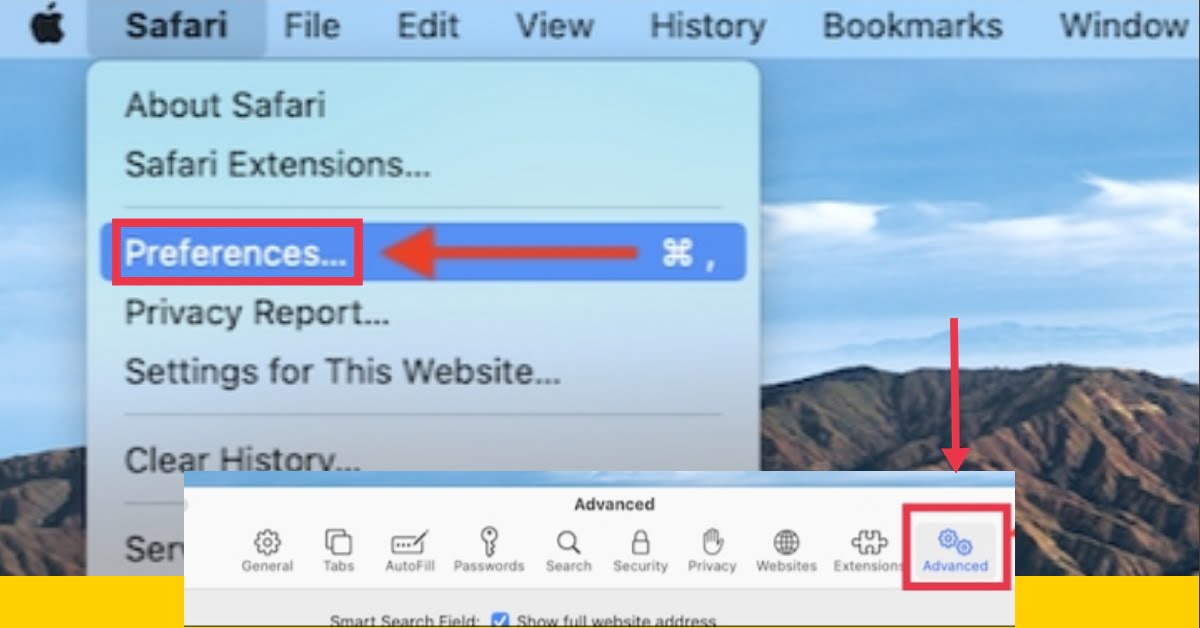
Step 5. In the “Advanced” tab, locate the “Accessibility” section
Step 6. Click the checkmark next to “Never Use Font Sizes Smaller Than.” In the drop-down menu, choose between “14,” “18,” or “24” -point font sizes.
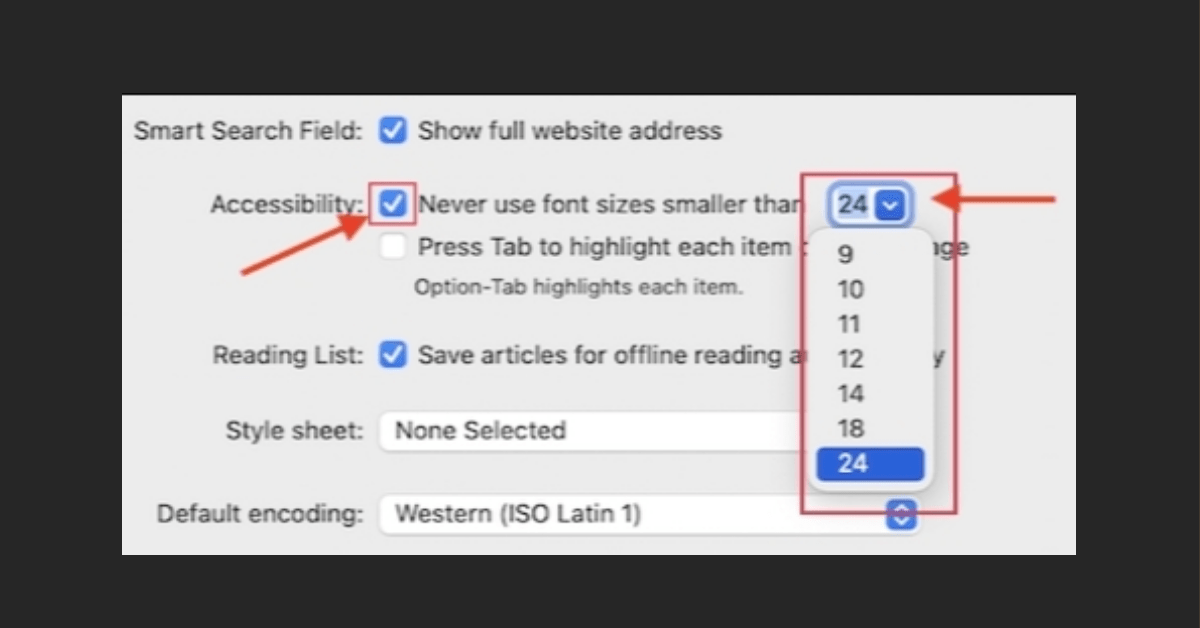
Step 7. If you find the text hard to read, go with the 24-point font size, which will double the default text size for most websites. However, for some people, the 18-point size is the best spot.
If you change your mind later and want the smaller font sizes back, click “Safari” in the menu bar and navigate to Preferences > Advanced, and then uncheck the “Never Use Font Sizes Smaller Than” option. Alternately, you can simply select a smaller font size from the menu.
How to Enlarge the Small Fonts Automatically in Safari on iPhone
While using an iPhone and browsing through Internet pages in Safari and trying to read through an article, you may have encountered tiny fonts. In this part, you will learn how to enlarge the small fonts automatically in Safari.
Follow the Steps to Increase the Font Size in Safari
Step 1. Open the ‘setting’ in your iPhone.
Step 2. Scroll down and find ‘Safari’
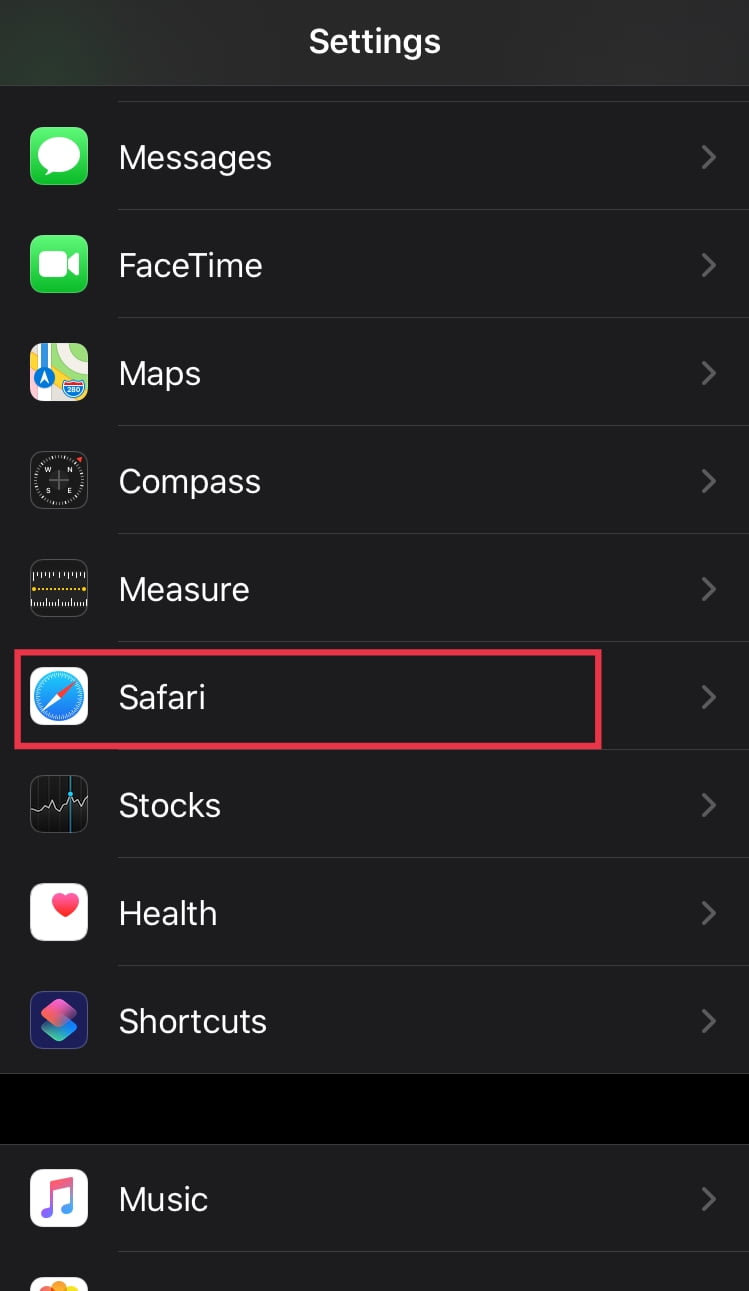
Step 3. Go to ‘Settings for Websites‘ and tap on the ‘Page Zoom’.
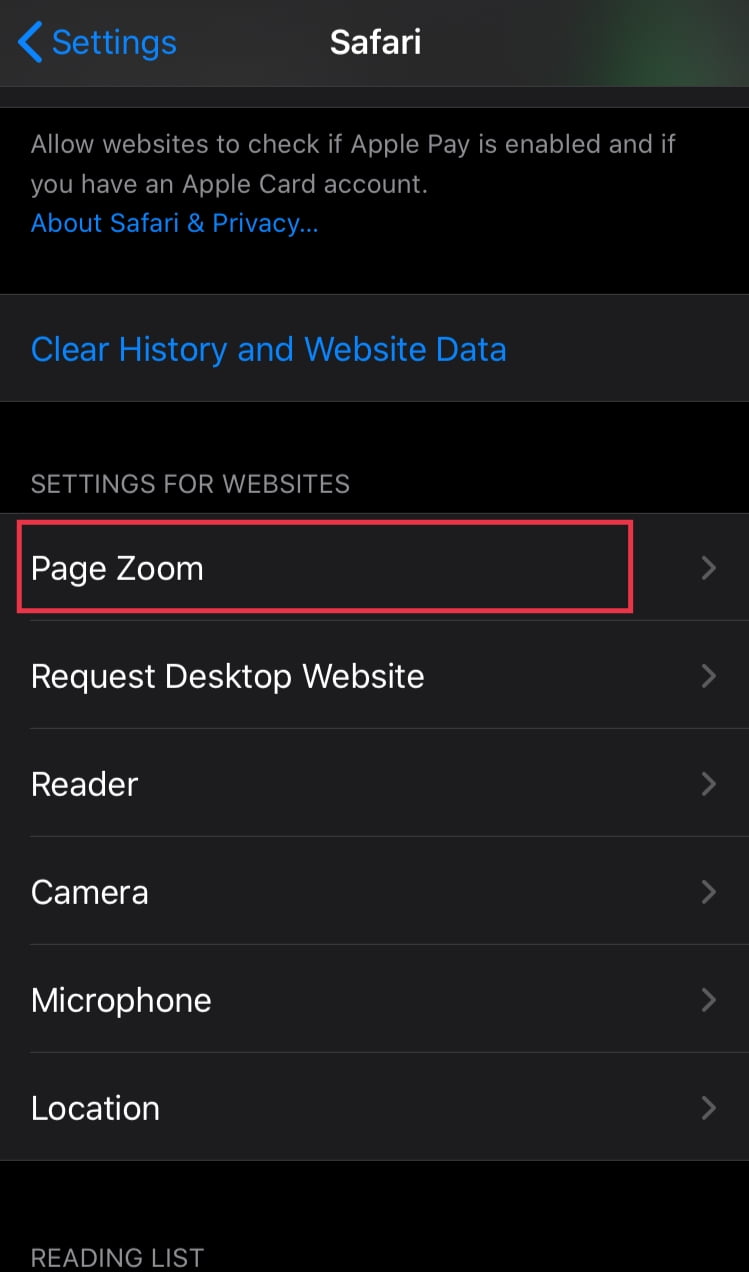
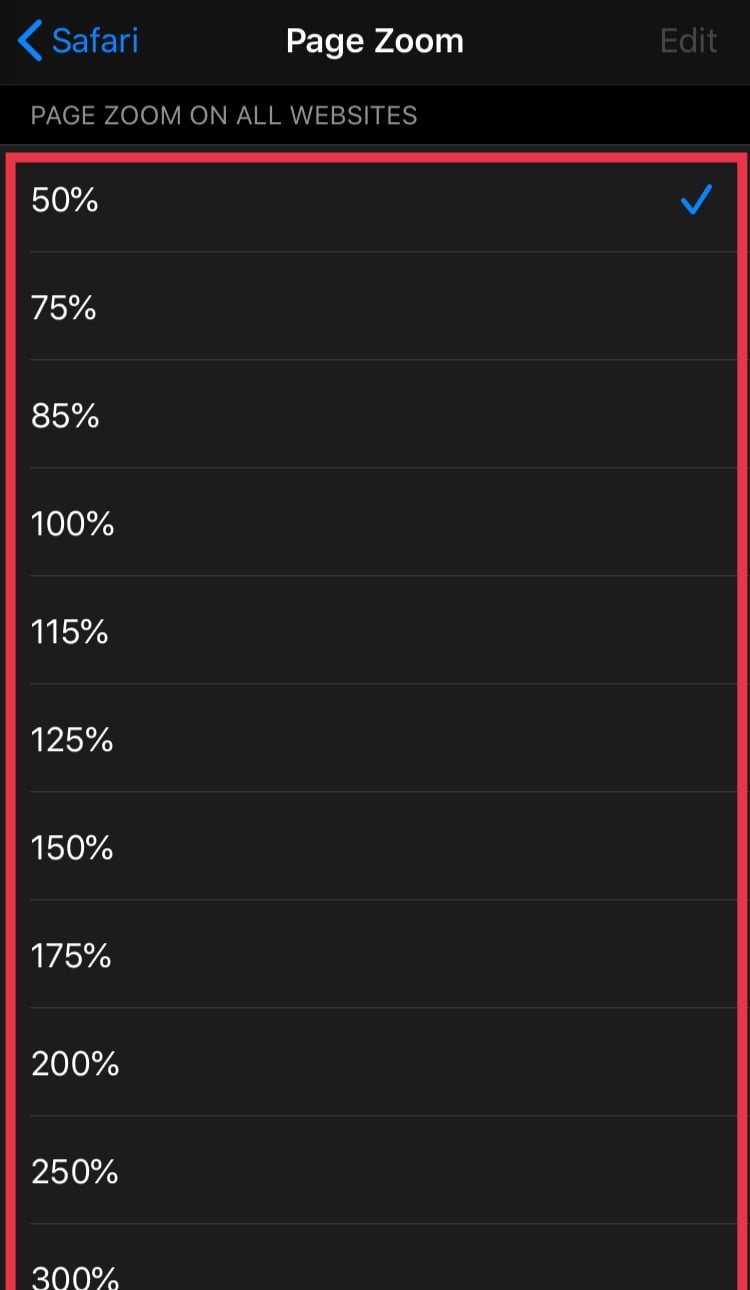
Step 4. From there you can select your preferred percentage according to your iPhone screen and your preferences.
Step 5. Now open the Safari and try to open different websites and see if it’s alright.

Final Words
Scrolling down through Safari, Reading through your favorite blogs, encountering tiny words and hard to read fonts, that’s something we hate. I hope that I’ve solved part of your problems, The small fonts. I hope you learned how to enlarge the small fonts automatically in Safari on Mac and iPhone.
If you have any feedback, don’t hesitate to share them with us. Till then! Happy browsing!
Read More:
