You may want to create a local account. Maybe you need to create an account for someone at home or a small business who doesn’t have or doesn’t need a Microsoft account. Anyway, here’s a look at setting one up. In this guide, we will show you how to add and create a local user account on Windows 11 PC or laptop, also you will learn how to change the account type for the local user.
Table of Contents
What is a Local Account on Windows 11?
You may have used a local account before. This name may be confusing for novice users, but it is nothing more than an account for accessing a Windows 11 PC or laptop as the default administrator. Local accounts apply to that specific computer, but not to other computers. You will log in, change settings, install software, and distinguish your user area from other users on the system.
Benefits of using a local account include:
- More Privacy: Your Windows 11 settings and computer uses don’t transmit to remote servers. Everything is stored locally on one computer.
- More secure: You create a complex password that works on one computer and nowhere else.
- Internet-independent: Microsoft login requires an Internet connection to retrieve user settings and preferences; in Windows 11, local login does not require an Internet connection.
- Custom login name: It does not use your email address as the login name, so it will not show on the login screen when your screen is locked.
However, if you sign in to Windows 11 with a Microsoft account, you agree to share a lot of information with Microsoft. Signing in with a Microsoft account brings some benefits, like syncing personal settings between Windows 11 devices, syncing files on OneDrive, and accessing apps from the Windows Store.
Create a Local User Account on Windows 11
Now that you know the benefits of having a local account and you want to create one for your computer, here is how you do it:
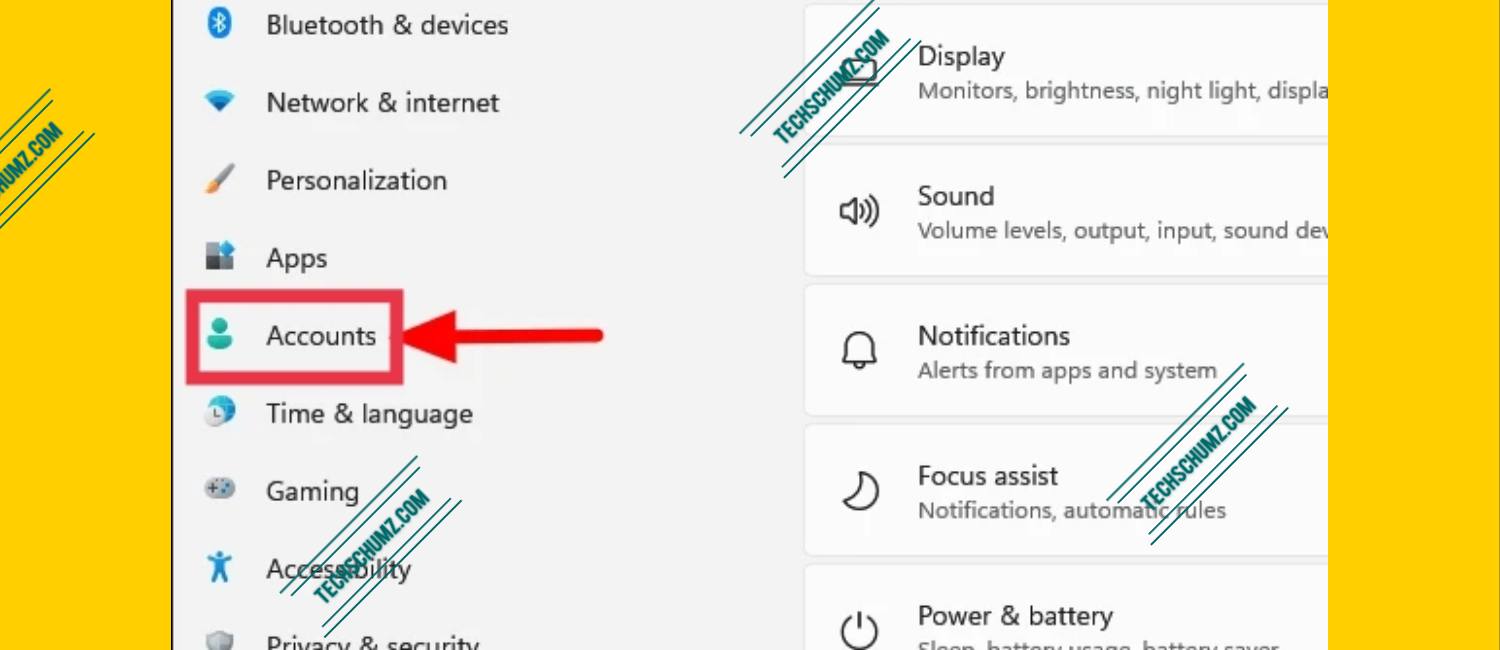
- To create a Local User Account on Windows 11, use the Windows + I keyboard shortcut to directly launch the Settings app.
- In Settings, tap on the ‘Accounts’ tab.
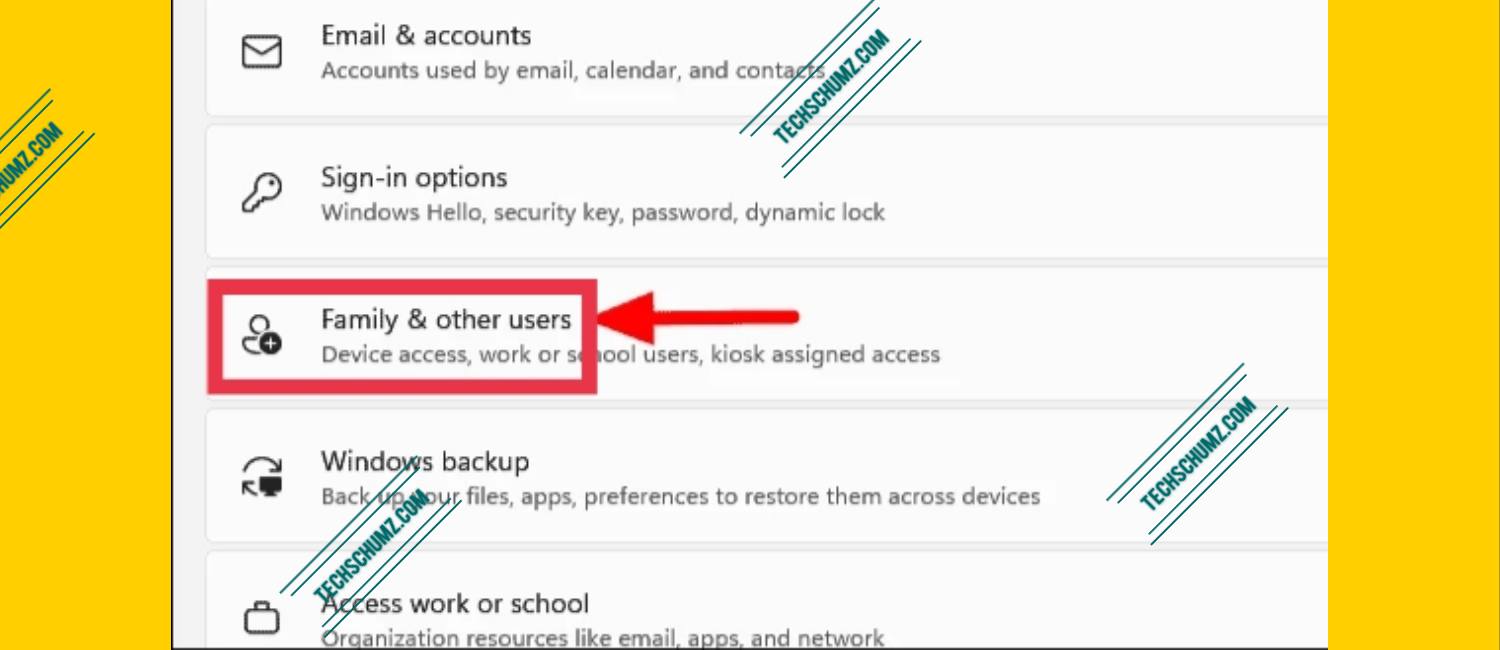
- Tap on the ‘Family & other users’ listed on the right.
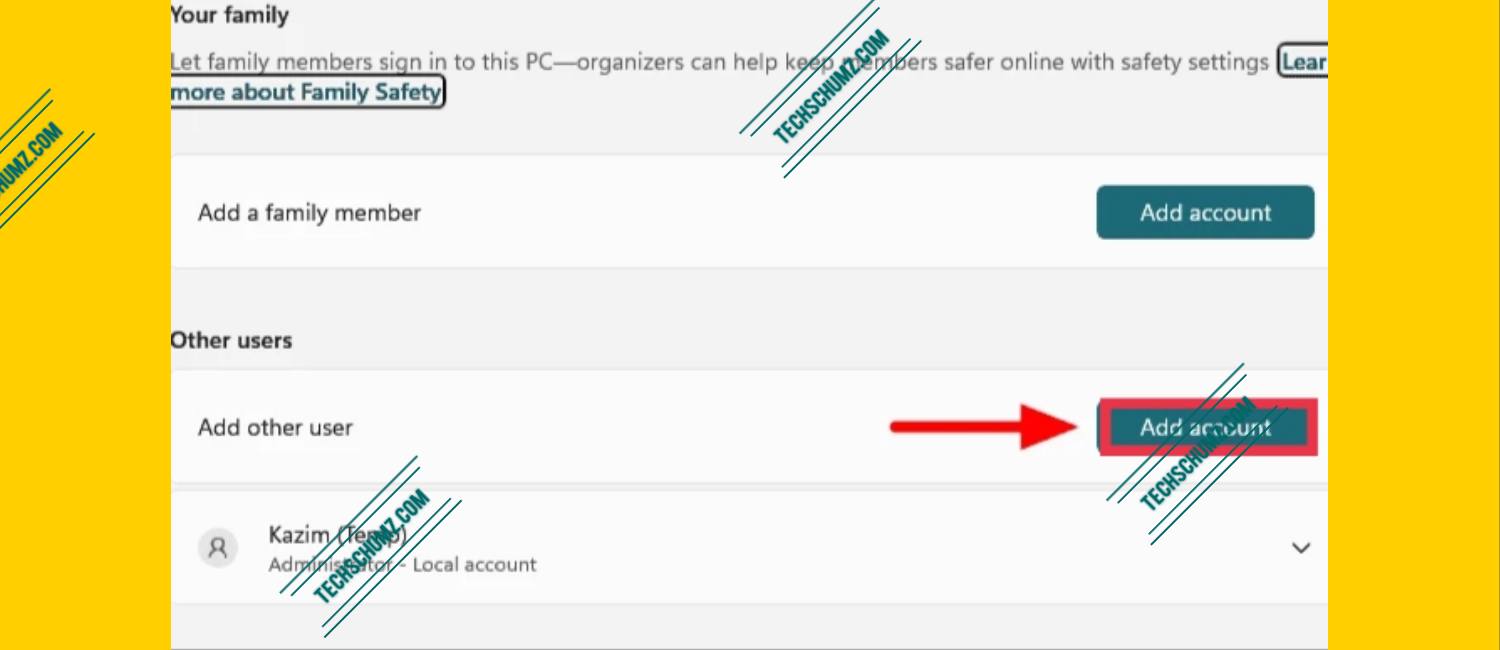
- Click on the ‘Add account’ option under the ‘Other users’ setting.
- On the initial window, select ‘I don’t have this person’s sign-in information.‘
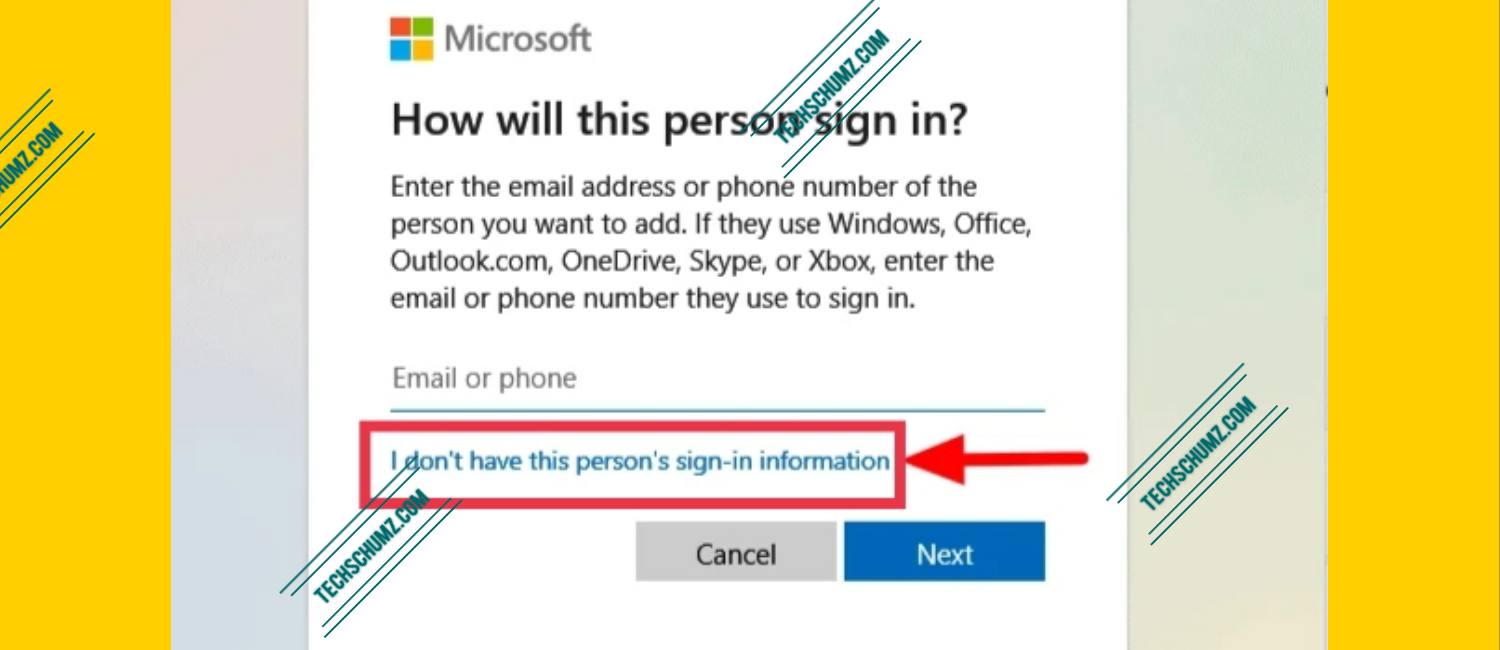
- Next, click on ‘Add a user without a Microsoft account’.

- You will now be asked to enter your username and password in the corresponding sections. Aftercompleting the required parts, click “Next” at the bottom to create a local account.
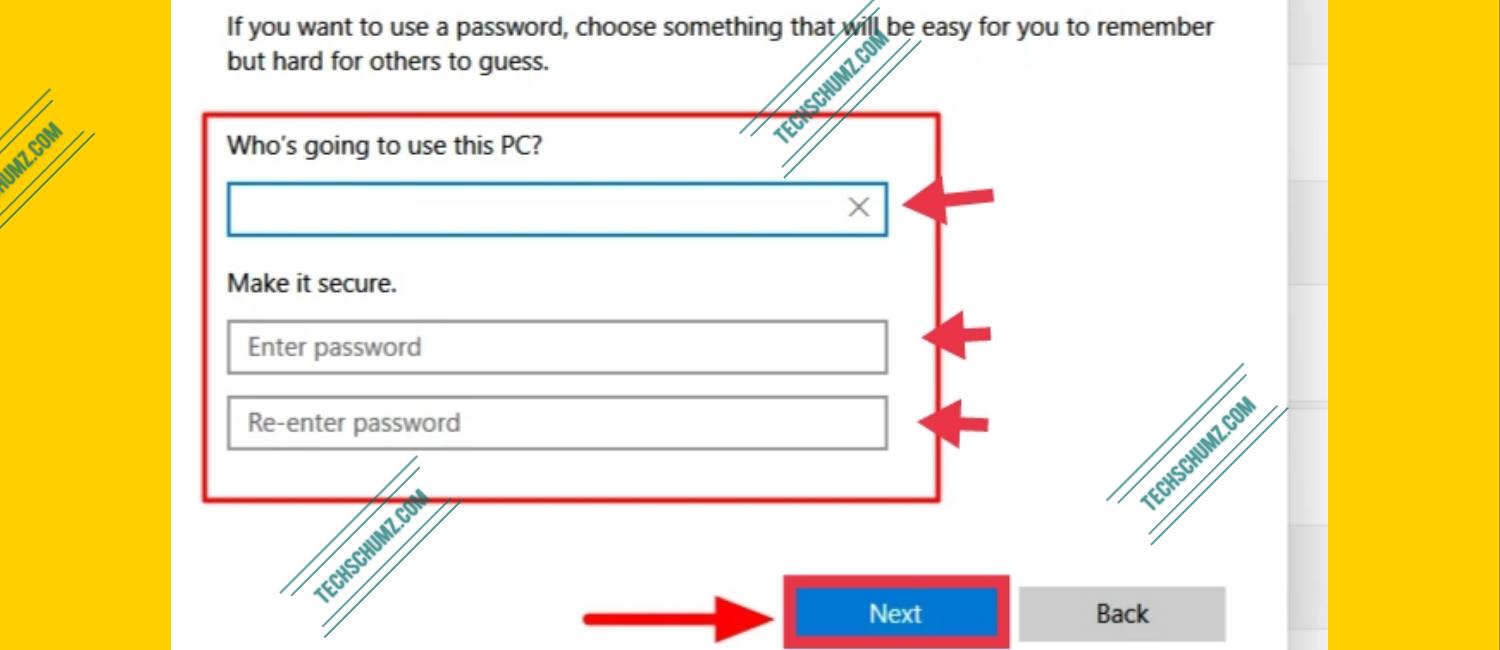
Note: When creating a local account, you can choose to continue with or without a password. If you do not want a password protected local account, leave the password part blank and click “Next”.
Now, if you have a Microsoft account linked to your Windows 11 PC or laptop and you want to remove it from your computer, open the below link to read it.
-> How to remove a Microsoft account from your Windows 11 computer
Change the Account Type for a Local User
When creating a new local user account, the default is a standard user account, which is more secure. You can change it to an administrator account. However, you should only do this if the account is for you or someone you trust.
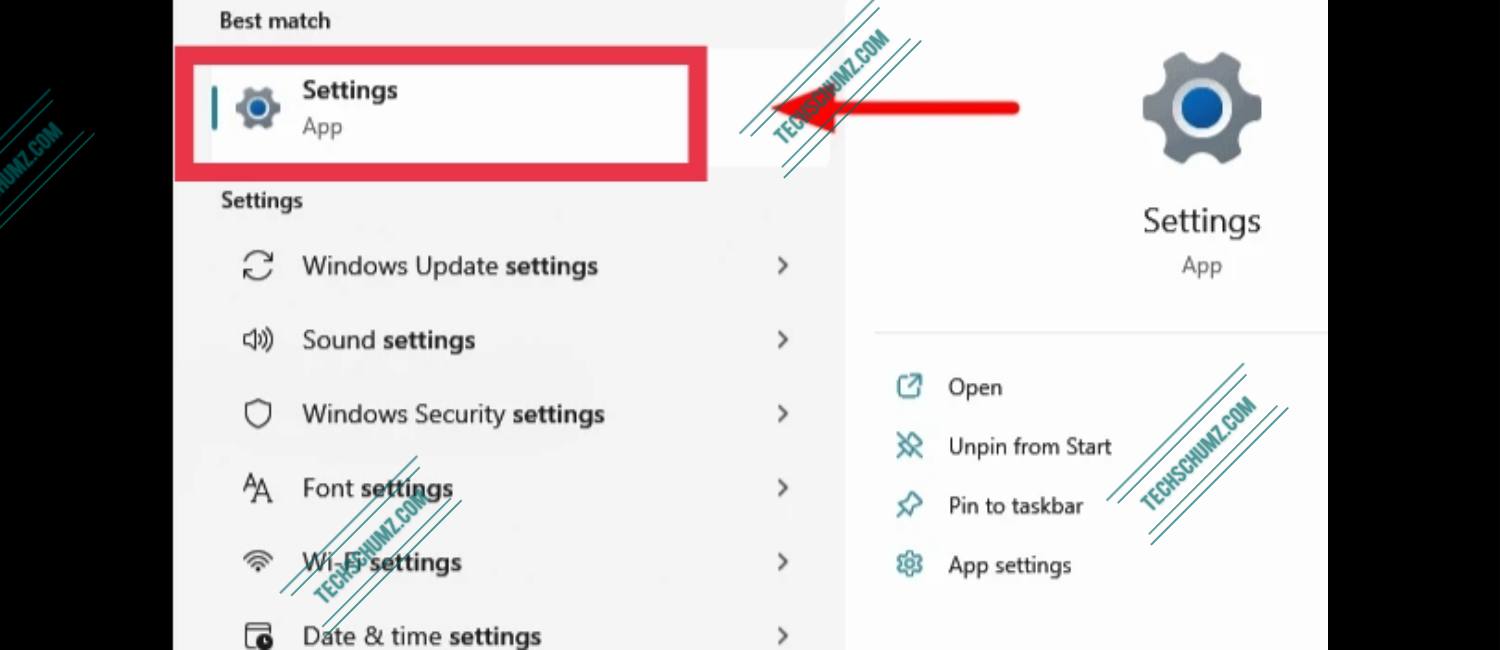
- To change the account type to administrator, search for ‘Settings’ in the Start Menu, and click on the relevant search result to launch the app.
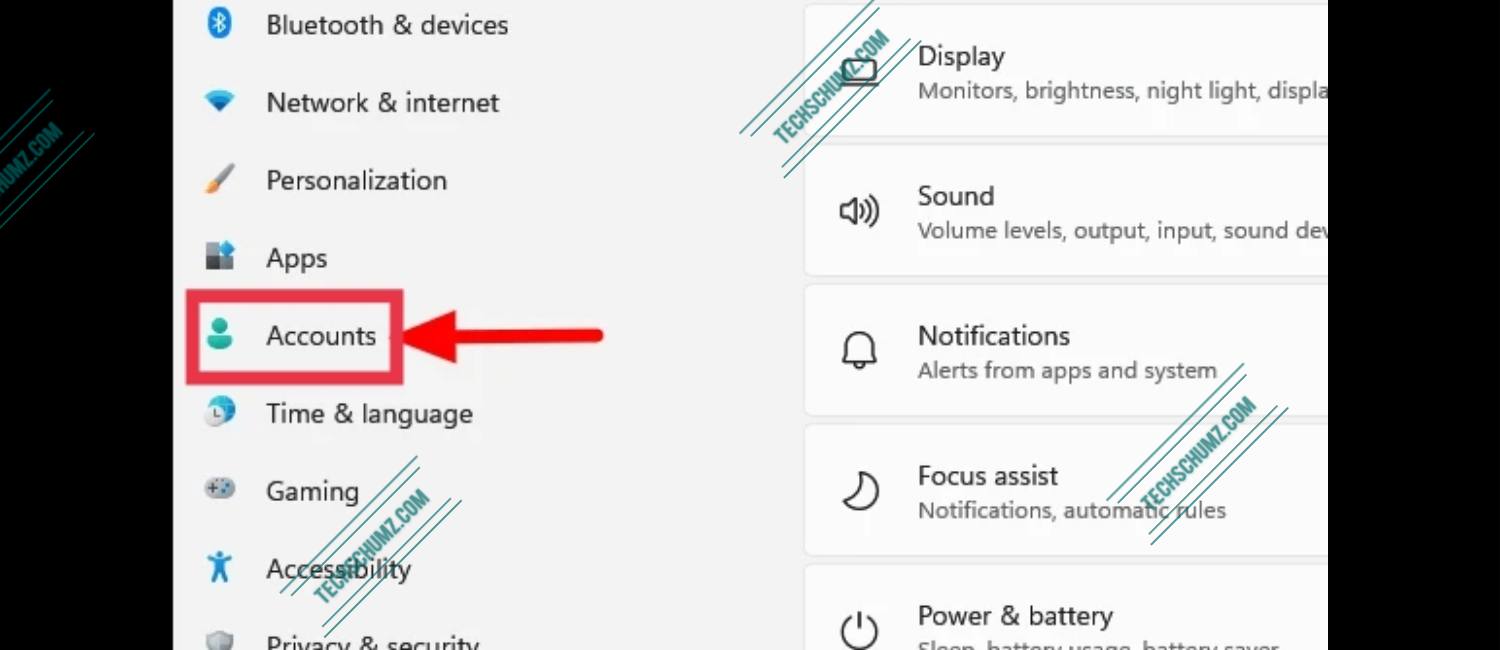
- Select the ‘Accounts’ tab.
- Select the ‘Family & other users’.
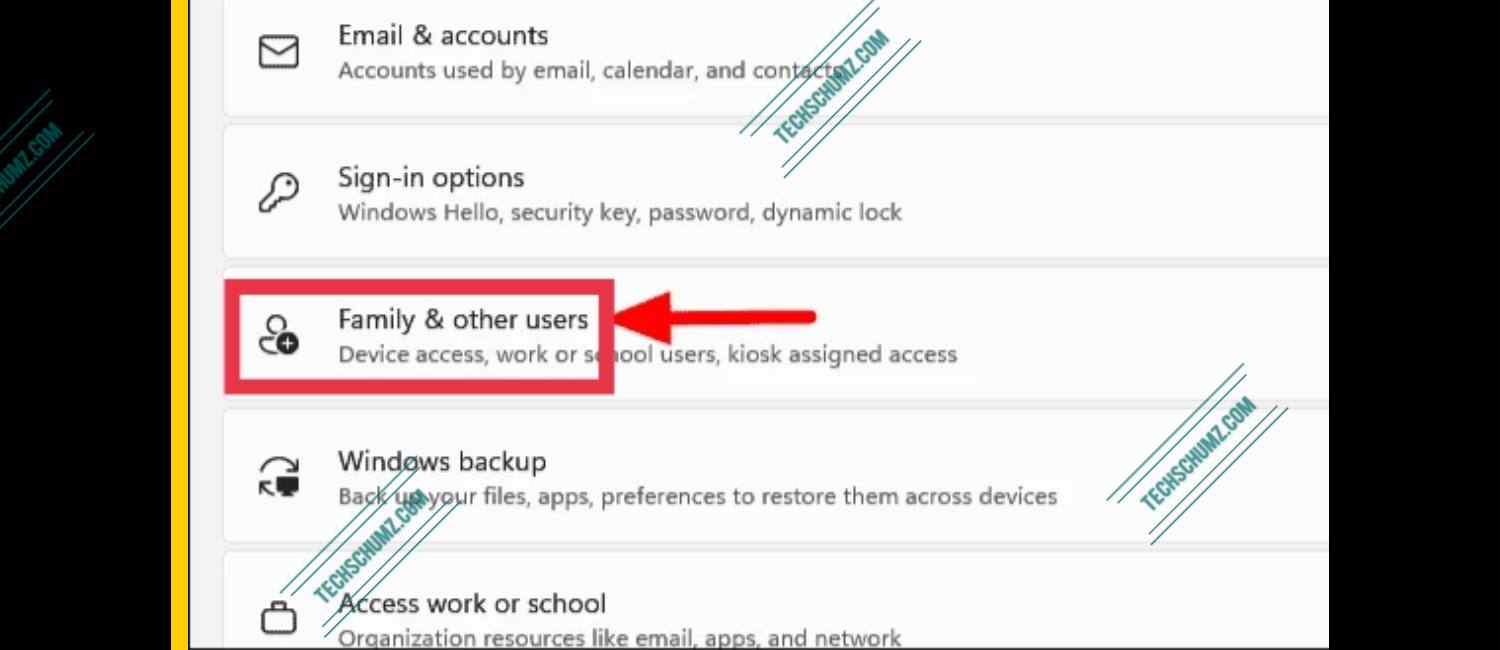
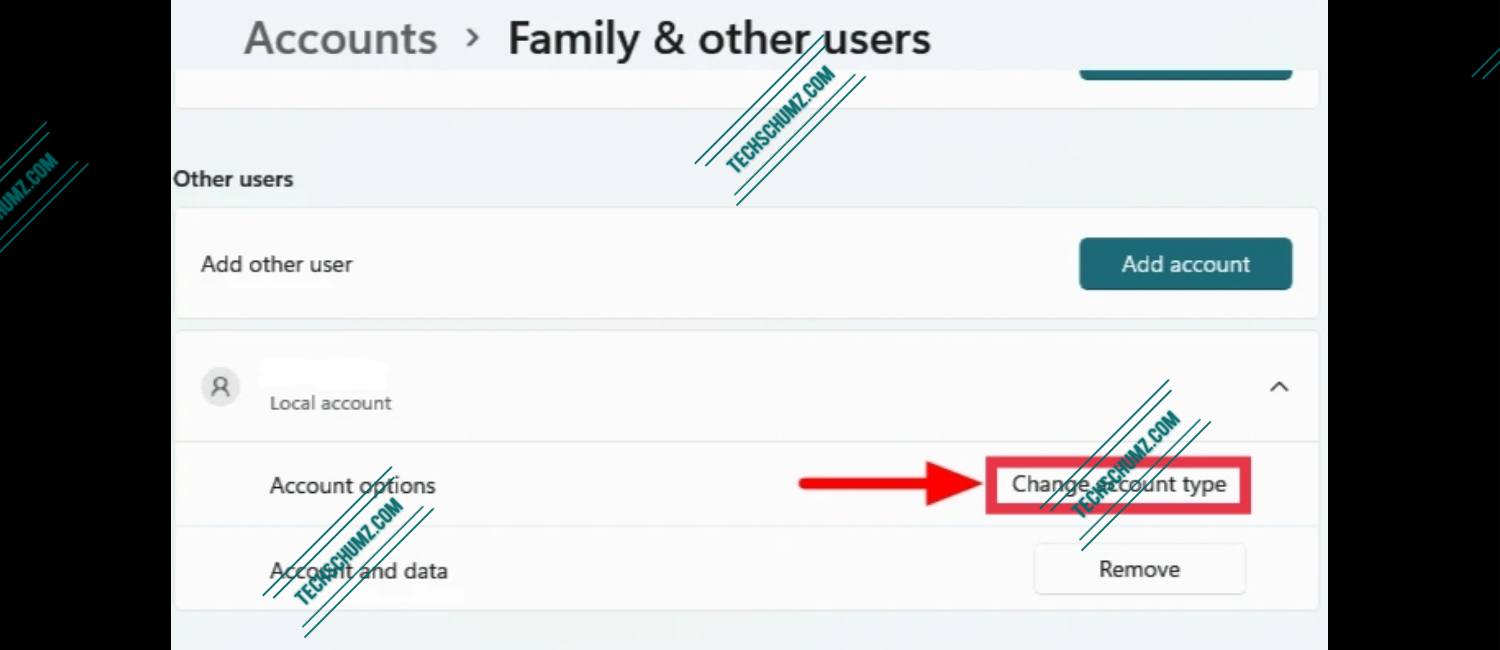
- Click on the account name listed under ‘Other users’ in settings.
- Tap on the ‘Change account type’ option next to ‘Account options’.
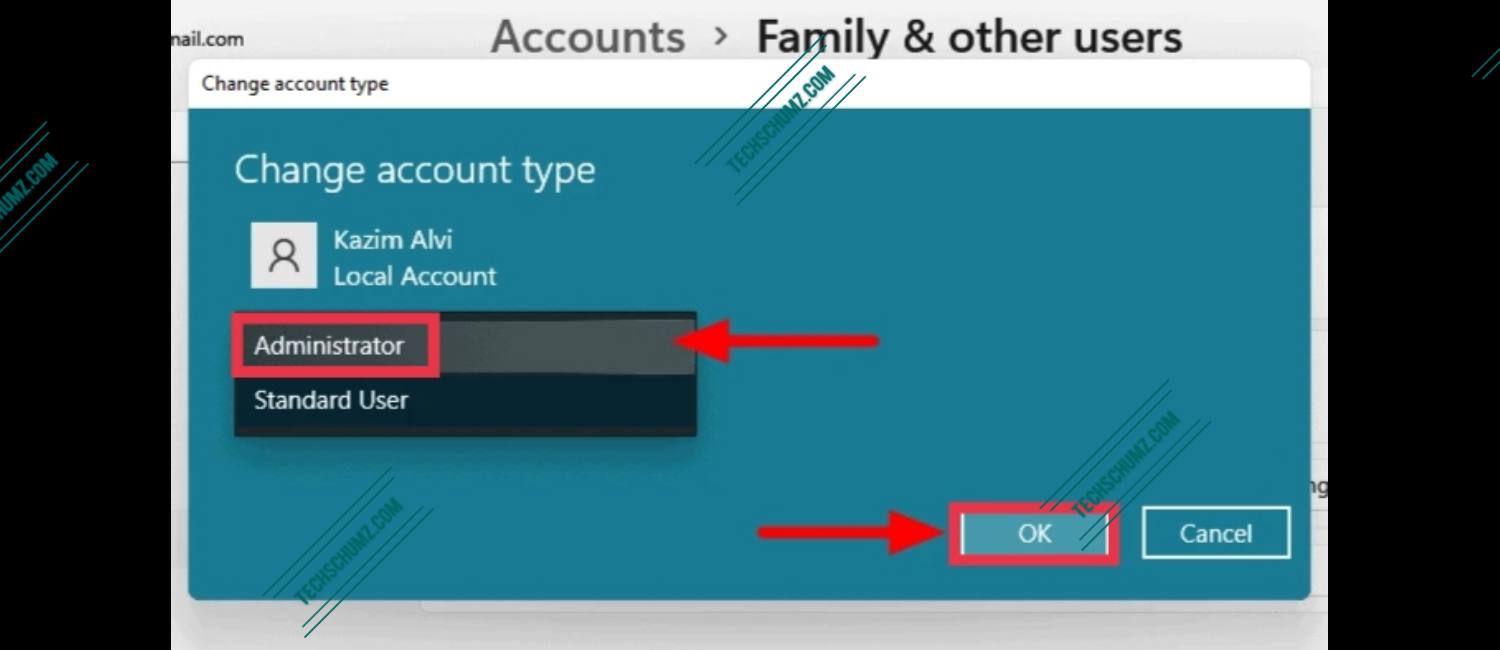
- In the ‘Change account type’ window, click on the drop-down menu under ‘Account type’, and select ‘Administrator’.
- Finally, click on ‘OK’ at the bottom to save the changes.
You now have a Local Account set up on Windows 11 with administrative privileges. Remember we have written an article about how to change administrator in Windows 11. To read it click here.
Final Words
This article is all about how to create a local user account on Windows 11 and also how to change the account type for the local account user. If you want to have a secure computer with more privacy and with a custom login name, then you have a local account. But if you want to sync your personal settings between your devices, syncing files on OneDrive, and accessing apps from the Windows Store then you must have a sign in with Microsoft account. The choice is yours!
Good Luck! Enjoy Windows 11!
Read also: