Connecting your computer to a hidden WiFi network in Windows 11 can be tricky because the steps you need to follow are no longer simple. In earlier versions of Windows, users only need to click the “Connect to hidden network” option, enter the SSID name and password, and the hidden network will remain in the list of available networks.
In this guide, I will help you learn how to connect to a Hidden WiFi network on Windows 11 PC or laptop. You can do it by going to Control Panel or using quick settings which you will learn about both below.
Related: How to Connect a Windows 11 Computer to WiFi
Table of Contents
What Is a Hidden Wi-Fi Network?
Hidden WiFi networks are wireless networks that are configured to hide your network SSID (WiFi name). Therefore, these types of networks will not appear in the WiFi section of your Android, Windows, iOS and other devices.
To join a hidden WiFi network, you need more than just a password. You must know the network name, WiFi security type, encryption type, and password. Also, you should ask your network administrator for these details.
2 Quick Methods to Connect to a Hidden WiFi Network on Windows 11 PC & Laptop
Meanwhile, in Windows 11, the situation is different because the operating system seems to hide the hidden WiFi network that the user has connected to, making it look like all other hidden networks. In other words, Windows 11 shows a list of hidden networks and no longer automatically connects to known networks. You can follow any of the below methods to connect to those hidden WiFi networks.
Method 1. Connect a Windows 11 PC or Laptop to a Hidden WiFi via Control Panel
To manually connect to a hidden WiFi from the Control Panel on your PC, follow the below steps:
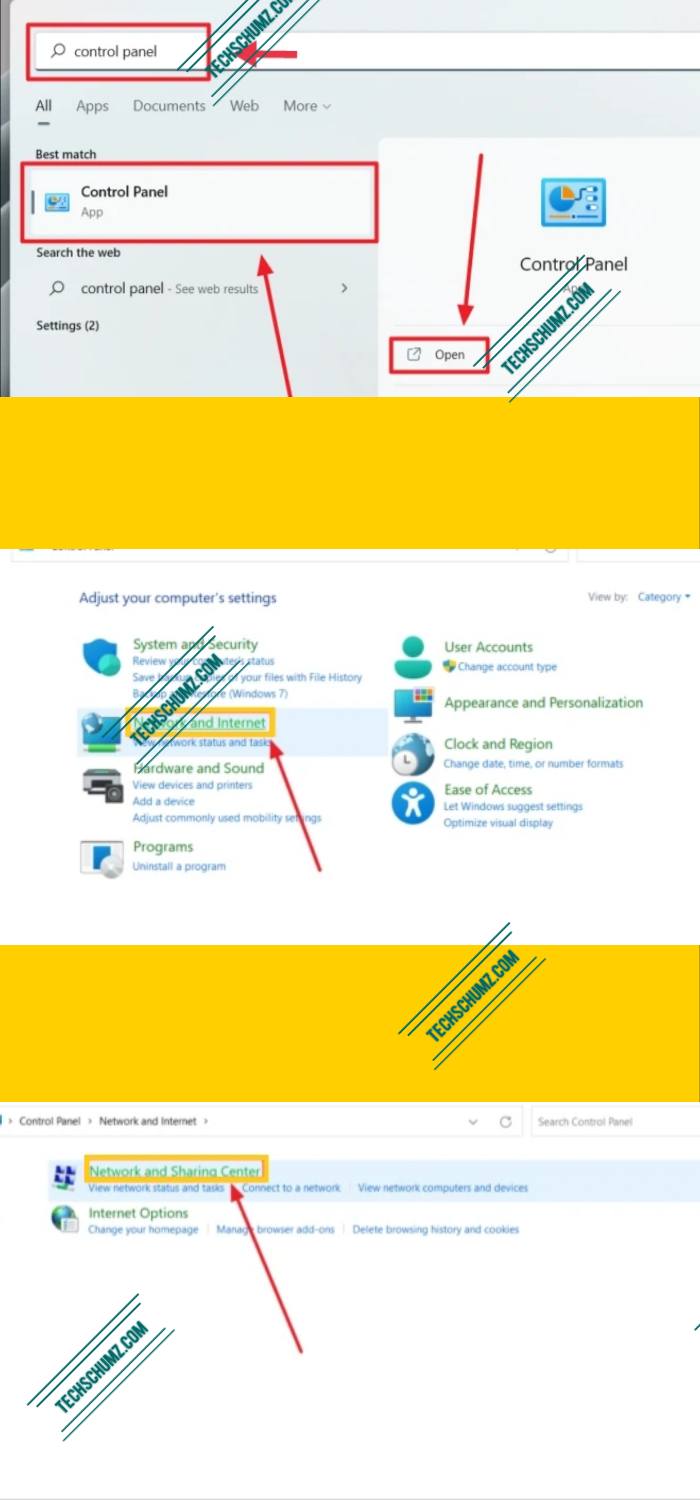
- Step 1. To get started, Search for ‘Control Panel’ in the Start Menu and tap on the result to open it.
- Step 2. After the Control Panel window appears, click on ‘Network and Internet’.
- Step 3. Now, click on ‘Network and Sharing Center’.
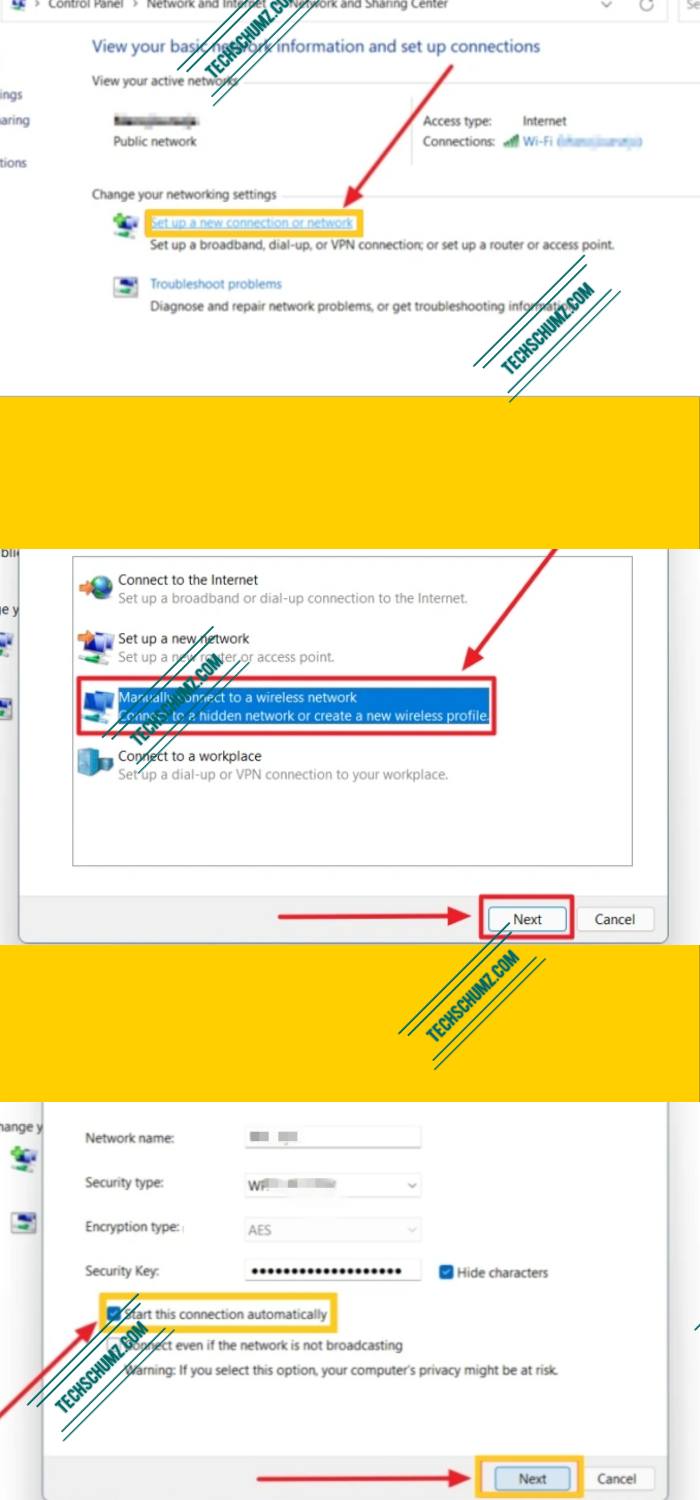
- Step 4. After clicking on ‘Network and Sharing Center’, a new window will open, tap on ‘Set up a new connection or network’ below the ‘Change your networking settings’ section.
- Step 5. Now, select ‘Manually connect to a wireless network’, and then tap on ‘Next’ to continue.
- Step 6. Next, enter the required info related to the hidden network, and then remember to check the ‘Start this connection automatically‘ option to connect to this WiFi automatically afterward.
- Finally, click on Next, close the window and you are all set! You’ve successfully connected to the hidden WiFi.
Note: If your Wi-Fi button was turned off, click it to turn it back on. You will now be automatically connected to the manually added wireless network.
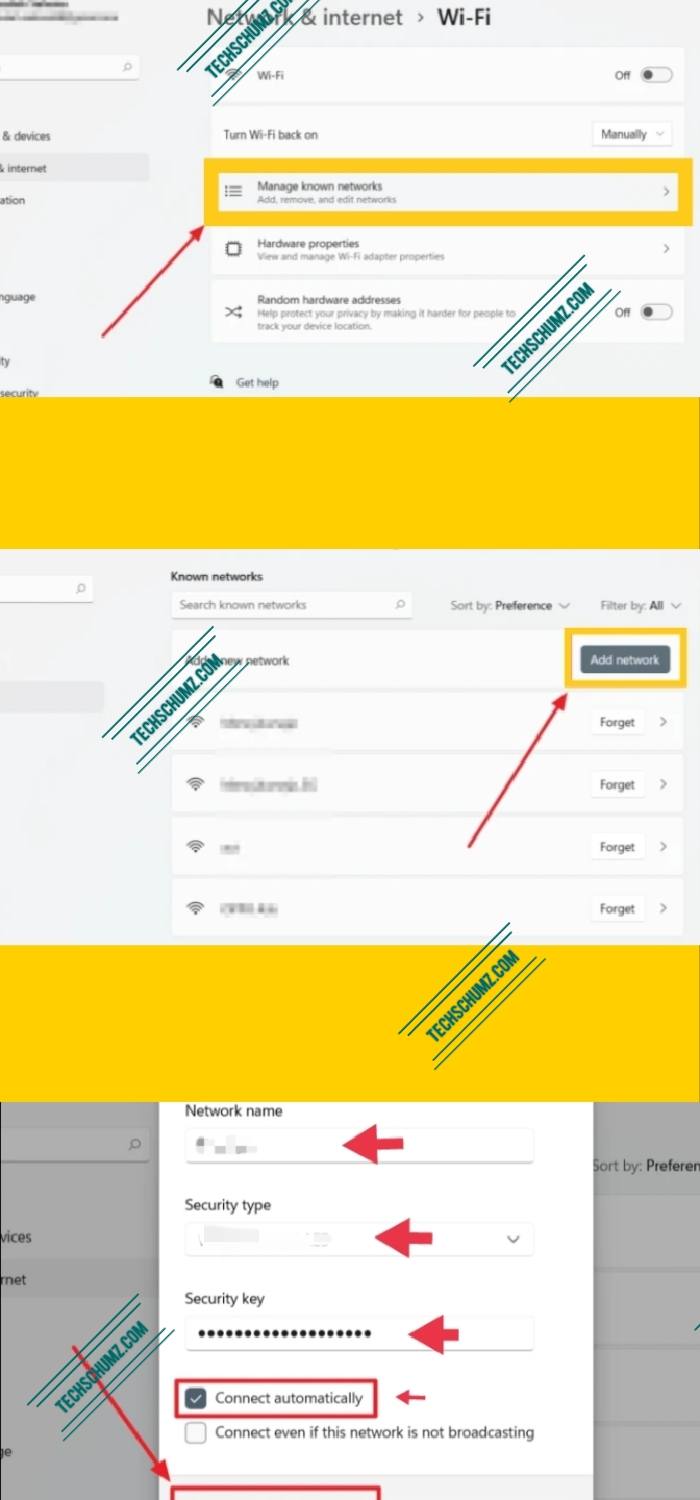
Method 2. Connect to a Hidden WiFi Network on Windows 11 via Quick Settings
To manually connect your PC or laptop to a hidden WiFi using Quick Settings, follow the below steps:
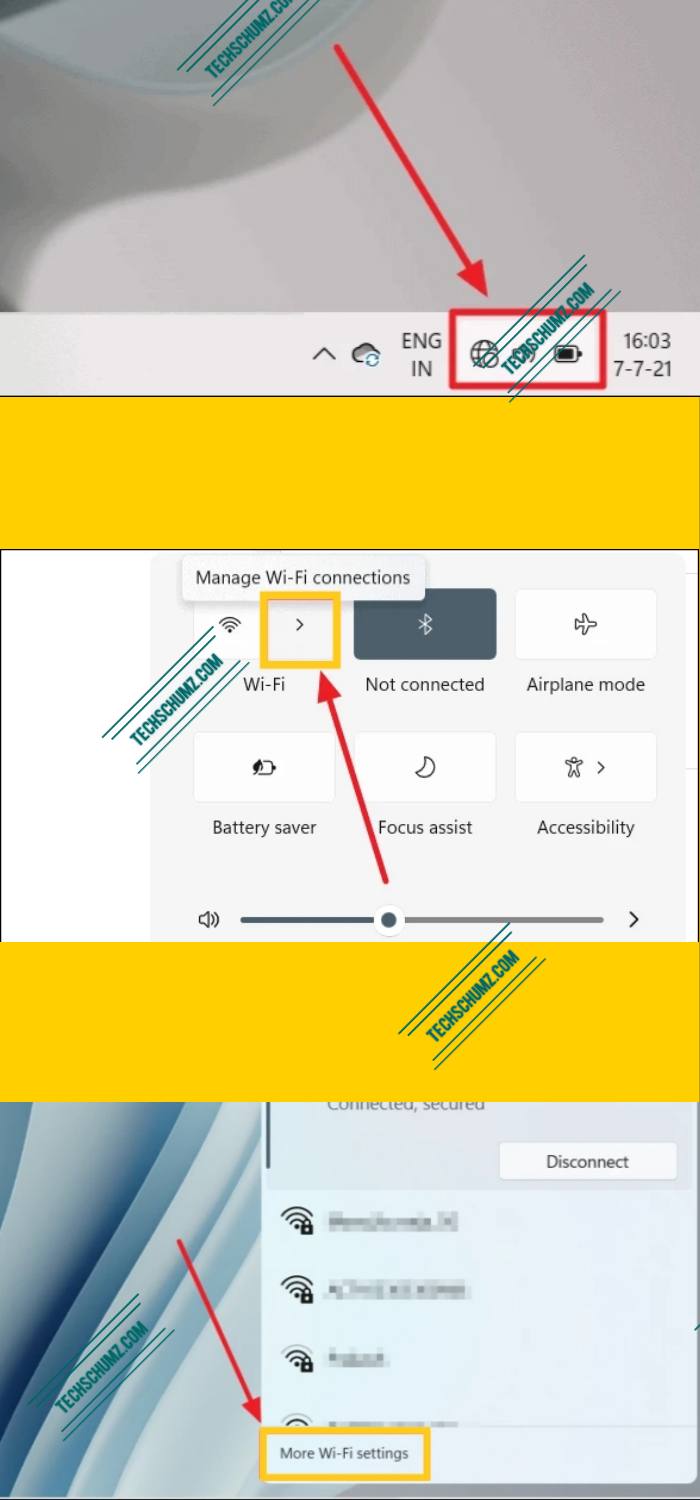
- To get started, tap on the Quick Settings toggle menu on the Taskbar.
- Next, tap on the arrow next to the Wi-Fi icon.
- Then, tap on the ‘More Wi-Fi settings’ option at the bottom of the ‘Wi-Fi box showing the list of Wi-Fi networks.
- Now, tap on the ‘Manage known networks’ options, and click on the ‘Add Network’ button.
- Finally, enter the asked info, and check the box in front of ‘Connect automatically’ if you want to automatically connect to the selected WiFi. Once done, hit ‘Save’.
- That’s it! You are all set!
After completing the above steps, the new network will be on your list of available/saved networks. After this, you will also connect to this WiFi network automatically.
Final Words
These are two easy methods that you can use to connect a Windows 11 PC or laptop to a hidden WiFi network. The steps in both methods are easy to follow. So now when you don’t see any WiFi network there under the WiFi network list, don’t panic because you can always connect to a hidden WiFi manually. Good Luck! Enjoy Windows 11!
Read Also: