A clean install of Windows 11 can be started directly from the Media Creation Tool or a mounted ISO file. However, booting the device with USB installation media is likely the only way to install this OS on a new computer or device with an empty hard drive. For this, you can use the Media Creation Tool, Rufus, or Command Prompt to create a bootable USB flash drive to install Windows 11. This guide will teach you how to use Command Prompt to create a USB bootable drive for an in-place or clean install of Windows 11.
Table of Contents
How to Create a Bootable USB Drive for Windows 11 Using CMD?
The command prompt is an internally built application that allows you to test different tasks on the Windows operating system. So here I will show you a step-by-step guide on how to create a bootable USB drive for Windows 11 using the command prompt.
Step 1. First, you need to download Windows 11 on your PC.
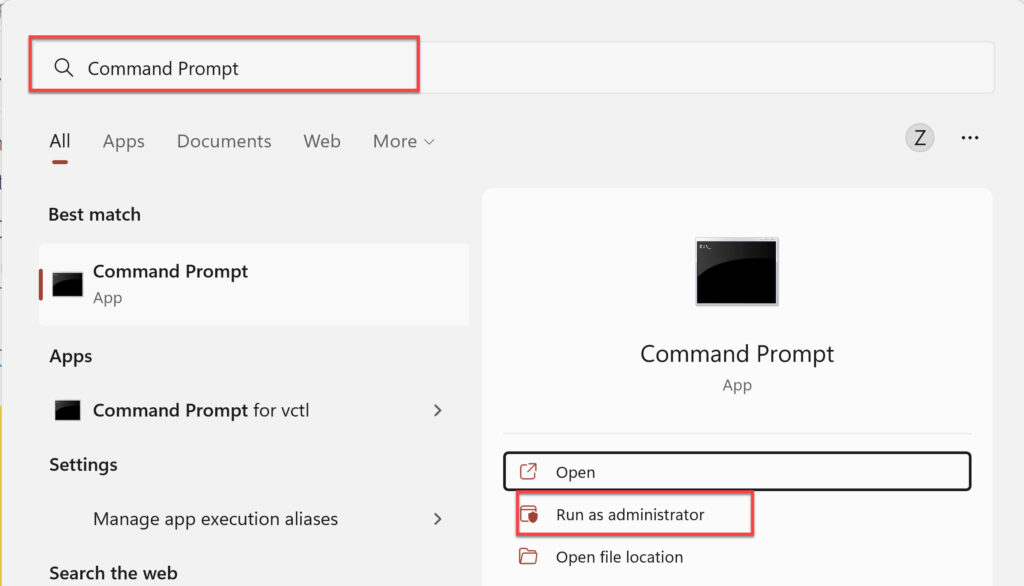
Step 2. Next, connect your USB drive to your computer, then open the Command Prompt by searching for it in the Start Menu.
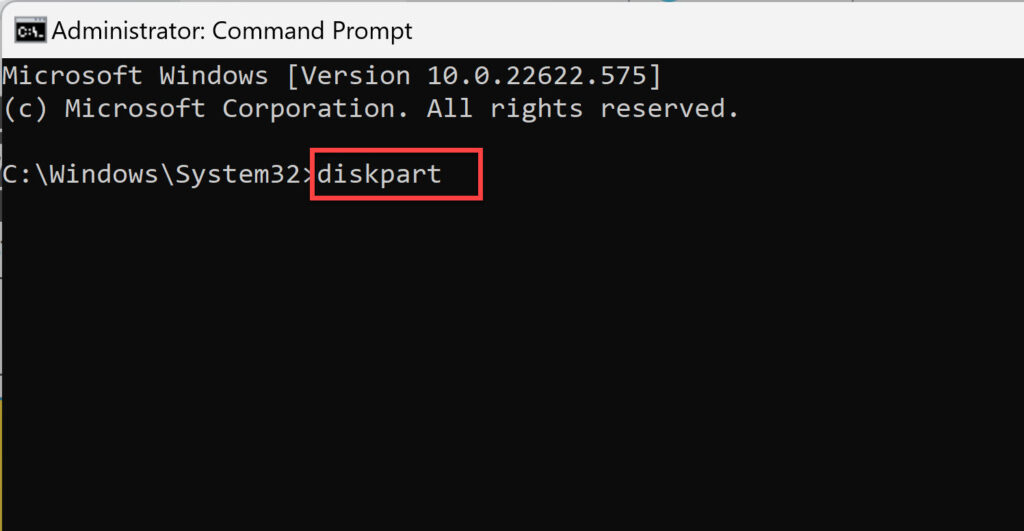
Step 3. Once it is open, type “Diskpart” and press Enter.
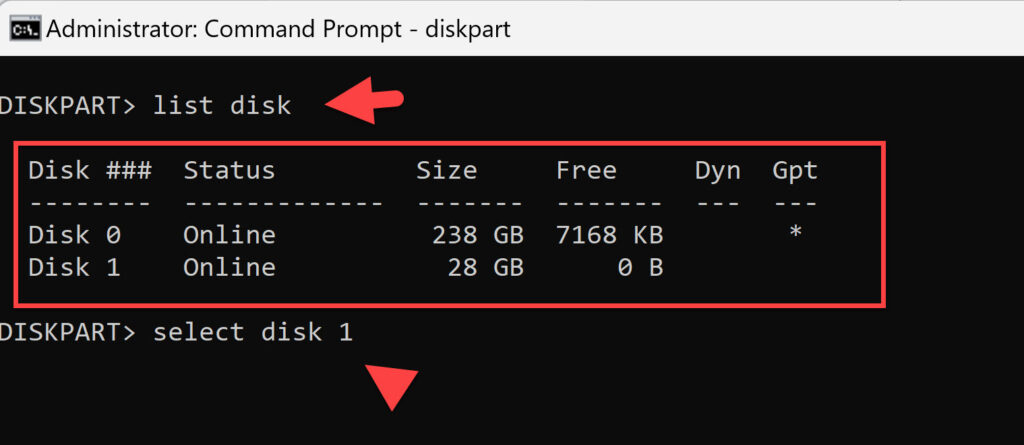
Step 4. Then, type the “list disk” command line to view available disks on your computer. Then select the disk you want to continue with.
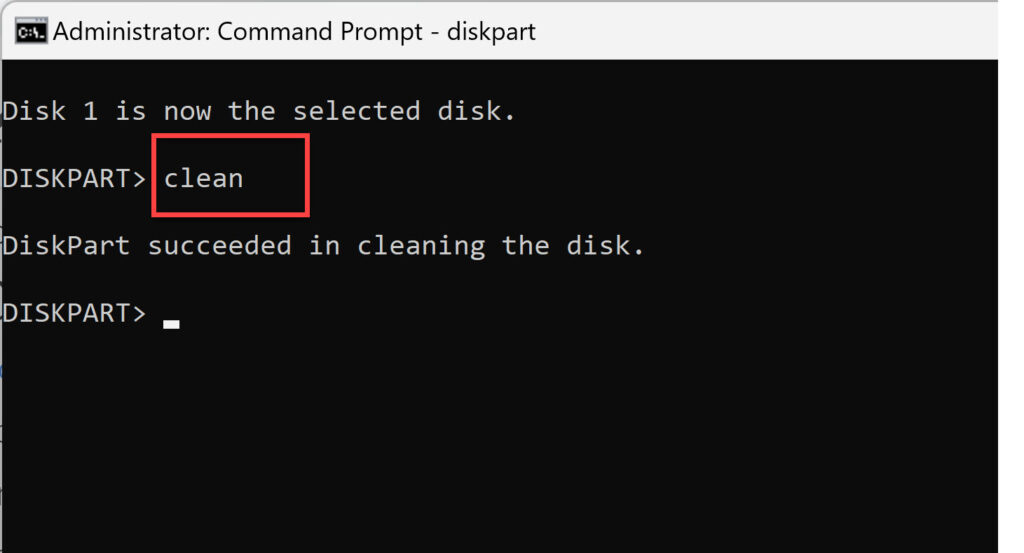
Step 5. After selecting the disk, type “clean” and hit Enter to delete everything from the disk.
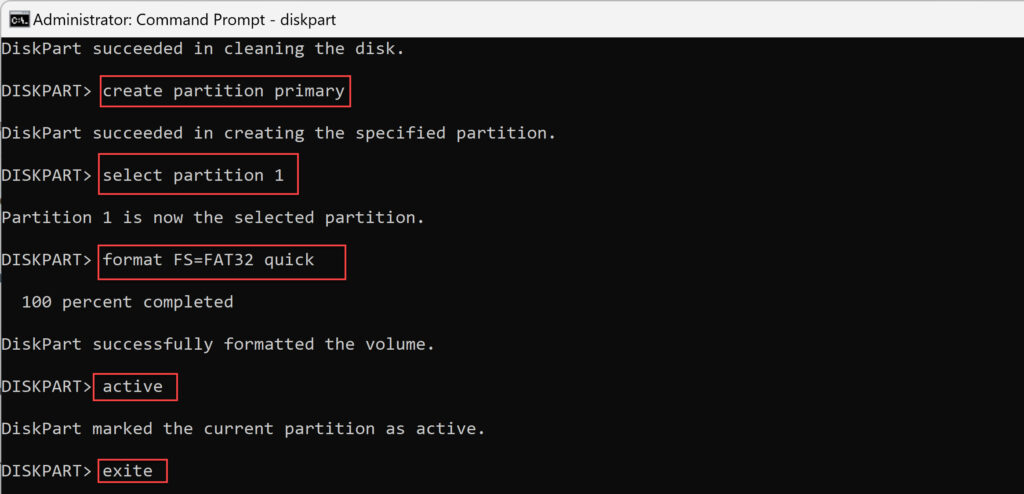
Step 6. Create a primary partition by running the following command:
create partition primary
Next, create a new partition by entering the following command and press Enter to proceed:
select partition 1
Now, to create the USB flash drive bootable, run the following command.
format FS=FAT32 quick
Step 5. Finally, type “active” followed by “exit” to finish creating the bootable USB, and close the command prompt window.
Step 6. Finally, navigate to Windows 11 ISO file, extract the file and copy that into the USB Drive.
Final Words
By following the above steps, you can create a Windows 11 bootable USB drive. After successfully creating a bootable USB drive, connect the USB drive to your computer and restart it. Press the Start menu key and select the USB drive and press Enter. Then proceed to install Windows 11 on your PC. However, if you find any bugs, feel free to share them with us via the comment section box. Good luck!
Read also: