
Sticky Keys are a neat accessibility feature that allows you to use keyboard shortcuts by pressing one key at a time instead of pressing all the keys at once. After using this feature, there are several ways to disable it. In this guide, we will show you two easy and different methods to disable or turn off sticky keys on Windows 11 PC. But first, let’s know a little more about this feature.
Table of Contents
What are Keyboard Sticky Keys on Windows 11?
Windows 11 comes with a feature called sticky keys that can help people who cannot hold down multiple keys on the keyboard at the same time. For example, to copy text or files, just use the CTRL + C key. However, everyone can do this.
When you disable sticky keys, you can also copy by pressing the CTRL key, and then press the C key to do the same function, you don’t need to hold the CTRL key while holding the C key. This is helpful for many people who can’t copy at the same time through disability or other means to simultaneously key. This makes it easy to use keyboard shortcuts by pressing each key individually, so you don’t have to press multiple keys at once.
When the new Windows 11 is released for everyone, it will bring many new features and improvements. These features and improvements are very useful for some people and add some learning challenges for others. Some things and settings have changed a lot, and people must learn new ways to work and manage Windows 11. The sticky keys feature has been moved to the accessibility settings panel, including many other settings in Windows 11.
2 Ways to Turn Off Sticky Keys on Windows 11
After knowing all about sticky keys on Windows 11, now is the time to learn how to get rid of them. To get started disabling sticky keys in Windows 11, follow one of the below methods:
Method 1. Disable Sticky Keys on Windows 11 via Control Panel
One way to turn off Sticky Keys is through the Control Panel. Here is how to do it:
- To turn off Sticky Keys via the Control Panel, open the Control Panel by searching for it in Start.
- Next, find and select the ‘Ease of Access Center’ option.
- Click on the ‘Make the keyboard easier to use’ link.
- Finally, uncheck the checkbox in front of the ‘Turn on Sticky Keys‘ option and tap on ‘OK‘ at the bottom to save the changes.

After completing the above steps, the ‘Sticky Keys’ feature will now be turned off.
Method 2. Turn Off Sticky Keys on Windows 11 via Settings
Another way to turn off sticky keys is by going through the Settings app. Here’s how it can be done:
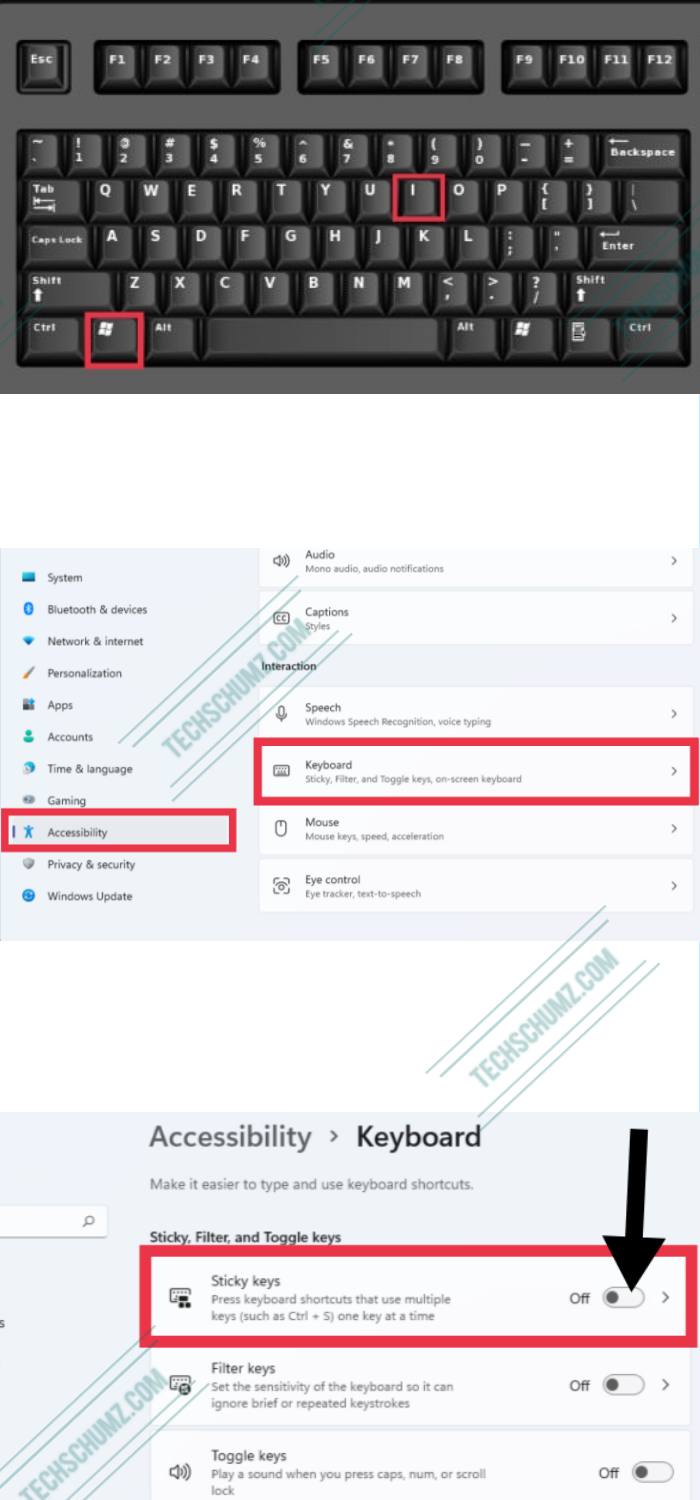
- To turn off sticky keys via Settings, simply press the WINDOWS + I shortcut keys to open the Settings app.
- Next, Click on ‘Accessibility‘ from the left pane.
- Then, scroll down and click on ‘Keyboard‘.
- Finally, toggle the button to the OFF position to disable sticky keys in Windows 11.
The Sticky Keys feature will now be disabled. You can also configure the Sticky Keys settings, such that it does not turn on by mistake or enhance its functionality.
How to Turn On Sticky Keys on Windows 11
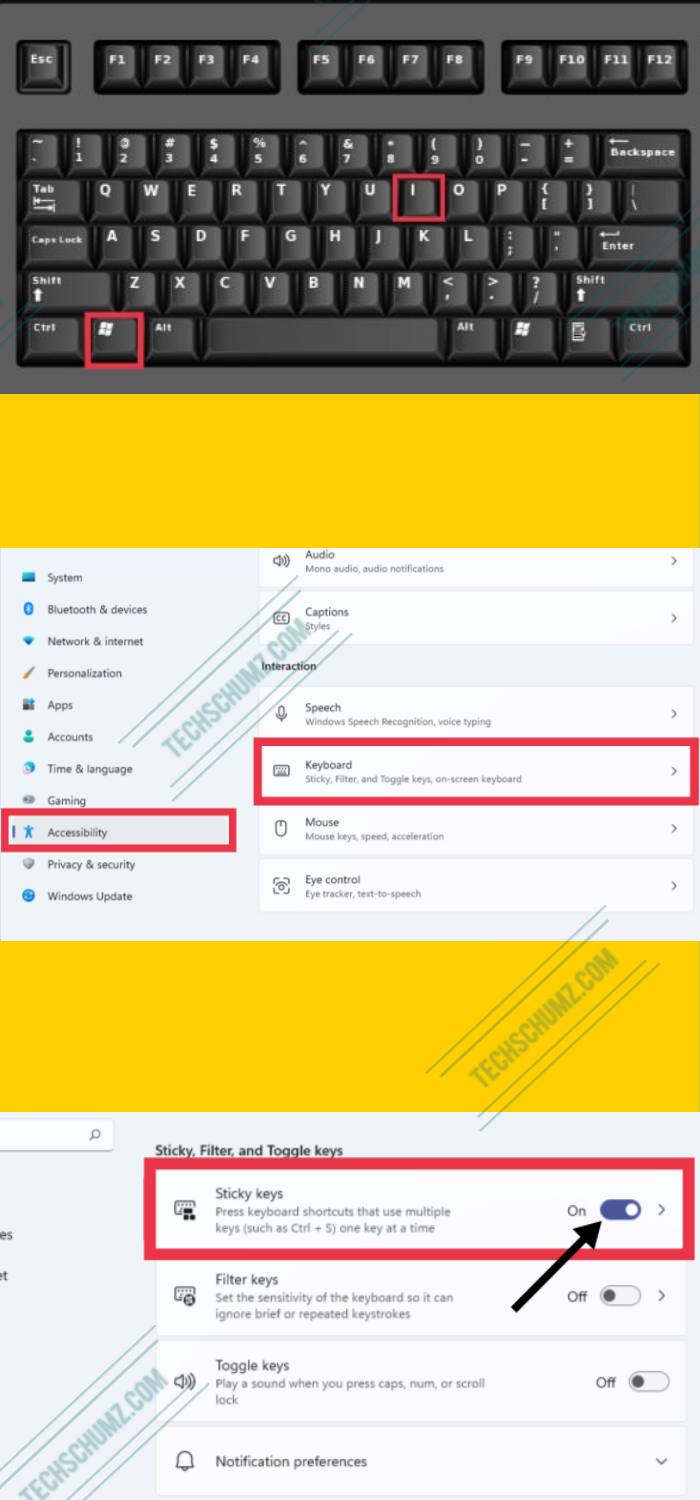
- To enable sticky keys, open the Settings app by using the ‘Windows key + I’ shortcut
- Next, in Windows Settings, click ‘Accessibility‘ from the left pane, and then select ‘Keyboard‘ on the right pane.
- Finally, on the Keyboard settings page, toggle the button to the On position to enable sticky keys in Windows 11.
Final Words
That’s it! These are two quick methods that you can use to disable or turn off the keyboard sticky keys in Windows 11. You can either use Control Panel or go for Windows 11 Settings app. Also if you ever need it again, you can simply enable it by following the above steps. Lastly, we hope you find this article helpful. If you encounter any questions related to the guide, please let us know in the comments section below.
Read also: