In an ideal world, you’d connect all your devices to a single WiFi network and instantly be on the internet, but it doesn’t always work out that way. But there some situation that you don’t have that option. In those situations, you’re going to need a way to share internet through another device, like your laptop.
You can share your Windows 11 PC’s internet connection with other devices over Wi-Fi. In this guide, we will help you learn two different methods on how to turn your Windows 11 PC into a WiFi hotspot.
Table of Contents
Method 1. Turn Your Windows 11 PC Into a WiFi Hotspot via Settings
A few free and paid applications are available over the internet to turn your PC into a hotspot. But, If you are using Windows 11, there is no need to install software to activate the WiFi hotspot feature.
To enable mobile hotspot on Windows 11 and turn your PC/laptop into a WiFi router, follow the below steps:
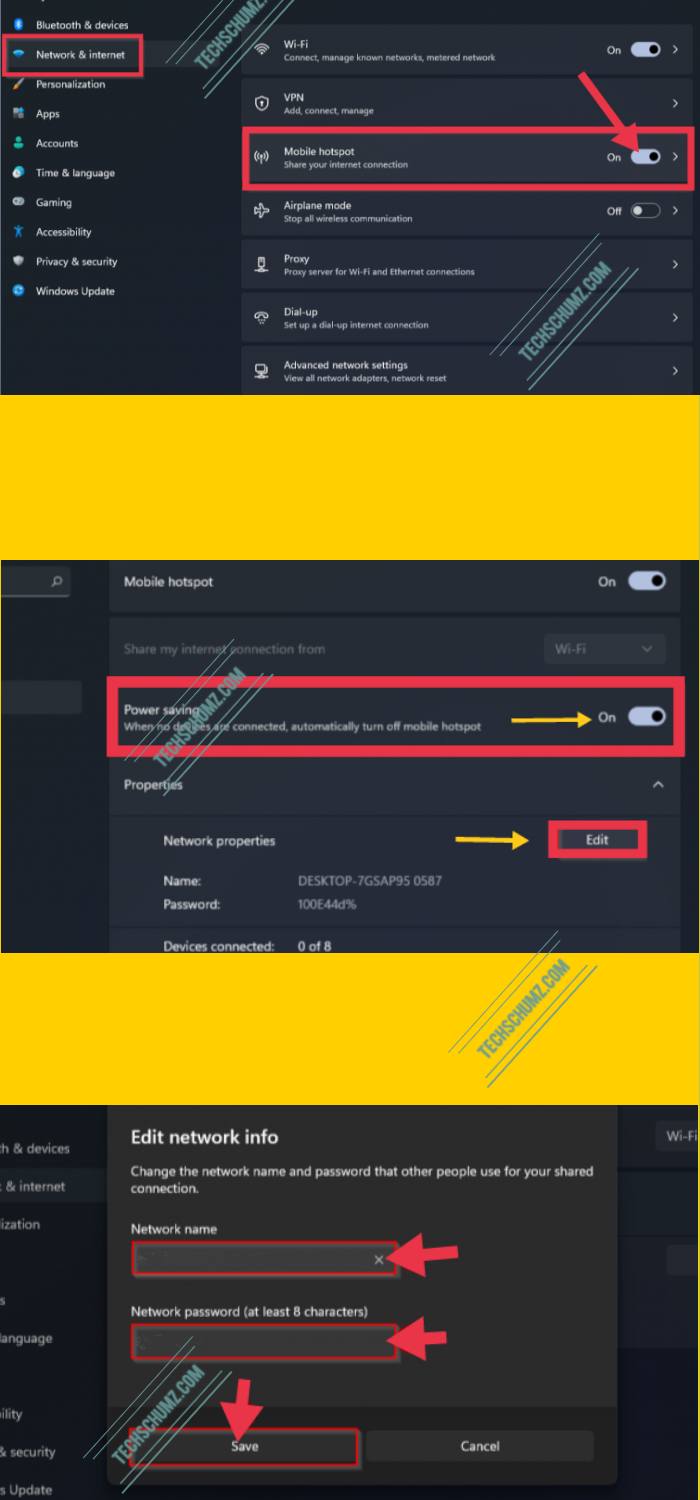
- Open the Settings app by using Windows + I keys, and then click on the Network & Internet category.
- On the right pane, turn on the Mobile hotspot option.
- (optional) Here, turn on or off the ‘Power saving’ option. If turned on, your PC’s mobile hotspot will automatically turn off when no devices are connected to the hotspot.
- Next, you may configure the Network name and password. For that, click on the Edit button.
- Now, use a network name and password according to your choice, and click on the Save button.
Now that all settings are configured, you can share your Internet connection with any other WiFi-enable compatible device. Activate WiFi on the WiFi device you want to go online. In the list, click the SSID name you configured on the PC. Enter the password to connect.
Method 2. Make a Windows 11 PC a WiFi Hotspot via Third-party app
If you don’t wish to use the Windows native feature or it doesn’t work for any reason, you can install third-party software like mHotspot that let you turn your Windows 11 PC or laptop into a WiFi router.
- Download and install mHotspot on your PC from here, and restart your PC afterwards.
- Go to Control Panel > Network & Internet > Network and sharing center. Click Change adapter settings, then right-click on the network you’re connected to and select Properties.
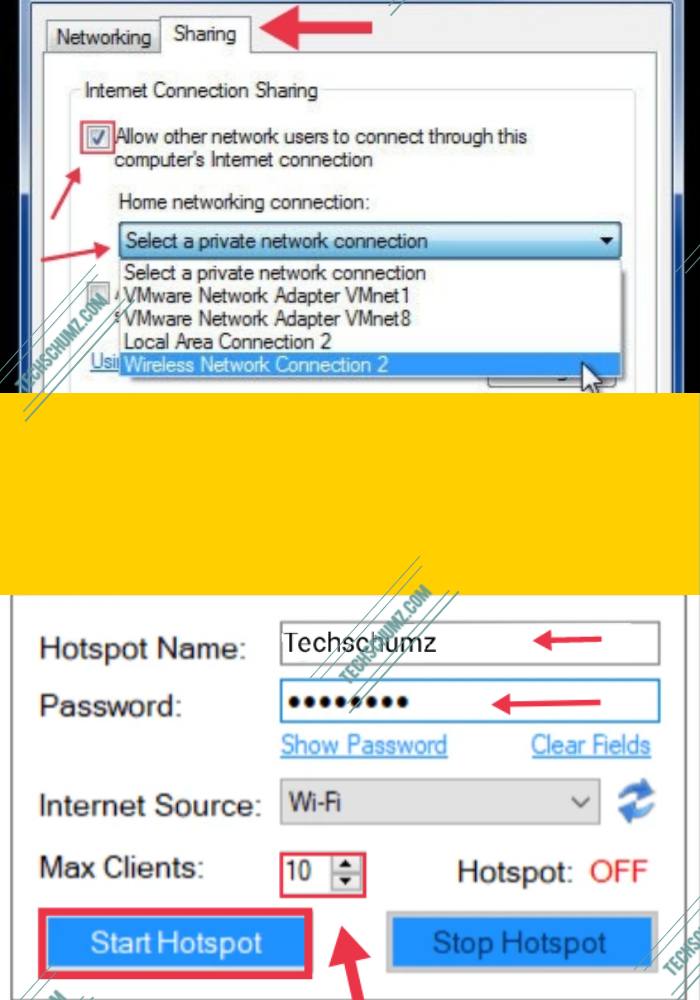
- Under the Sharing tab in Network properties, enable Allow other network users to connect through this computer’s Internet connection and hit the Apply button. This will allow the network to be shared.
- Now, open the mHotspot app on your Windows 11 computer. Then, use a Hotspot name and password, then select the network we enabled sharing.
- From the Max Clients option in the software, you can also allow the maximum number of devices that can be connected to your Hotspot.
- Finally, click on the Start Hotspot button and that’s it. Now, connect your devices to the WiFi hotspot you just created on your Windows 11 PC using mHotspot
Final Words
These are two easy ways to turn your Windows 11 PC into a WiFi hotspot. Above you learned how to use the Mobile Hotspot from Windows settings, and also how to use the mHotspot application to create a WiFi hotspot in Windows 11. Lastly, we hope you find this guide helpful. If you have any questions, please let me know in the comments section below.
Read also: