If you have an iPhone and have updated to iOS 15, you will notice some new features have been added to the current version of iOS. While your phone is unlocked, an incoming call appears as a banner notification on top of the screen, but it won’t distract you from doing whatever you’re doing. There is a phone call at the moment. This notification banner, on the other hand, is not to everyone’s taste, and calls can easily be overlooked. Services like “Remind me Later” and “Messages” won’t be available at the moment. In this guide, we will show you how to get full screen caller ID on iOS 15 with a picture on your iPhone 11, 12, and 13.
Table of Contents
Get Full Screen Caller ID on iOS 15
You can enable and use full screen Caller ID on your iPhone 11, 12, and 13 by selecting an option on your iPhone settings. After that, all incoming calls will take up the whole screen, exactly as they do when your phone is locked. To do so, follow the instructions below:
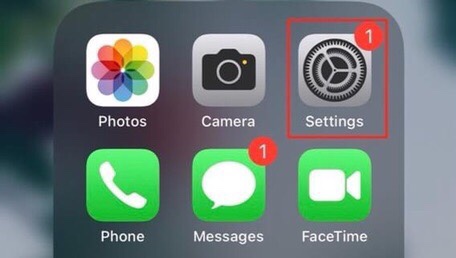
Step 1. To get started, go to the Settings app on your iPhone.
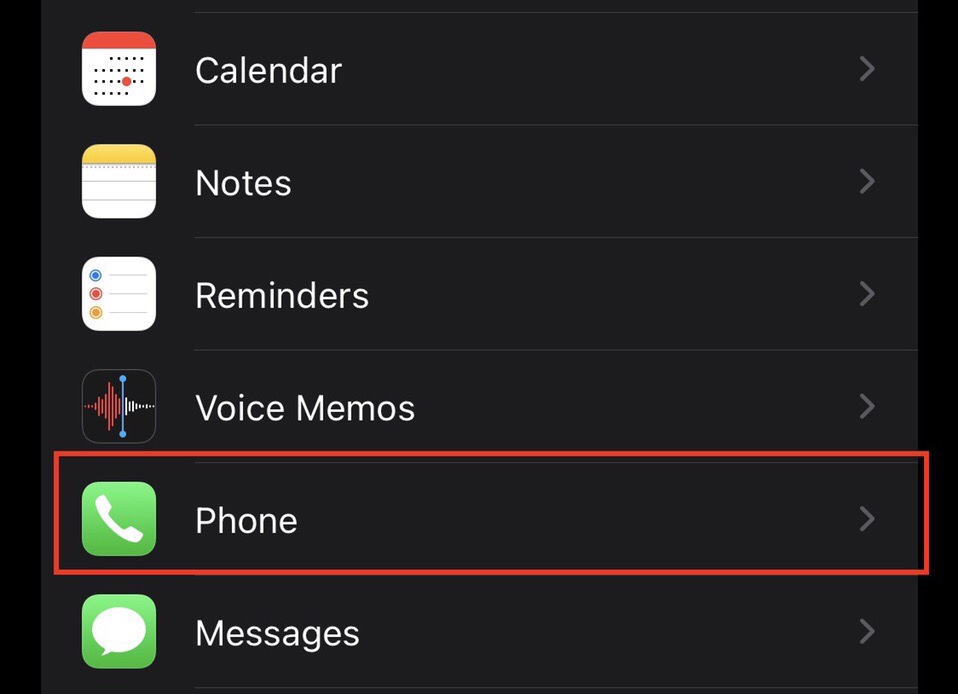
Step 2. Then, scroll down and select “Phone” from the list of apps.
Step 3. Now, to add a full-screen caller ID, tap on “Incoming Calls.”
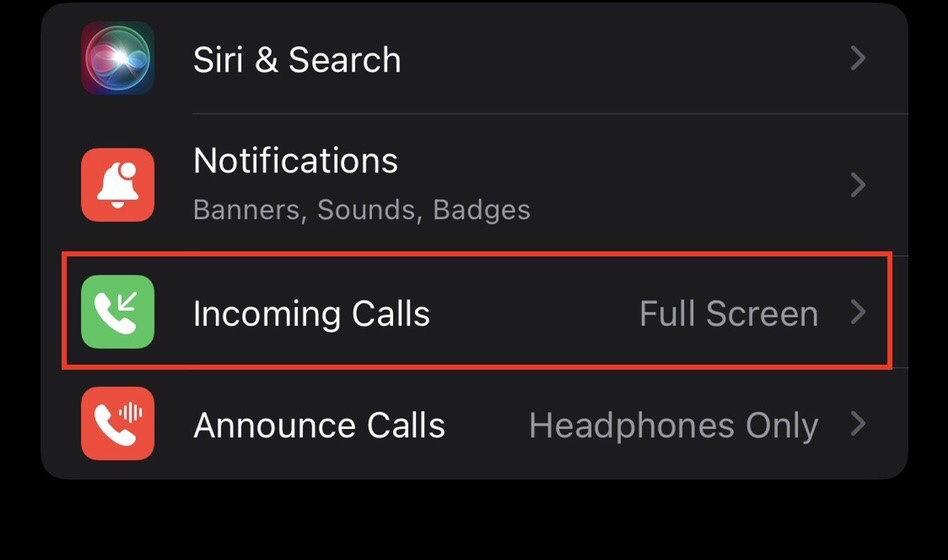
Step 4. Now you will see two options on your screen: “Banner” and “Full Screen.” Click on “Full Screen” to enable full screen caller ID on your iPhone.
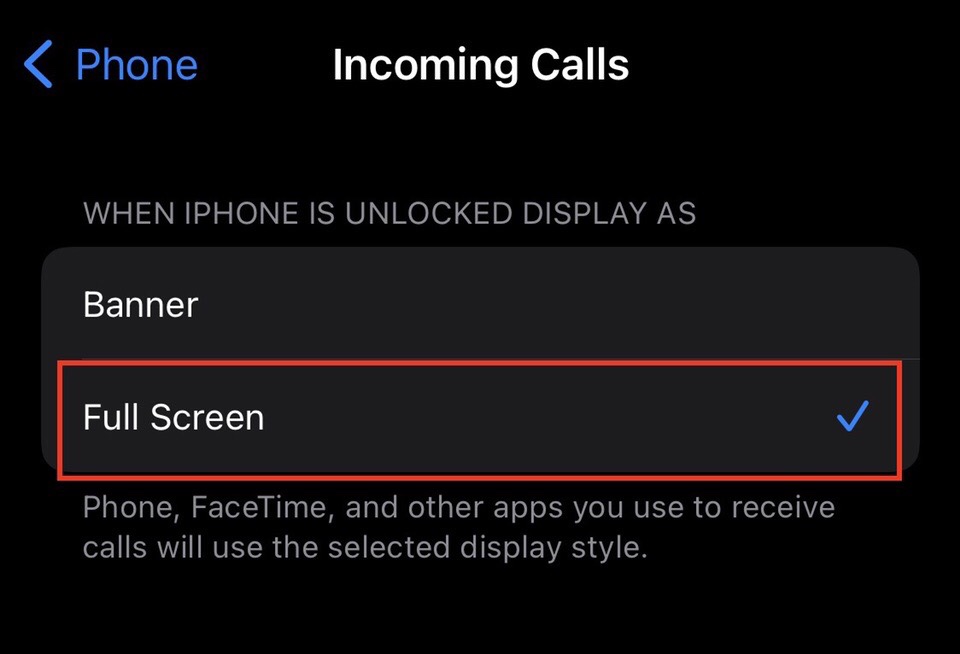
That’s it! You have now enabled full screen caller ID on your iOS 15 device. From this moment on, whenever someone calls, you’ll see a full screen caller ID.
Add an image for Caller ID on iOS 15
Don’t you think adding a picture to your iPhone’s full-screen caller id would be amazing if that person calls? Well, if you do, follow the steps below to add a picture to a specific contact or all of your contacts.
Step 1. Firstly, go to your iPhone and open “Contacts.”
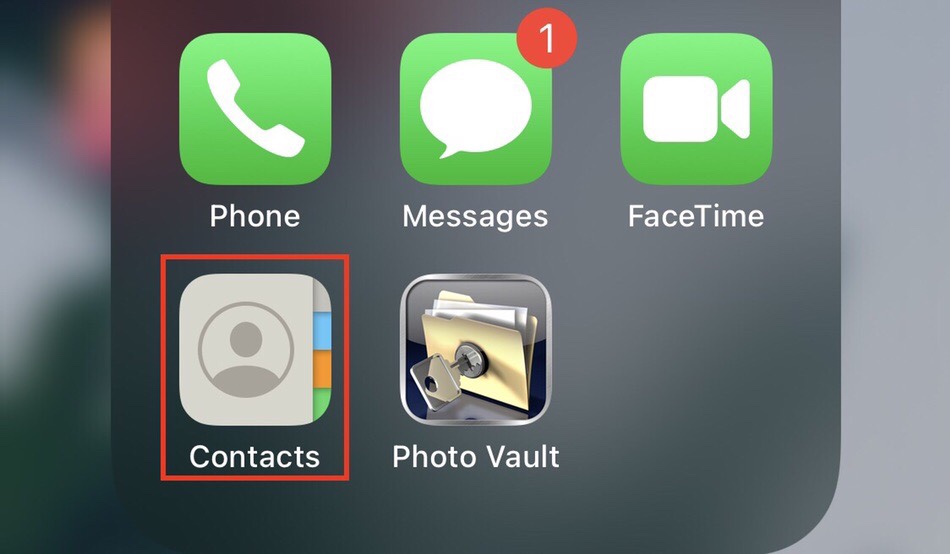
Step 2. Now, find and select the contact number to which you wish to add a photo.

Step 3. Now, under the contacts icon, tap on the “Add Photo” option.
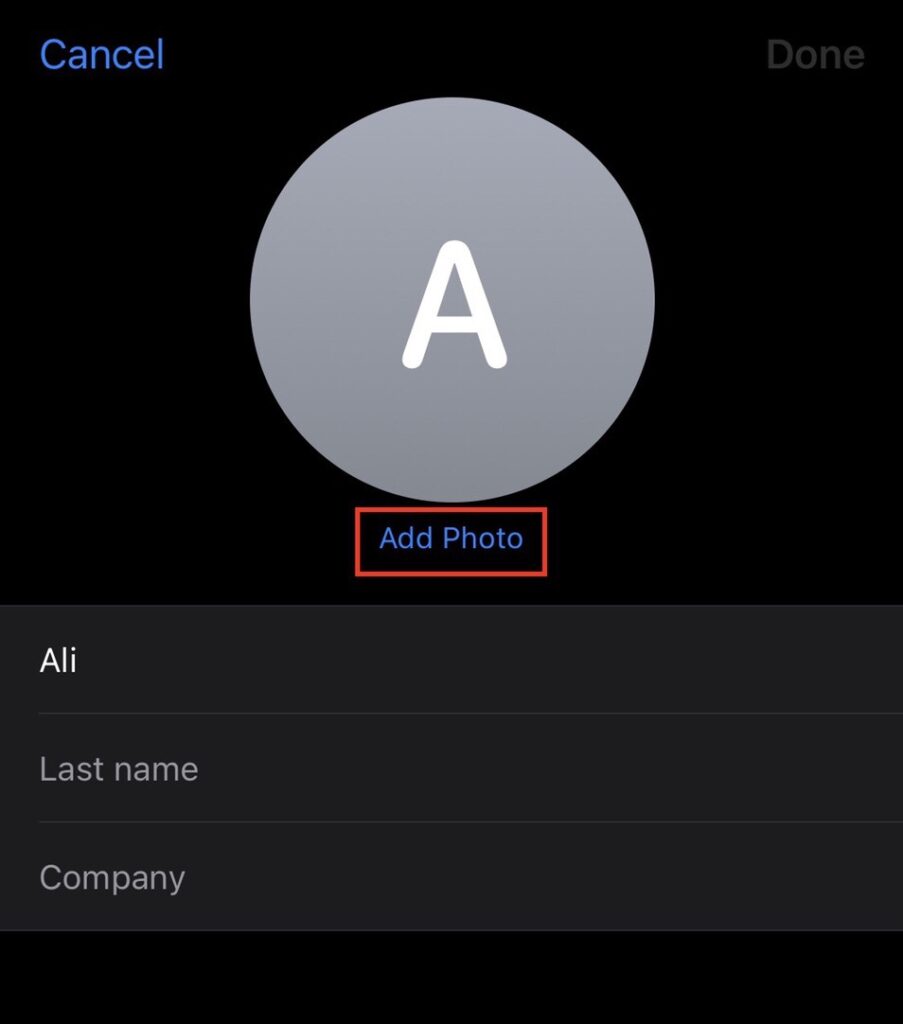
Step 4. Now, you see a bunch of icons on the screen. Tap on the “Gallery” icon to see the photos in your gallery.
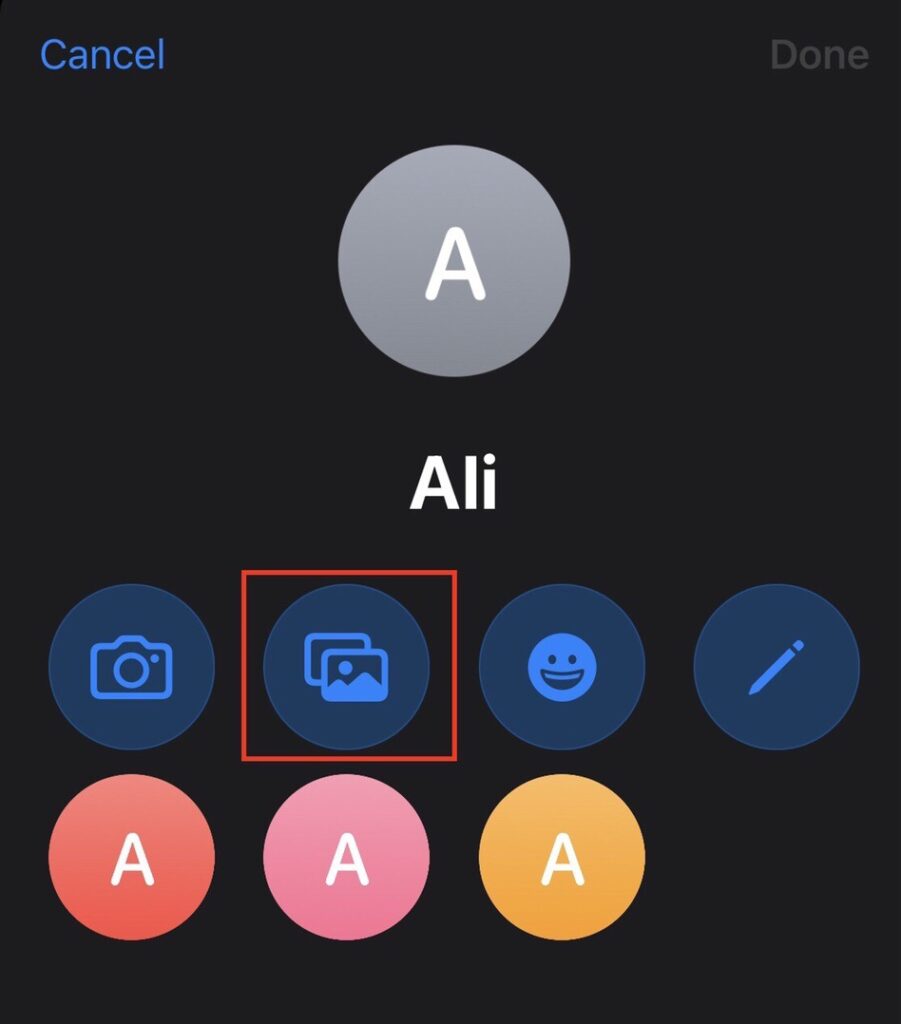
Step 5. Select a picture for the selected contact.

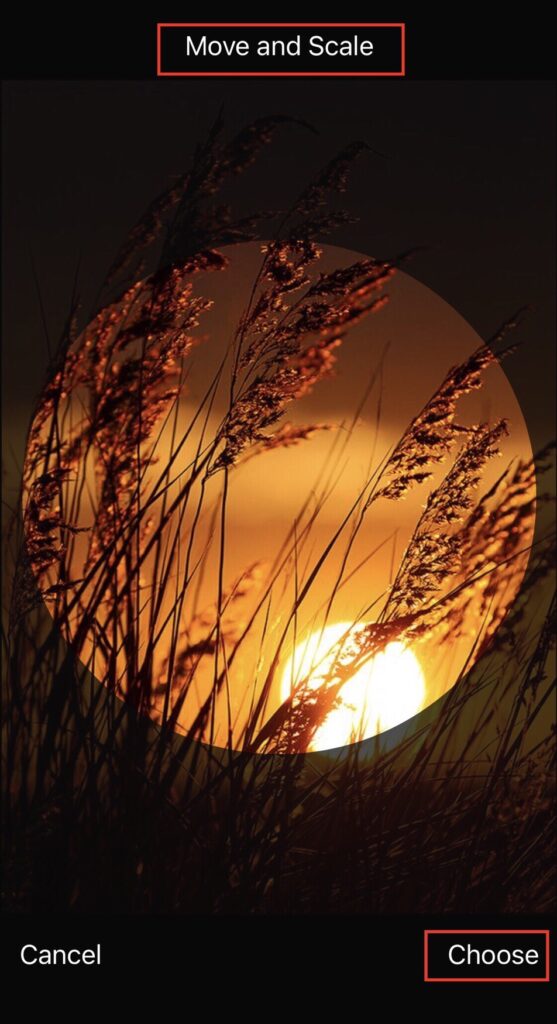
Step 6. After selecting the picture, move and scale the picture to fit in the circle, then tap on “Choose” to continue.
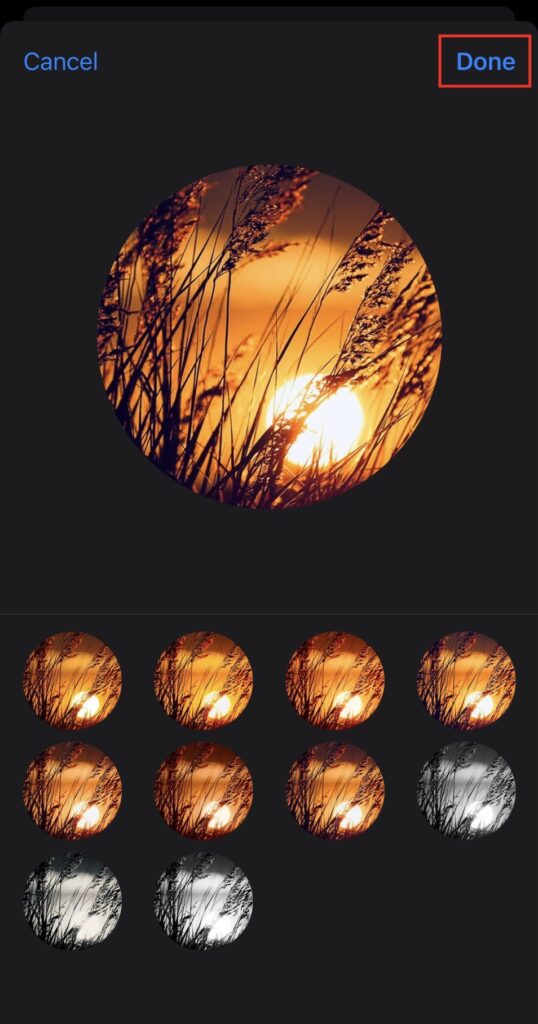
Step 7. Here are some effects for the photo; if you’re interested, select an effect and press “done” to add it to the contact.
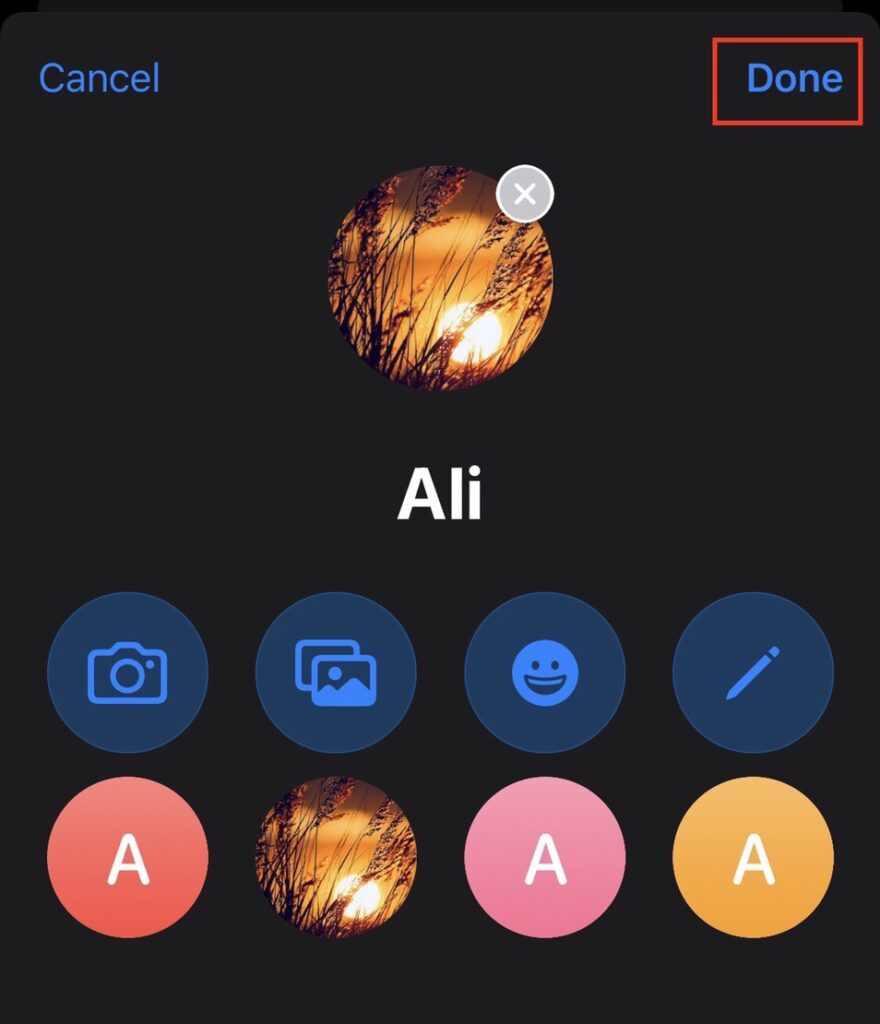
Step 8. To finish adding a photo to the selected contact, tap “Done.”
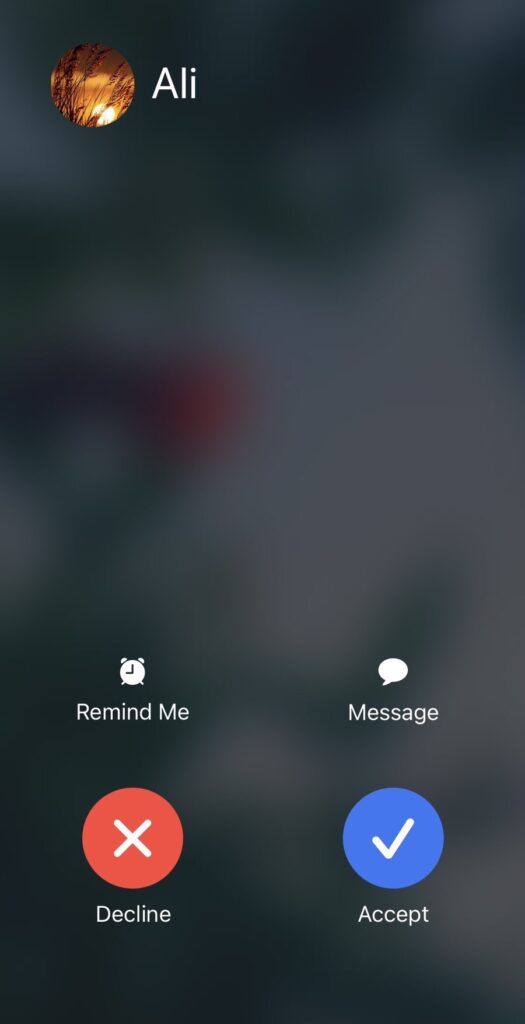
That’s it! When someone calls you, you will now see a full screen caller ID with the contact picture on your iPhone screen.
Final Words
You now know how to get full screen caller ID on iOS 15 and photos of your iPhone contacts. If you don’t like the full-screen caller ID, you can disable it and return to the little banner at the top. Finally, if you have any questions or anything to add, please leave them in the comments area.
Read also:
