Do you want to change the drive letter on Windows 11? Do you want to have your own unique drive letters? Then, you are in the right place. When you connect a new drive to your Windows 11 PC, the next available letter after C will be assigned automatically, which is usually used for system drives. Therefore, the external hard drive or USB flash drive may eventually appear as D, E, F, or any other letter, depending on the drive letter used.
All this is fine, but what if you want to assign a different letter for your drives? You may want to use M for your music files or X for your top-secret file. In this guide, we will show you three different methods on how to assign a new drive letter on Windows 11. But first, let’s have a little more information about drive letters
Table of Contents
What exactly are drive letters on Windows 11?
In the Windows world, a drive can be identified by its drive letter (such as “C:”). The important thing to remember is that Windows really only cares about drive letters. That must be unique; you cannot have two drives marked E: on the same computer.
The drive letter plays an important role in telling Windows where to find it. The files in C:\\Users may not be in D:\\Users. The standard drive letter with a colon (:) can be traced back to before DOS.
By default, in Windows (and before DOS), the boot drive is C: Other drives, whether internal, external, optical, or additional partitions, will get other letters, usually in the order of assignment: D:, E:, etc.
Why changing drive letter may cause problem?
Changing the drive letter assignment of the drive where the software is installed may cause the software to stop working. This is not common in newer programs and applications, but if you have older programs, especially if you are still using Windows XP or Windows Vista, this can be a problem.
Fortunately, most of us have not installed the software on a drive other than the main drive (usually the C drive), but if you do, treat this as a warning, you may need to reinstall after changing the drive letter software.
You cannot change the drive letter where the Windows operating system is installed. If you want Windows to exist on a non-C drive or any current drive, you can do it, but you must complete afresh installation of Windows to do so.
3 ways to change the drive letter on Windows 11
Again, letters are automatically assigned to storage device to identify them as they’re connected to Windows. If you want to assign a different letter than the one automatically assigned, use the steps below to do that.
Method 1. Assign a new drive letter on Windows 11 using Disk Management
To manage drive letters with the Disk Management tool, use these steps:
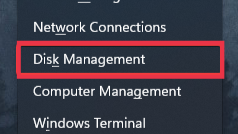
- Press ‘Windows + X’ or right-click the Start menu button, and select ‘Disk Management’.
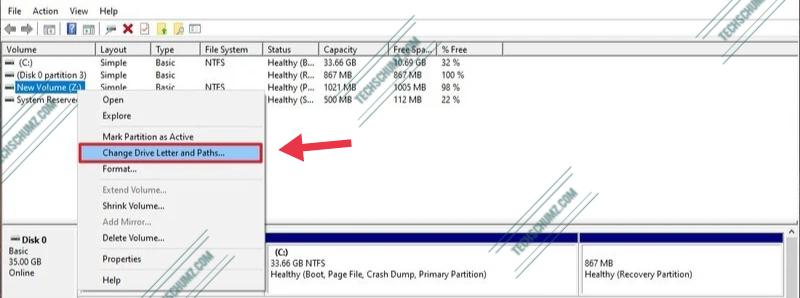
- Right-click the drive and select the Change Drive Letter and Paths option.
- Click the Change button.
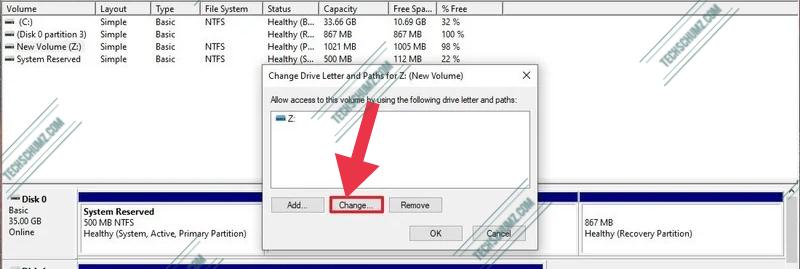
- Select the Assign the following drive letter option.
- Use the drop-down menu to assign a new drive letter.
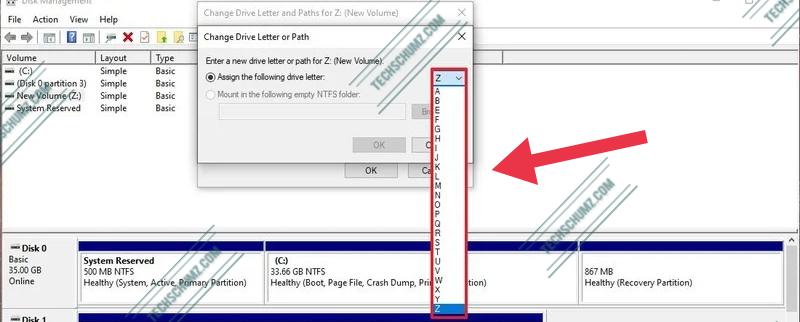
- Click the OK button.
- Click the OK button again.
Note: To avoid the system trying to assign the same letter to another drive, it’s a good idea to start adding letters in backward order. For instance, instead of using D, E or F, it better to start with Z, Y or X when assigning a new letter.
Once you complete these steps, the drive will permanently retain the assigned letter, even after reconnecting it. However, if you connect the drive to another device, it may receive a different letter.
Method 2. Change the drive letter on Windows 11 via Settings app
Most of the settings of Windows 11 have a centralized location. From changing mouse pointer color to creating new users and turning off sticky keys, everything can be done in the”Settings” app. Also, you can assign a drive letter using the Settings app, here’s how you can do it:
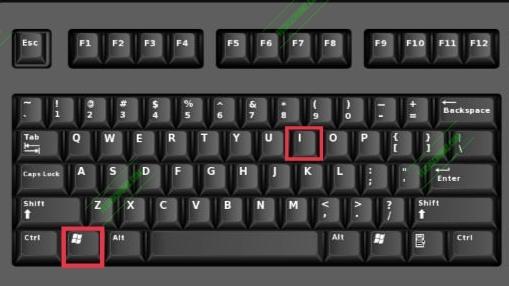
Step 1. Open the System Settings by pressing the ‘Windows + I’ shortcut keys.
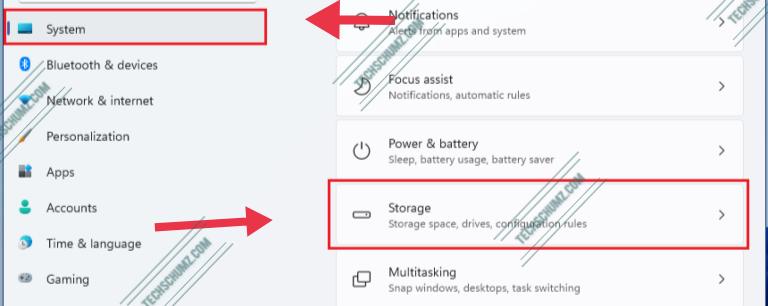
Step 2. Click ‘System’ on the left pane, then select ‘Storage’ on the right pane of your screen.
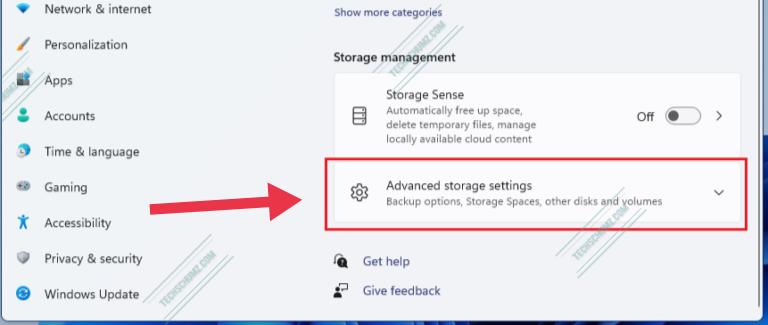
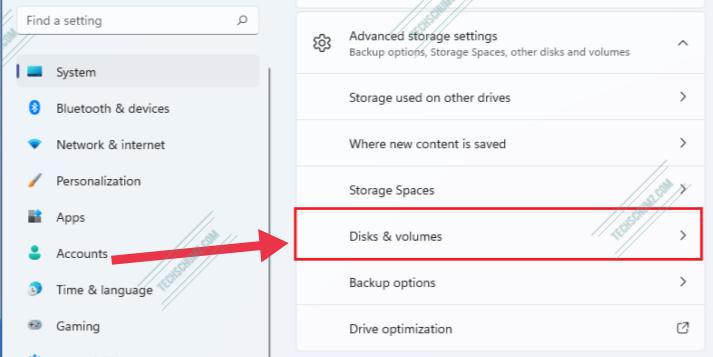
Step 3. On the ‘Storage‘ settings, tap on on ‘Advanced storage‘ settings.
Step 4. Click on ‘Disks & volumes’.
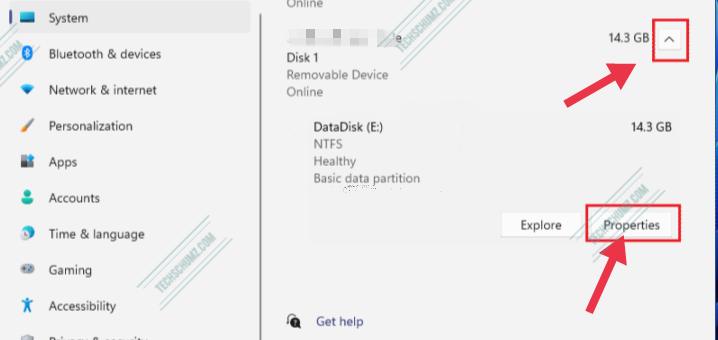
Step 5. On the Disks & volumes settings window, click on the disk drive, and then select ‘Properties’.
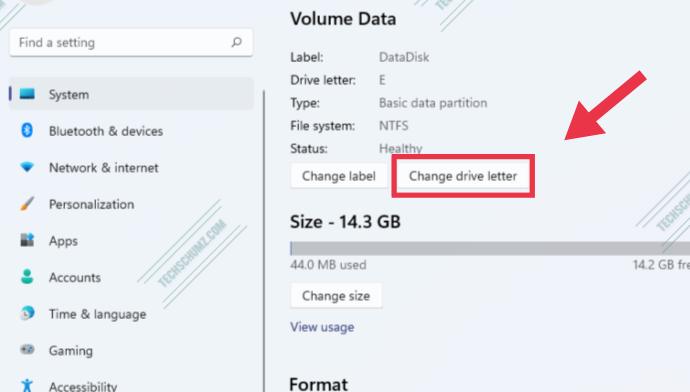
Step 6. Click on the ‘Change drive letter’ button.
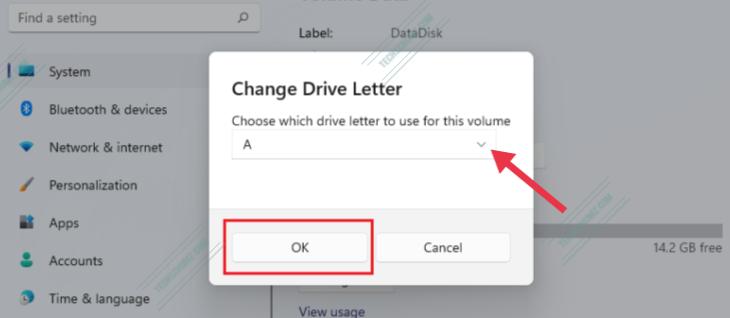
Step 7. On the new pop up window, choose any letter to use for the selected drive.
Step 8. Then simply click ‘OK’ to apply.
The drive will immediately switch to the selected letter of your choice. File Explorer will now refer to the drive with the new letter.
Method 3. Assign a new drive letter on Windows 11 using Command Prompt
Although the easiest way to assign a new drive letter in Windows 11 is to use the Disk Management or Settings app, you can also use DiskPart at the Command Prompt to perform the same task.
To assign a drive letter using Command Prompt, use these steps:
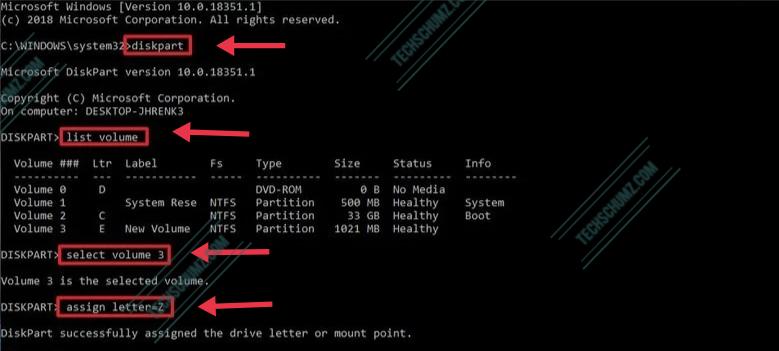
- Open Command Prompt by searching for it in Start, and run as an administrator.
- Type the following command and press Enter:
- diskpart
- Then, type the following command to see all the volumes and press Enter:
list volume
- Type the following command to select the volume (drive) to assign a new letter and press Enter. In the command, make sure to change “3” to the number that represents the drive on your device.
select volume 3
- Now, use the below command to assign a new drive letter, and press Enter:
assign letter=Z
- The command assigns the letter “Z” to the drive, assuming it is available. However, you must always change it to the character you want to use.
After completing these steps, Windows11 should automatically assign the same letter every time you reconnect storage to the same device as well as disk management.
Summary
That’s it! These are three methods that you can use to change the drive letter on Windows 11. You can use any method that seems simple for you. After all, all methods will get you the same result. Finally, if you have any questions related to the above steps, please write them in our comments section below. Good Luck!
Read also:
Nice summary, but none of this works if you want to change the letter of your DVD drive in Windows 11 You have to physically disconnect it to release the letter it has assumed. I’ve always called my DVD drive Z:, but it’s now no longer possible to do this.