If you want to try or install Linux Mint in VirtualBox on Windows 11, then you are in the right place. In this way, you can run Linux Mint on the current system without modifying the partition or boot sequence of the machine. One of the best ways to run Linux on an existing operating system is to run it as a standard desktop program.
Therefore, it is easier to run a virtual machine on the current device than to download Linux Mint directly on your Windows 11 PC. It has its own virtual disk, but it shares resources with your PC, such as RAM, CPU, and graphics. Developing and destroying virtual computers is a more effective way to explore new operating systems without worrying about your email intrusion.
To set up a virtual machine (VM) on a Windows 11 PC, many people may use software such as Parallels, VMware Workstation, or Player. For this reason, VirtualBox is a good free alternative. In addition, you can install and configure it in just a few minutes.
Table of Contents
Linux Mint
Linux Mint is a free and open-source operating system (OS) distribution based on Ubuntu and Debian, which can be used on x86/x64 compatible machines. It is designed to be easy to use and provide a readily available to-do list experience, including desktop multimedia support. The operating system is easier to install than most Linux distributions. Mint includes software required for e-mail and online functions, as well as support for multimedia content online or from the user’s own files and physical media. It also provides third-party browser extensions, Java, media codecs, and other elements that support recognized standards.
To better support various hardware, Mint has many different desktop versions, including Cinnamon, GNOME, XFCE, and KDE. For those who are more familiar with Linux, the operating system is also compatible with an alternative version of Linux Mint Debian. At the same time, the third most popular home operating system is Linux Mint, second only to Microsoft’s Windows and Apple’s Mac OS.
Minimum System Requirements
- RAM: 1 GB (2 GB recommended)
- Disk: 15 GB free space (20 GB recommended)
- Display: 1024 x 768 resolution (at lower resolutions, press ALT to drag and drop windows if they don’t fit on the screen).
- The 64-bit ISO can boot from BIOS or UEFI.
- The 32-bit ISO can only be booted from the BIOS.
Linux Mint Key Features
- So that users can quickly get used to the interface, the Cinnamon interface of Linux Mint gives you the impression that you are using a classic Microsoft Windows-style desktop.
- The desktop is incredibly versatile. It has many themes, window borders, and device icons, so you don’t need any additional programs to modify the appearance.
- It also comes with a surprising number of pre-installed applications, such as Firefox, LibreOffice, GIMP photo editing, etc.
- Because of its simpler user interface and easy configuration, Linux is easy for beginners. You can use a program called “Driver Manager” to quickly install hardware drivers.
- It takes up very little system resources. The Cinnamon version requires about half of the popular Unity and GNOME desktop memory.
Steps to Install Linux Mint in VirtualBox on Windows 11
Below are the steps that you need to follow if you want to try Linux Mint on your Windows 11 computer.
- Download and install VirtualBox on your Windows 11 PC.
- Download the Linux Mint ISO file for VirtualBox.
- Create a new virtual machine for Linux Mint on Windows 11.
- Add the Linux Mint ISO file to the virtual machine.
- Install Linux Mint in VirtualBox.
Note: Before going for the steps, first, you need to make sure that virtualization is enabled on your Windows 11 PC. Otherwise, the error message “Can’t open a session on the virtual machine” will appear. To learn more about it and how to install it, see the link below.
—> Enable virtualization on your Windows 11 PC
Step 1. Download and Install VirtualBox on Windows 11
Installing Linux Mint on your Windows 11 PC necessitates the installation of VirtualBox first, so you must first install VirtualBox on your PC or laptop. If you don’t want to have any problems when installing Linux Mint, you also need to install the extension pack. If you don’t know how to install them, we have step-by-step instructions for you. Please see the link provided below.
—> Install VirtualBox and the extension pack on Windows 11
Step 2. Download Linux Mint ISO File for VirtualBox
After you have successfully installed VirtualBox on your Windows 11 PC, now you need to download the new update of the ISO file for Linux Mint. You can download it from here.
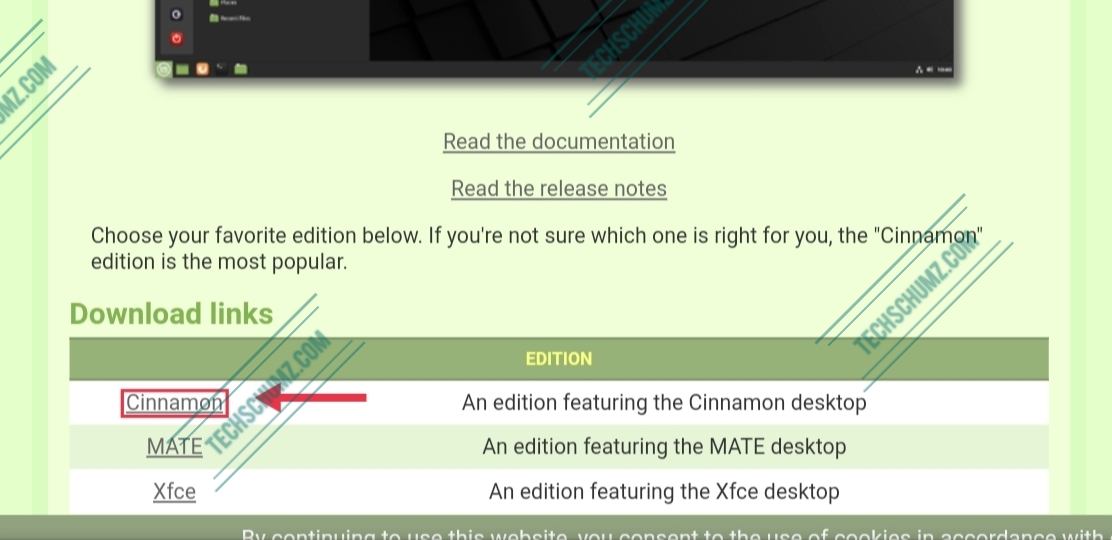
Note: There are three versions of Linux Mint available for download; you must choose Cinnamon, the flagship version of Mint.
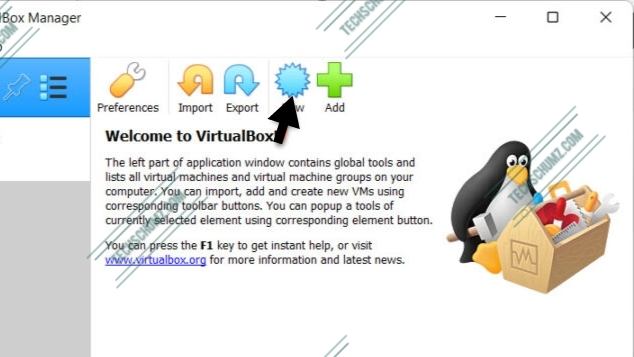
Step 3. Create a New Virtual Machine for Linux Mint on Windows 11
Once the Virtualbox is installed on your computer and you have also the Linux Mint ISO File ready, now if you want to install Linux Mint on your Windows 11 PC then you need to create a virtual machine for Linux Mint. This is how it can be done:
- First, open the VirtualBox and click ‘New’.
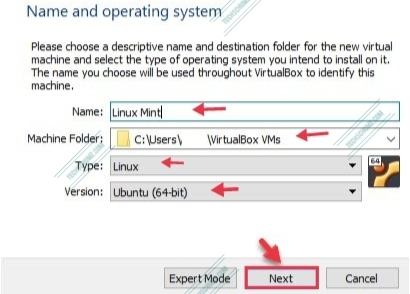
- Next, choose any name for your virtual machine.
- Set type to ‘Linux’ and version to ‘Ubuntu (64-bit)’. and click on the ‘Next’ button.
- In the next section, choose a memory size of 2040 MB and click ‘Next’.

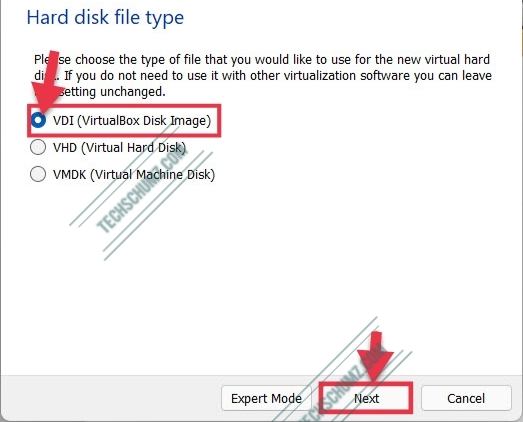
- In the Hard disk file type, select: VDI (VirtualBox Disk Image)” and click ‘Next’.
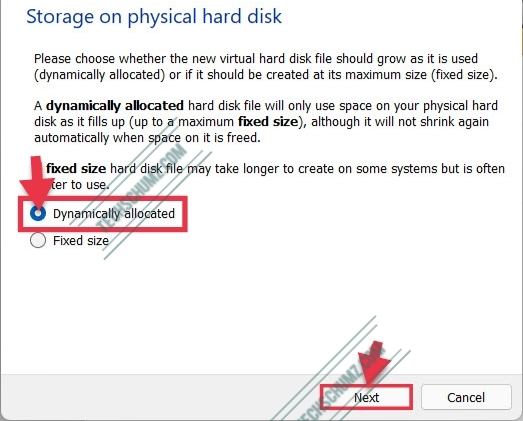
- Now, select ‘Dynamically allocated’ for a faster setup. If you are after a better performance (which we recommend), select ‘Fixed size’, and then click ‘Next‘.
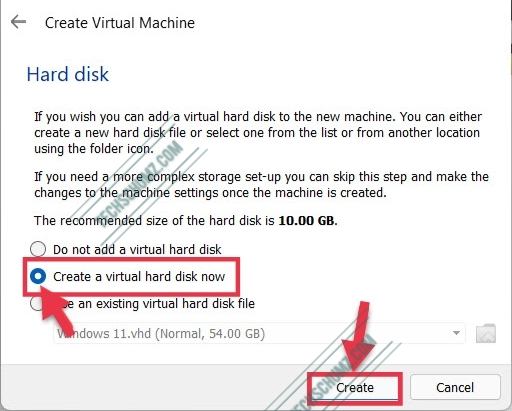
- Finally, Select the amount of disk space for your Linux Mint virtual machine and click the Create button.
Step 4. Add the Linux Mint ISO file to Virtual Machine
After you have created a virtual machine for Linux Mint, now it’s time to add the ISO file of Linux Mint for installation. For that, follow the below steps:
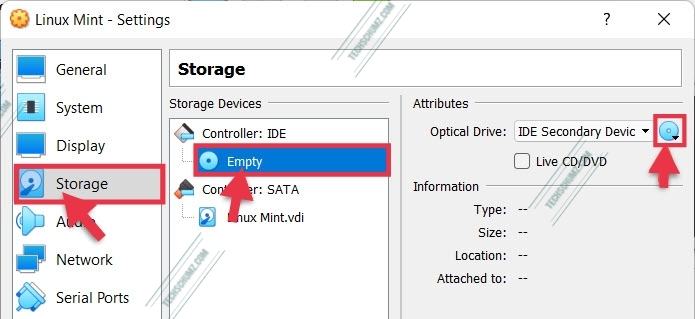
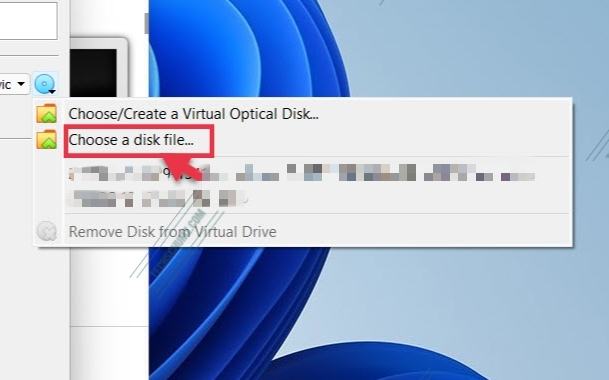
- Click on the ‘Settings’ tab.
- Click on ‘Storage’, and click on ‘Empty’ followed by the small CD icon on the right side.
- Now, tap ‘Choose a disk file’.
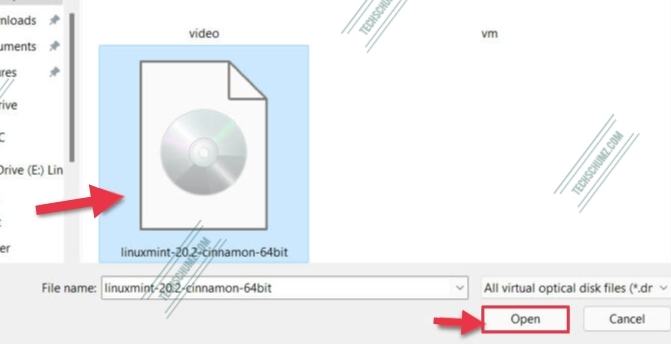
- A popup will appear, find and select the Linux Mint ISO file and click ‘Open’.
- Close the ‘Settings’, and that’s it of this section.
Step 5. Install Linux Mint on your Windows 11 PC in VirtualBox
Now that you have the virtual machine ready, it is time to install Linux Mint on your Windows 11 PC in VirtualBox. For that, follow the below steps:
- Go to the VirtualBox homepage, and click on the ‘Install’ button.
- Select OEM Install (For manufacture) and hit the ‘Enter‘ button.
- On the welcome window, click ‘Continue‘.
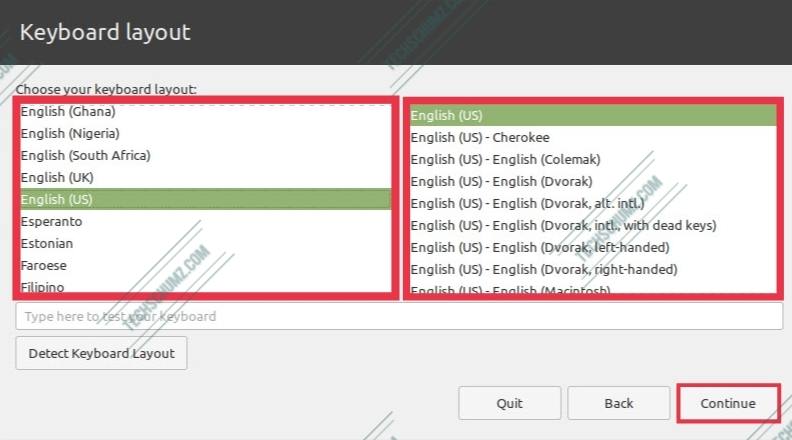
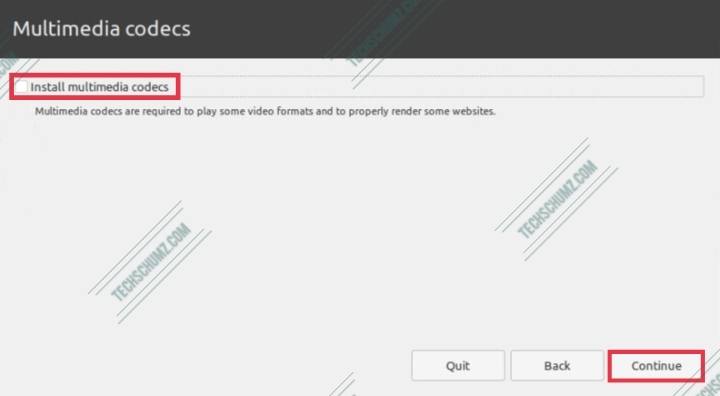
- Choose a Language and a keyboard layout for Linux, click ‘Continue‘, and install Multimedia codes.

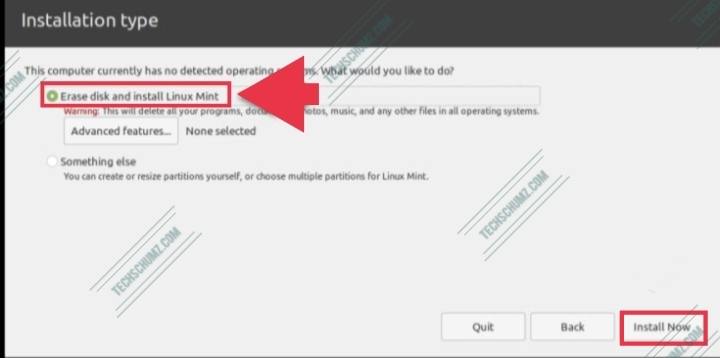
- Erase all the disks and click ‘Install Now‘.
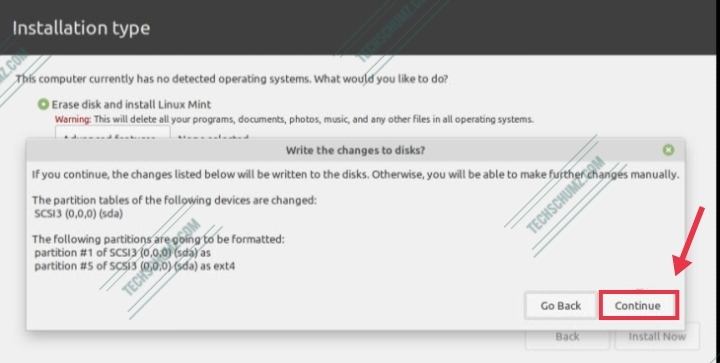
- Click ‘Continue‘ to confirm the disk deletion.
- Choose your location and click ‘Next‘.

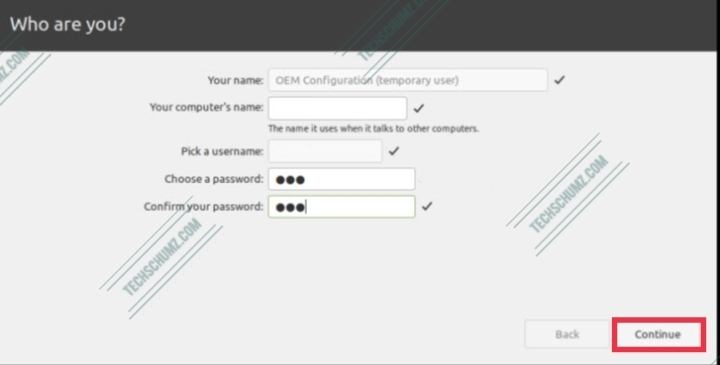
- Choose a computer name and password for Linux Mint.
- You need to wait until that OS is copied to the HDD. When the installation is complete, click ‘Restart Now’.
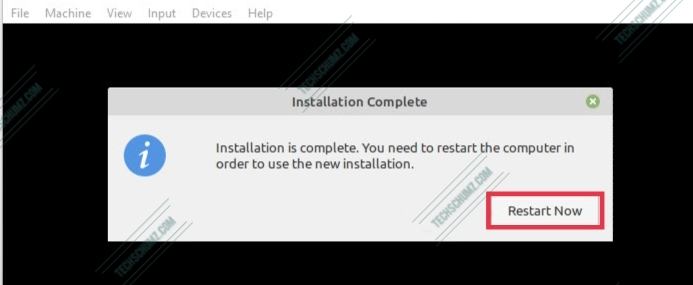
That’s it! After the restart, you will have the Linux Mint installed on your Windows 11 computer.
Summary
This guide is all about how you can install Linux Mint in VirtualBox on Windows 11. To install and try it on your PC, you need to follow some steps, which are as follows.
- Download and install VirtualBox on your PC or laptop.
- Download Linux Mint ISO File.
- Create a new virtual machine for Linux Mint.
- Add the Linux Mint ISO file to the virtual machine.
- Finally, start the Linux Mint installation in VirtualBox.
We hope you find this article useful, if you encounter any kind of questions related to the steps, please let us know in the comments section below. Good Luck!
Read also:
Per Oracle’s documentation, Windows 11 is not supported for Virtual Box. No idea how it would run if installed
I just installed it on a new dell with windows 11 and I’ve had no issues.