I bet you’ve heard about the new OS, known as macOS Monterey, for Mac. I’m pretty sure you are here because you want to try it on your Windows 10 computer. Then you are in the right place. In this article, I will show you the best and step-by-step instructions to install macOS Monterey on VirtualBox on Windows 10 PC or laptop. I need you to read this post to the end and provide your thoughts regarding our guidance.
Related: How to Install macOS Monterey on VMware on Windows 10 PC
Table of Contents
macOS Monterey
Apple has announced the next version of macOS at its WWDC keynote, after showing off iOS, iPadOS, and watchOS. It’s being called Monterey, in keeping the California location-based theme it’s had since 2013.
macOS Monterey (macOS 12) is replacing macOS Big Sur in Apple products on the market. There aren’t many changes in macOS 12, but some major updates and changes have already arrived. Its development team added some new features such as general control, Airplay on Mac, shortcuts, 3D map layout, some note updates, etc.
Apple offers a new look and background for macOS Monterey (macOS 12). The new design includes edge curves and adds a new box to settings that require administrator privileges. With the addition of general-purpose controls to macOS Monterey (macOS 12), you can use one mouse for your iPad, iMac, and MacBook. You can use not only a mouse but also a keyboard and other devices.
On June 9, 2021, the first beta of macOS Monterey (macOS 12) was available to developers. Soon after, they will release a beta that you can test without a developer account. Also, don’t forget about the final version of macOS Monterey (macOS 12), which will be available this fall, and also remember that you can download and install macOS Monterey on Windows 10 using VirtualBox, which I’ll show you step-by-step below.
Compatible devices with macOS Monterey
According to Apple, not all Apple computers can support macOS Monterey (macOS 12). Here is a list of Macs that are compatible with macOS Monterey:
- 2015 and later MacBook
- Early 2015 and later MacBook Air
- Early 2015 and later MacBook Pro
- Late 2014 and later Mac mini
- Late 2015 and later iMac
- 2017 and later iMac Pro
- Late 2013 and later Mac Pro
How to Install macOS Monterey on VirtualBox on Windows 10 PC & Laptop
Below, I’ll show you how you can install macOS Monterey on your Windows 10 or 11 computer in five easy steps. The steps are as follows:
- Enable virtualization on your Windows 10/11 PC.
- Install VirtualBox and the VirtualBox Extension Pack on Windows 10/11.
- Create a New Virtual Machine for macOS 12.
- Customize macOS Monterey’s Virtual Machine.
- Running VirtualBox Codes on CMD.
- Perform a macOS Monterey clean installation.
Before starting the process, you need to download the below files:
- Download and install VirtualBox.
- Download the VirtualBox codes.
- Download macOS Monterey (macOS 12) ISO Image.
Recommended: I recommend using an SSD on your computer, especially for speed, as most users are saying that their system is slow while using virtual machines. Also, increasing the amount of RAM on your physical computer will not cause any speed issues.
1. Enable Virtualization on your Windows 10/11 PC
Modern CPUs include hardware virtualization features that help in the acceleration of virtual machines built by VirtualBox. To use this functionality, however, you must first enable it. Please keep in mind that virtualization must be enabled on your system. Otherwise, you will see the error message “Can’t open a session on the virtual machine.” Click on the link below to learn more about it and how to install it.
-> Enable virtualization on your Windows PC
2. Install VirtualBox and the VirtualBox Extension Pack on your Windows 10/11 Computer
Installing macOS Monterey on your Windows 10 or 11 computer requires installing VirtualBox first, so you need to install VirtualBox first on your PC or laptop. If you don’t want to face any errors while installing macOS Monterey, you need to install the extension pack too. If you don’t know how to install them, we have a step-by-step guide for you. Click on the link below.
-> Install VirtualBox and its extension pack on your Windows system
3. Create a New Virtual Machine for macOS 12 Monterey on Windows 10
After installing VirtualBox on your PC and laptop, the second step to installing macOS Monterey on your Windows 10 computer is to create a virtual machine from which the macOS Monterey will boot. For that, follow the steps below:
- Go the VirtualBox and tap on new.
- Next, Tap on the expert mode, enter a name, starting with macOS.
- Once the macOS is typed the macOS version and type will be automatically selected by the VB.
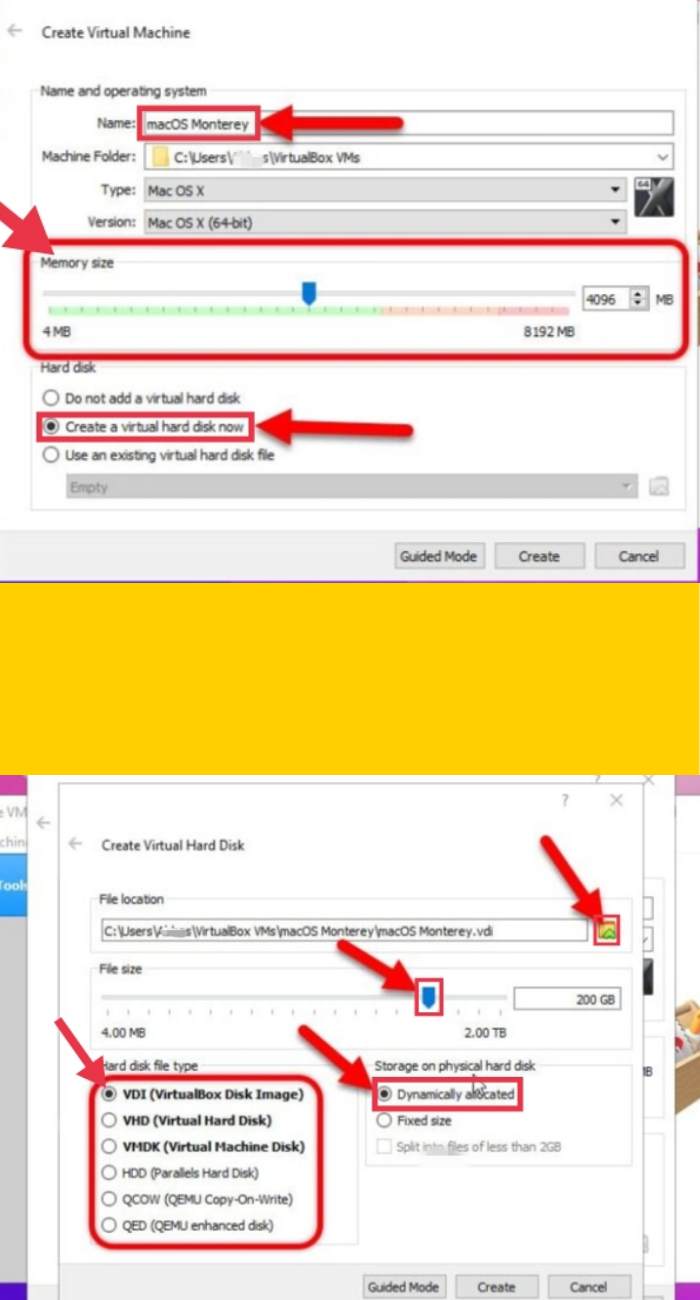
- Now, you need to choose the amount of RAM for the VirtualBox, I will go with 4 GB.
- Next, select create a Virtual Hard disk Now and tap on Create to generate the VM.
- Specify the file location to save the Virtual Hard Disk, you can choose the default one or change it. Select the storage capacity of the virtual machine, and finally select the type of Virtual Hard Disk. You can choose the default Hard Disk type called VDI. Finally, remember to choose a dynamically allocated physical drive.
4. Customize Virtual Machine of macOS Monterey
Creating a virtual machine is not a big deal, but configuring and customizing it is important, so you better follow the steps below closely.
- After creating the virtual machine, you will return to the main VirtualBox page and click on macOS Monterey settings.
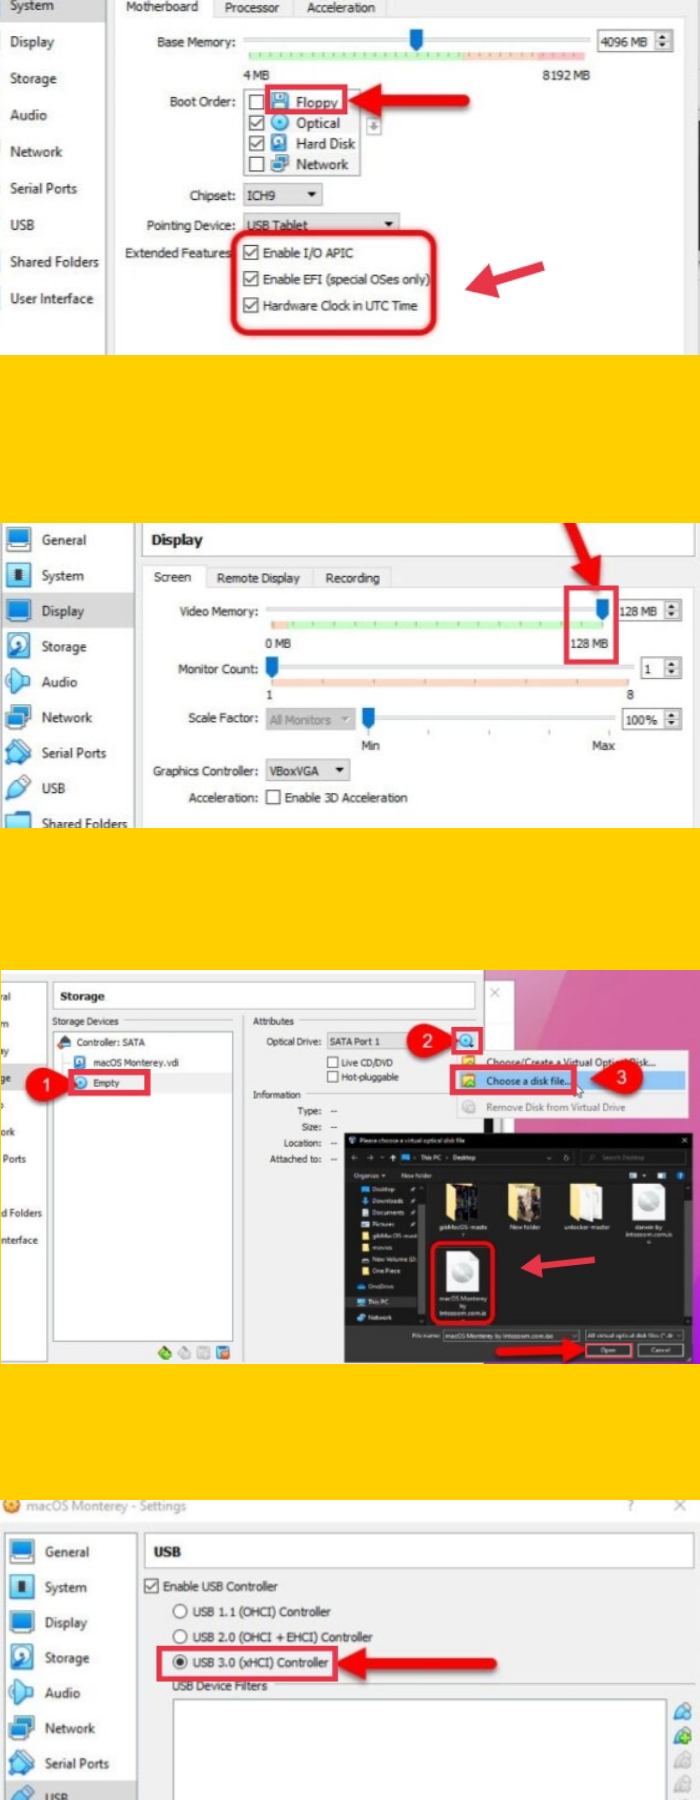
- Open the System tab, uncheck the floppy disk since we are not using it, also make sure that you ticked the extended features. There you see other settings like the chipset and pointing device, don’t touch them.
- For the virtual machine display settings, increase the video memory to 128MB and leave the rest unchanged. I think it would be better if you look at the screenshot below.
- In this step, we must attach the macOS Monterey ISO image to the virtual machine. Go to the Storage tab, click empty, next to attributes, click the CD icon and find the macOS 12 ISO image.
- The final setup is very simple because you need to enable USB 3.0 to solve the mouse and keyboard freezing issue. When we install the VirtualBox expansion pack, USB 3.0 is enabled, otherwise, it is disabled.
5. Run VirtualBox codes on CMD
To install and use macOS Monterey in VirtualBox on Windows 10/11, the VirtualBox code is an important factor. Since VirtualBox does not directly set macOS settings on Windows, this is where the code comes in. If the code is not applied or it is applied incorrectly, the virtual machine containing macOS will be in a loop. They must be applied carefully.
Note: Before you take another step, make sure to know the name of the VM, and then go to the File menu and choose exit.
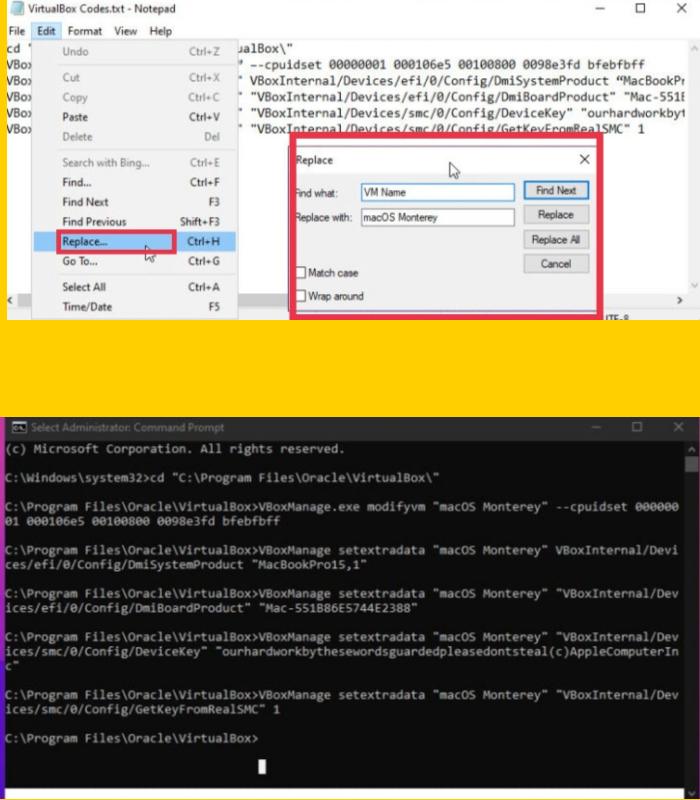
- Open the downloaded codes, then go to the edit menu
- Next tap on Replace, replace the VM Name with the Virtual Machine you created a moment ago.
- Now open CMD and run it as administrator and copy the code and paste into CMD, then press Enter. Remember that if the code is entered incorrectly you will see an error, try to paste it correctly.
6. Performing macOS Monterey clean installation
This is the final step to install macOS Monterey on VirtualBox on Windows 10 PC & laptop after completing all the four steps above. Now it is time to do a clean install of macOS Monterey on VirtualBox on your Windows 10 computer. So let’s start the installation process. Follow the below steps:
- Open the VirtualBox and start the Virtual machine of macOS Monterey. After that, a bunch of codes will appear on the screen and finally, you will be on the Apple logo.
- Next, you need to choose your language.
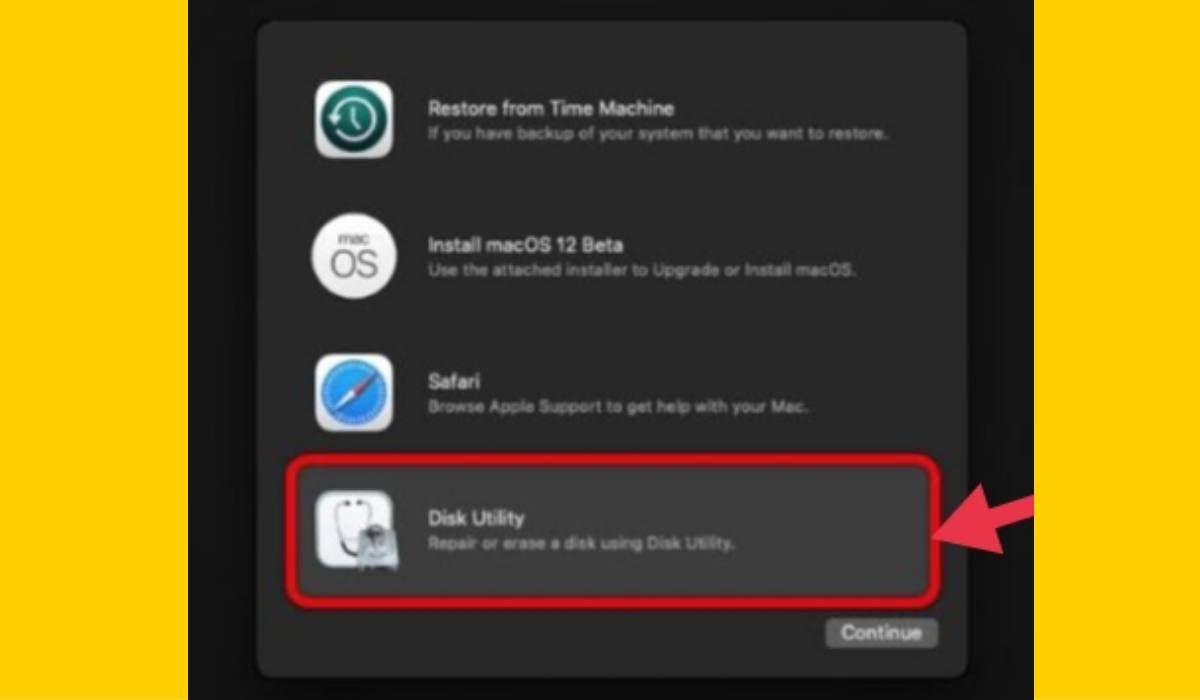
- Before installing the macOS Monterey (macOS 12) on the VM, you need to partition the Storage. For that, you need to go to the Disk Utility and click continue.
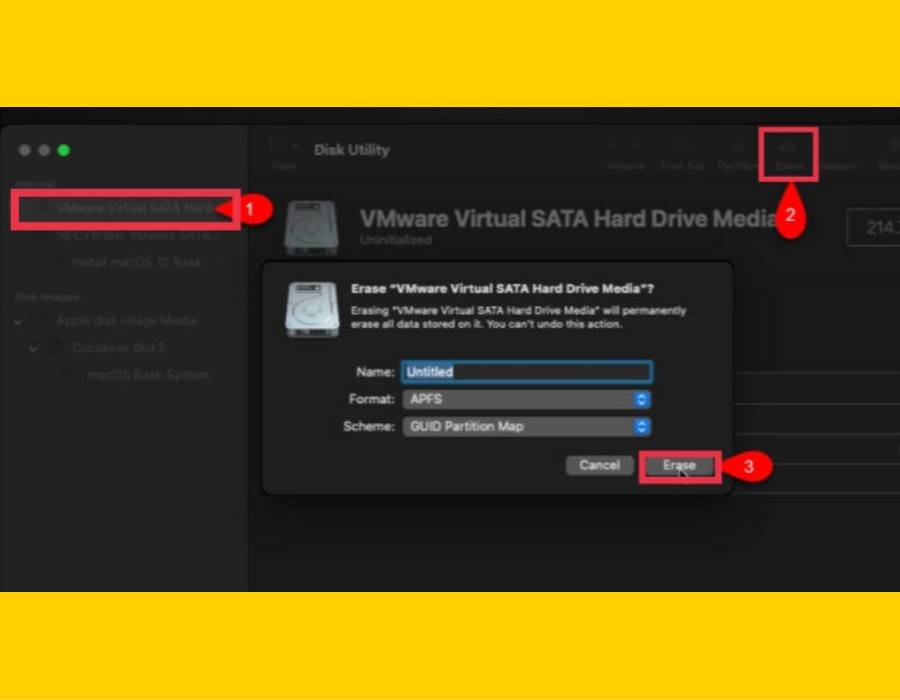
- Now, you need to choose the storage when you created the Virtual machine. then click erase and partition it so that the macOS Monterey should be installed in it.
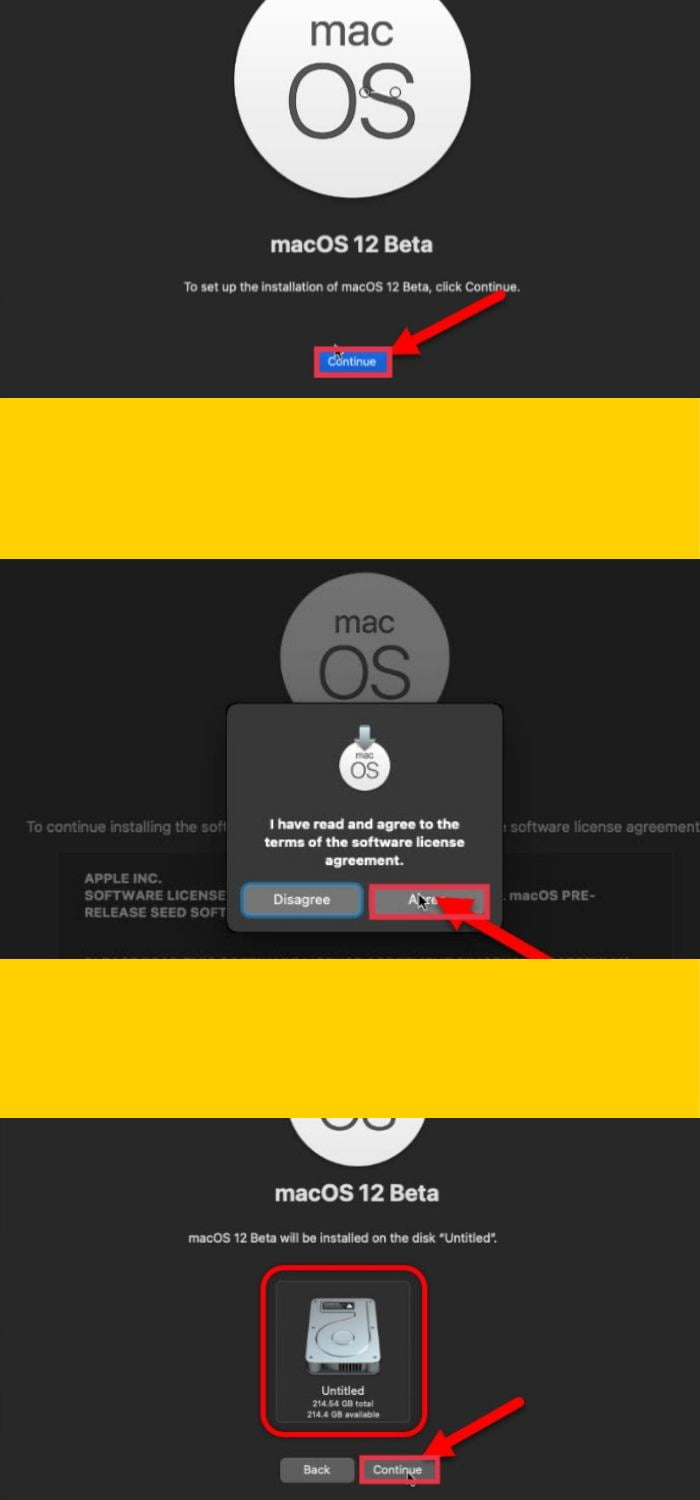
- Next, Quit the Disk Utility, and in the main menu select the Install macOS 12 Beta and tap on continue.
- Now, you need to agree to the terms and conditions and select the disk so the macOS Monterey can be installed.
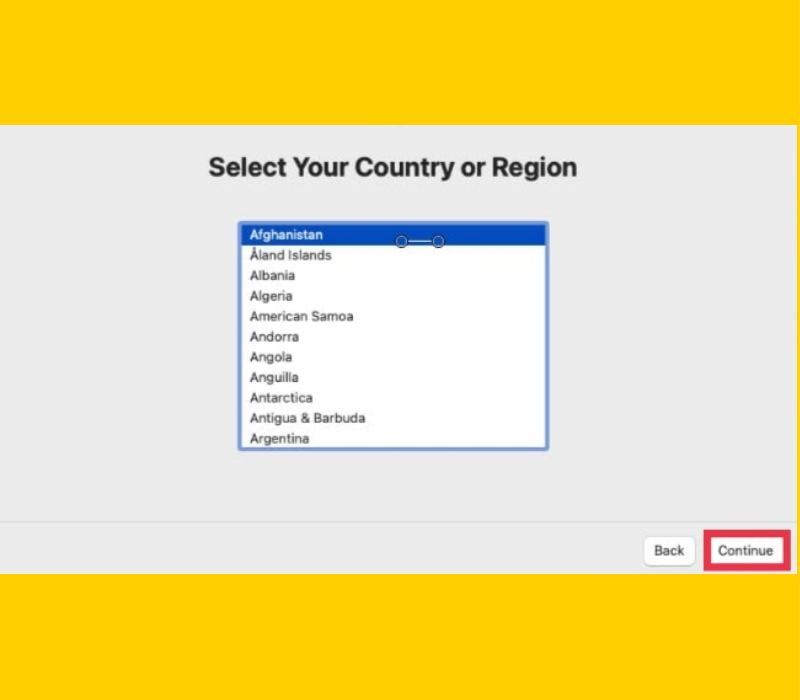
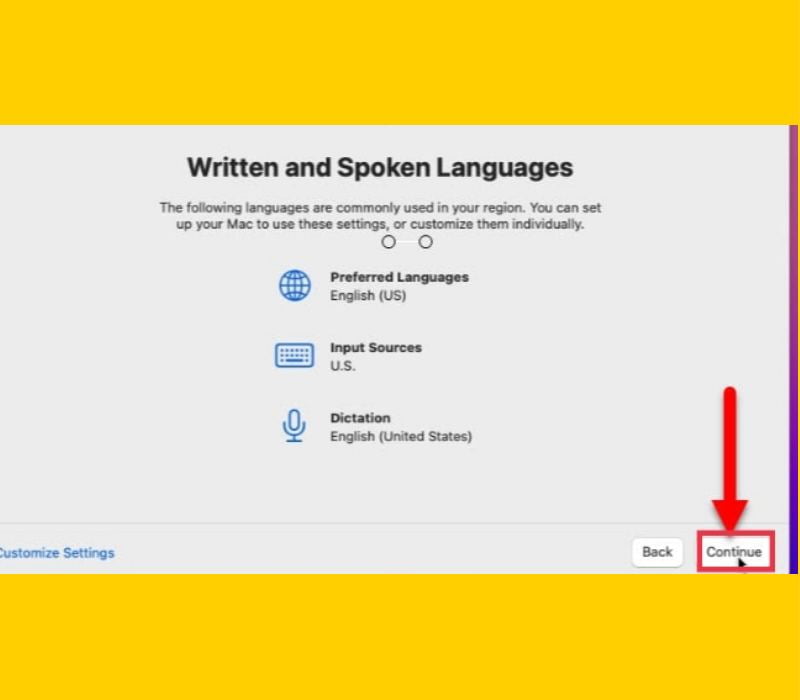
- Based on the Country you are living, choose it so the country input keyboard should be added by default. I have chosen the United States of America, and the OS has inserted the U.S input sources. Tap on ‘Continue‘ twice.
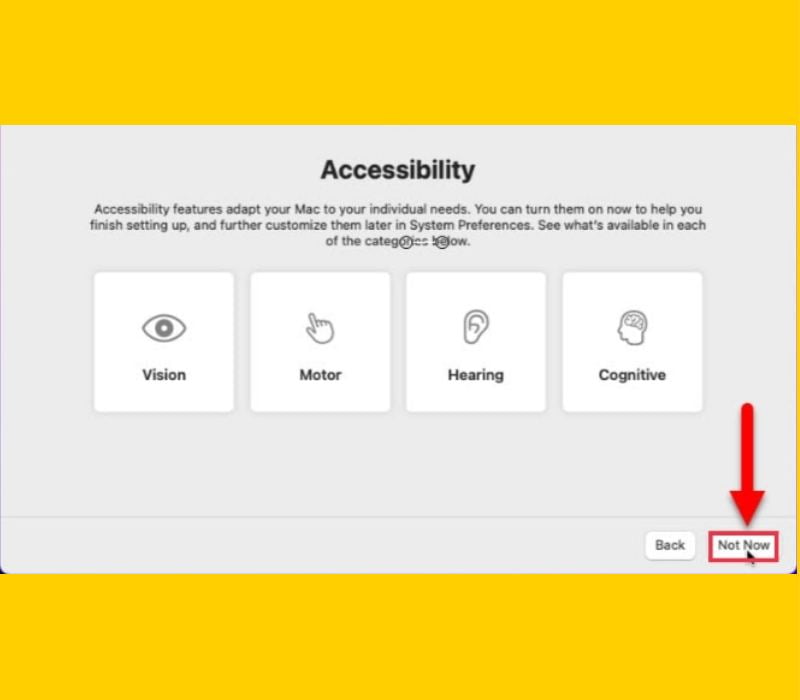
- I will not go for Accessibility, So, I will pass this step by clicking Not Now.
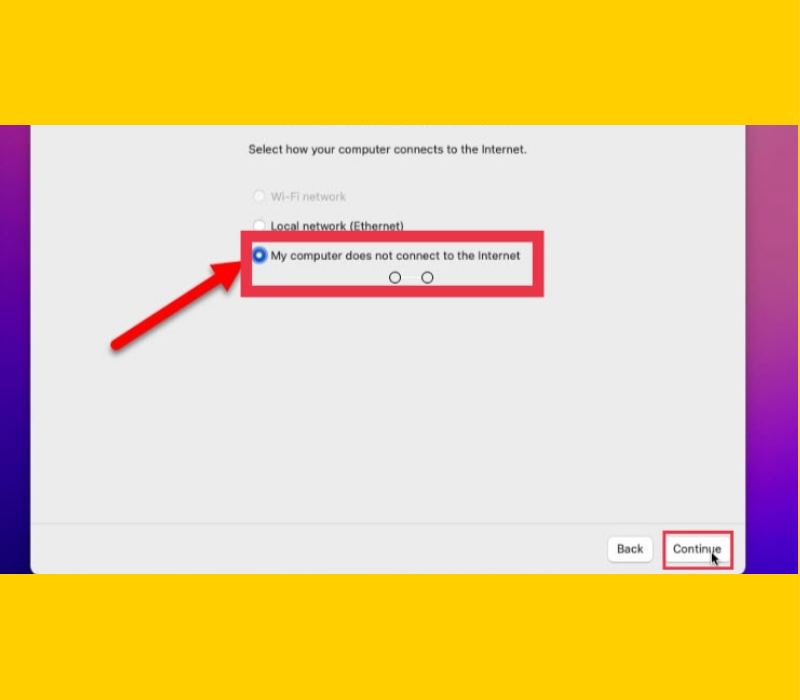
- Select ‘My computer doesn’t connect to the internet‘. Since it is a Virtual Machine Wifi does not work, ethernet is not working either because of the Virtual machine. Don’t worry, the internet is working on this type of mac. Tap on ‘Continue‘ to proceed.
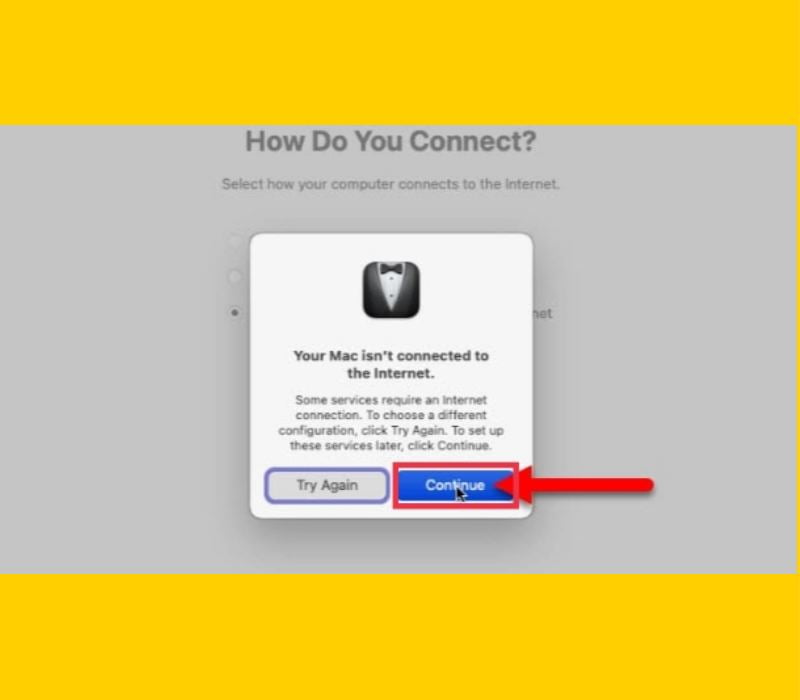
- Ignore the alert and continue.
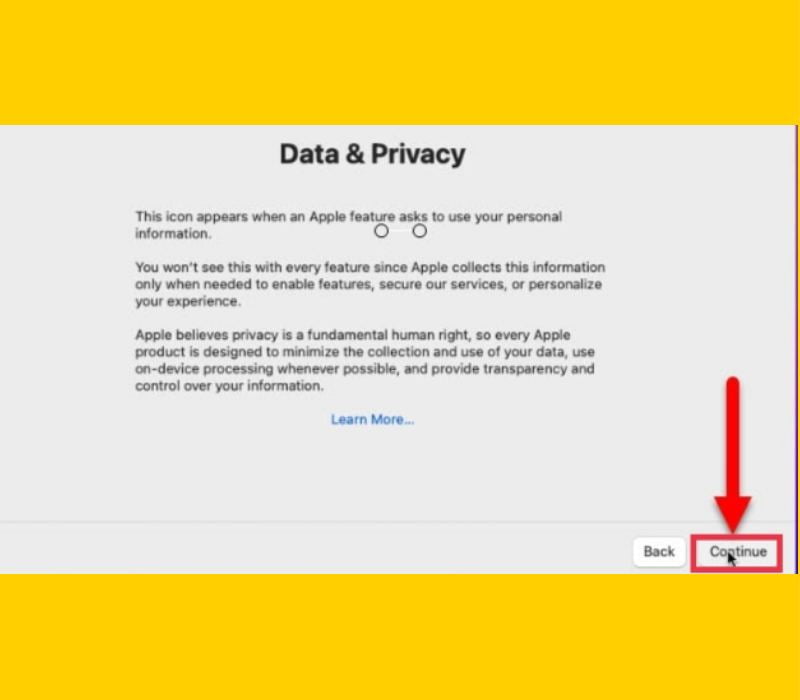
- Tap on ‘Continue‘ with data and privacy.
- Apple has provided the Migration Assistant for users who are migrating from another Mac, Windows PC. In simple words, you can transfer your files here. Since we are performing a clean installation, there is no need to configure it, So click on ‘Not Now‘.

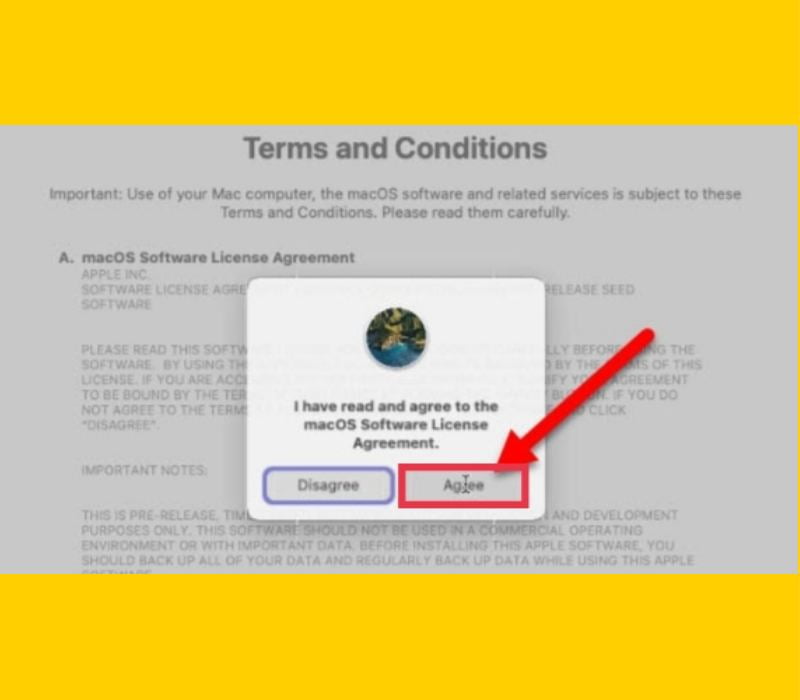
- You have to read and agree to the macOS Monterey’s Terms and regarding the license.
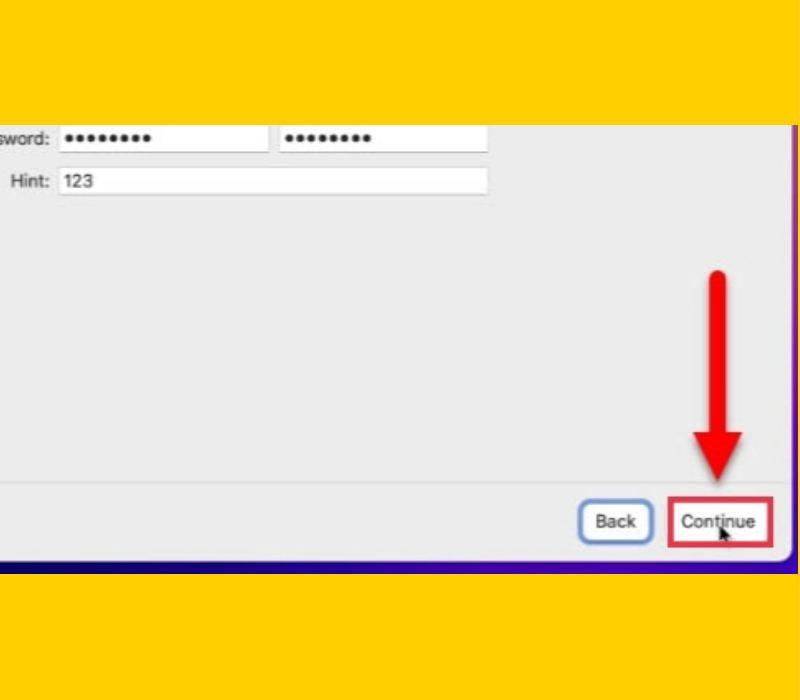
- You need to create an account for your Virtual machine computer, and tap on ‘Continue‘.
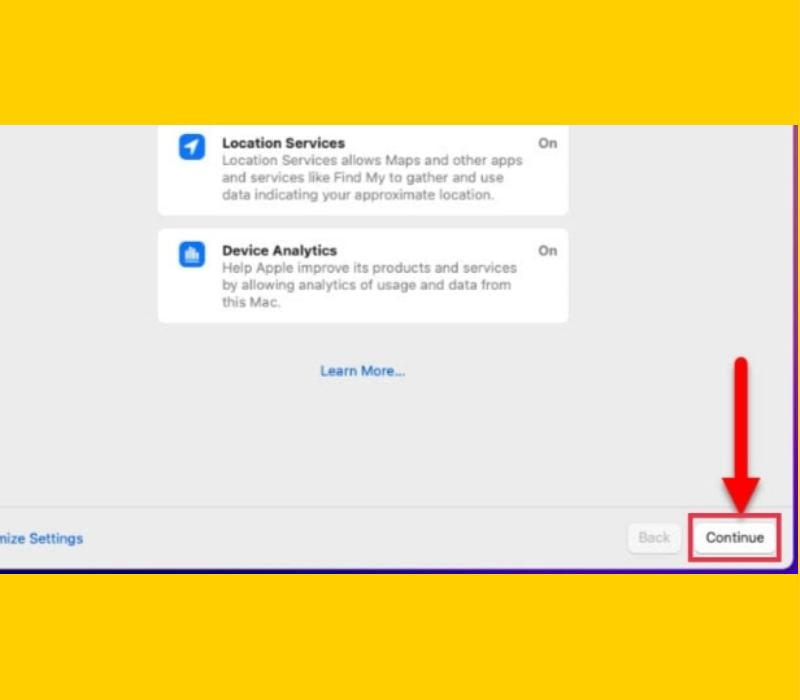
- Apple is showing you that they have already enabled the location services, along with the device analytics. You can turn them off if you are concerned about security and privacy. Click on ‘Continue‘
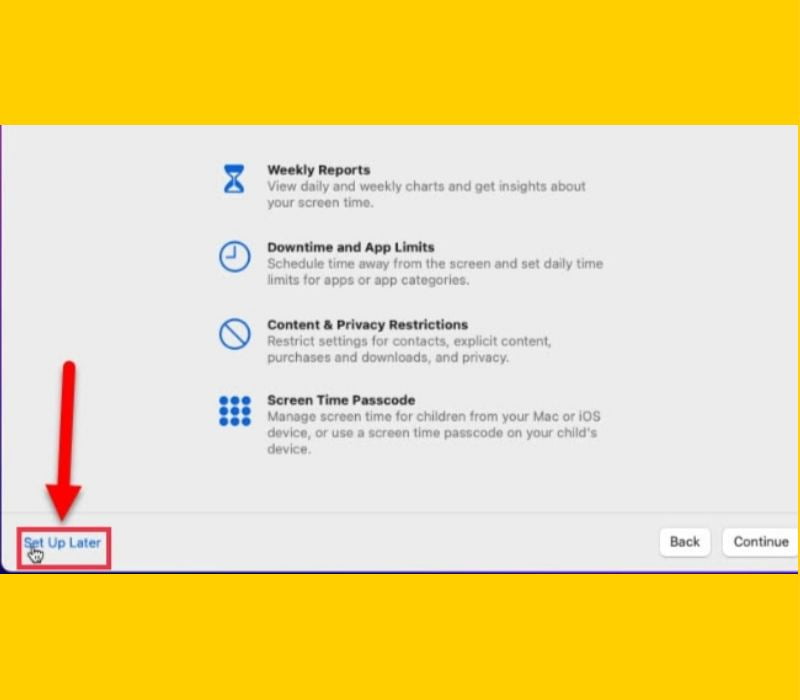
- If you want to monitor you weekly, downtime, content, and privacy restriction, you can enable the Screen Time. Screen Time is actually is good if you are looking to monitor your work.
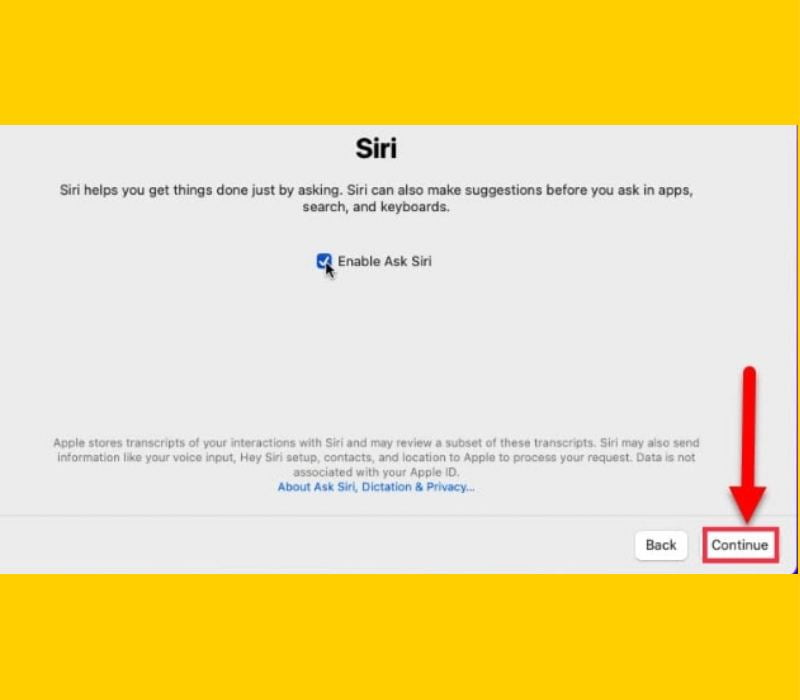
- The voice assistant is another feature for you to decide to enable it or not. Since these days many users are using the voice assistant, you should give Siri a try too. Tap on ‘Continue‘ to add Siri.
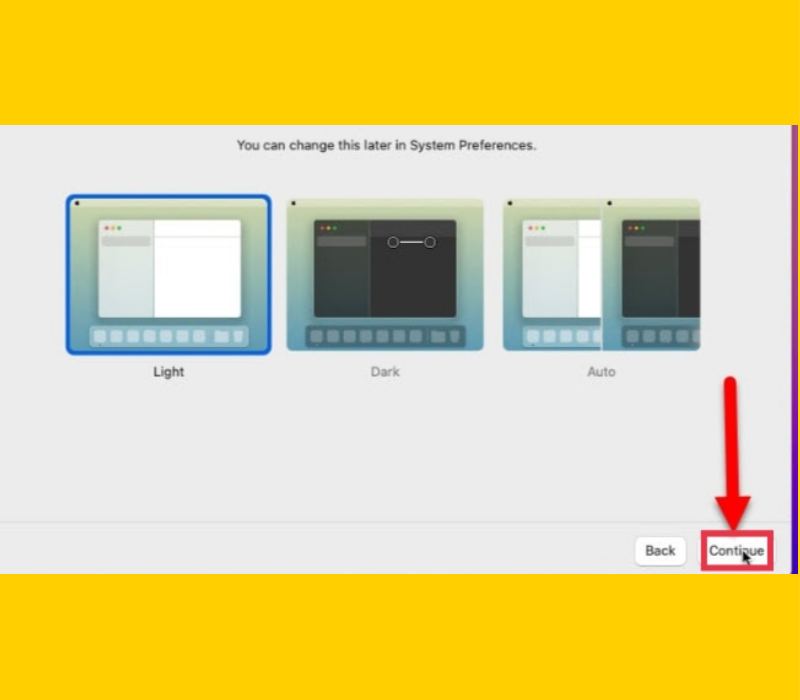
- Finally, Choose Your desired Look at the macOS Monterey (macOS 12) and tap on ‘Continue’.
Final Words
That’s is how you can Install macOS Monterey on VirtualBox on Windows 10 PC and laptop easily and with step-by-step instructions. If you have any kind of questions or encounter any kind of problem, please let me know in the comment section. Good Luck!
Read also:
How to Hide the Desktop Icons on macOS Big Sur
How to Create a Bootable USB Installer for macOS Catalina on Windows 10
Once in Monterey it’s quickly becomes slow and laggy and crashes often, any way to remedy this?
I got up to step 5. Clean Install of Monterey. In running VM, I see the following at the bottom of the screen:
#[EB|LOG:EXITBS:START] 2021-11-17….
It then just sits there for ever. I’m pretty sure I didn’t miss a step and I’ve managed to get older version of macOS to work. Is there something missing from the instructions?
Do you have a ryzen cpu? After you have pasted all the codes on cmd you can try this as the last string to paste:
VBoxManage modifyvm “macOS Big Sur 11” –cpu-profile “Intel Core i7-6700K”
*VBoxManage modifyvm “VM Name” –cpu-profile “Intel Core i7-6700K”
in my case:
VBoxManage modifyvm “macOS Monterey” –cpu-profile “Intel Core i7-6700K”
I have a ryzen CPU
**VBoxManage modifyvm “macOS Monterey” –-cpu-profile “Intel Core i7-6700K”
maybe it’s ok… I’m trying 🙂
Hi,
I have the same error message.
I have an old AMD FX6350.
Thanks for your help
Actually another line made it for me. I’m writing it here in case it helps anyone else:
VBoxManage modifyvm “macOS Monterey” –cpu-profile “Intel Xeon X5482 3.20GHz”
just a heads up for anyone wondering: its two hyphens followed by “cpu-profile”.
i think this website keeps auto formatting it to that long dash so copy and pasting gives you “unknown option: -cpu-profile” in CMD
– – cpu-profile (without the spaces)
Worked for me! (Ryzen CPU also). u mvp
Failed to open a session for the virtual machine Mac OS Monterey.
Failed to load R0 module C:Program FilesOracleVirtualBox/VMMR0.r0: SUP_IOCTL_LDR_OPEN failed (VERR_LDR_GENERAL_FAILURE).
Failed to load VMMR0.r0 (VERR_LDR_GENERAL_FAILURE).
Result Code: E_FAIL (0x80004005)
Component: ConsoleWrap
Interface: IConsole {872da645-4a9b-1727-bee2-5585105b9eed}
Why It Doesn’t Let Me Login To My Apple iCloud Account?
It Shows iCloud is Not Supported For My Device?
It just stops ta 30% and 29 minutes of second loading, it goes up to one minute and lasts forever( Intel cpu
At Virtualbox setting it have to be set only to 2 CPUs, not more! Otherwise installation will restarts in loop.
Thanks, you saved my bacon. In my case, it was set to one CPU (intel i5 CPU) and it didn’t work (slightly different symptom: it stopped in the initial text screen after a few moments).
Strangely enough, in a different machine with a Ryzen 5 CPU, “1 CPU” worked correctly and installation was completed.
Anyway, for anyone reading this, if you have problems, try setting CPUs to 2.
the cursor moves very slowly and, in general, everything is a bit slow
Try increasing the ram maybe.
how do i find vm name?
It’s the name you give to the VM in step 3.2
This was a brilliant walkthrough from start to finish! Thanks man, I love you!
Hi,
Right now I have two vm’s: Win10 and Ubuntu. If I change settings with those codes, will the win10 and ubuntu still run?
The codes apply only to the VM specified (you specify the VM name in each code entered). Your other VMs will not be affected.
I get an error message when I enter the command into the command prompt saying:
cd “C:\Program Files\Oracle\VirtualBox\”
VBoxManage.exe modifyvm “macOS Montery” –-cpuidset 00000001 000106e5 00100800 0098e3fd bfebfbff
VBoxManage setextradata “macOS Montery” VBoxInternal/Devices/efi/0/Config/DmiSystemProduct “MacBookPro15,1”
VBoxManage setextradata “macOS Montery” “VBoxInternal/Devices/efi/0/Config/DmiBoardProduct” “Mac-551B86E5744E2388”
VBoxManage setextradata “macOS Montery” “VBoxInternal/Devices/smc/0/Config/DeviceKey” “ourhardworkbythesewordsguardedpleasedontsteal(c)AppleComputerInc”
VBoxManage setextradata “macOS Montery” “VBoxInternal/Devices/smc/0/Config/GetKeyFromRealSMC” 1
anybody know why the mouse is so laggy and scrolling doesn’t work?
Installation keeps stalling at 12% then goes back to the install screen where you choose install or disk utility. No error messages. Ran a repair, didn’t find anything. I’m installing on VirtualBox Windows 11. Runs Big Sur without any issues but the OS is too old for what I’m needing to do.
All steps followed exactly.. then to command line..
why VM 6.1 (window 11) not not find a registered machine named ‘macOS Monterey?
C:\Program Files\Oracle\VirtualBox>VBoxManage.exe modifyvm “macOS Monterey” –cpuidset 00000001 000106e5 00100800 0098e3fd bfebfbff
VBoxManage.exe: error: Could not find a registered machine named ‘macOS Monterey’
VBoxManage.exe: error: Details: code VBOX_E_OBJECT_NOT_FOUND (0x80bb0001), component VirtualBoxWrap, interface IVirtualBox, callee IUnknown
VBoxManage.exe: error: Context: “FindMachine(Bstr(a->argv[0]).raw(), machine.asOutParam())” at line 547 of file VBoxManageModifyVM.cpp
Everything was going well.
I followed your guide all through the Disk Utility and once the MacOS Install started at about 23 Minutes…at approximately 16 Minutes, I get the following Error Message.
—————————————————————
Installation cannot proceed because the Installer is damaged.
Redownload the installer and try again.
—————————————————————
What is the “Installer”? Is it the macOS Monterey.iso image file or something else?
Any help would be appreciated.
I have the same problem.
Have you found a solution for this?
No, I haven’t.
I did a few things like;
1) Decreasing the size of the VM when making it in Virtual Box
2) Re-Installing Virtual Box from scratch
3) Using the EXACT iso file name within Virtual Box when making the VM
None of that worked and I got the same identical error at approx. 16 minutes left in the Monterey Install.
So, I thought that maybe, the ISO had to be the Beta version that Virtual Box names in the Disk Utility, so I have been trying to download a Beta version 12,0 or 12.1 or 12.2 from https://archive.org/details/macos-collection but it is REALLY SLOW downloading and after like 700-1000MB, it stops and fails.
So, I can’t test that theory.
I wish some of the folks that seemed to have succeeded in getting this thing to work, would post a reply explaining exactly what and how they got it to work.
It does not allow you to log in with apple id
On trying to boot the VM, I get:
Failed to query SMC value from the host (VERR_INVALID_HANDLE).
Result Code:
E_FAIL (0x80004005)
Component:
ConsoleWrap
Interface:
IConsole {872da645-4a9b-1727-bee2-5585105b9eed}
I also have this issue. Have you found a solution?
Try this
VBoxManage setextradata “Monterey” “VBoxInternal/Devices/smc/0/Config/GetKeyFromRealSMC” 0
With Virtualbox 6.1 i get an error when executing the first one of the codes. When i type
VBoxManage modifyvm “macOS_Monterey” –-cpuidset 00000001 000106e5 00100800 0098e3fd bfebfbff
i get the error:
VBoxManage: error: Invalid parameter ‘–-cpuidset’
I found out, that the switch must be “–cpuid-set” as seen in the man-pages, but that also sends an error. I am unsing the Linux Virtualbox.
I had the same problem but I found a fix see the code below but replace VM name with you VM name:
VBoxManage.exe modifyvm “VM name” –cpuidset 00000001 000106e5 00100800 0098e3fd bfebfbff
copy it and paste it in command prompt after running every other command and good luck installing macOS
can some tell me why my virtual hd drive has a problem it has a problem and it says failed to open session for the vm but when I start the virtual machine with out the virtual hd drive every thing boots properly
when i click on details it shows:
Failed to open a session for the virtual machine macOS Monterey.
VDI: invalid pre-header in ‘F:macOS MontereymacOS Monterey_3.vdi’ (VERR_VD_VDI_INVALID_HEADER).
VD: error VERR_VD_VDI_INVALID_HEADER opening image file ‘F:macOS MontereymacOS Monterey_3.vdi’ (VERR_VD_VDI_INVALID_HEADER).
Failed to open image ‘F:macOS MontereymacOS Monterey_3.vdi’ in read-write mode (VERR_VD_VDI_INVALID_HEADER).
AHCI: Failed to attach drive to Port0 (VERR_VD_VDI_INVALID_HEADER).
Result Code: E_FAIL (0x80004005)
Component: ConsoleWrap
Interface: IConsole {872da645-4a9b-1727-bee2-5585105b9eed}
never mind I fixed it
any help would be appreciated
For the “downloaded code,” make sure all the double quotes ” are proper, not some special open double and closing double quotes. I ran into issues during OS update, until I fixed the scripts as follows:
(replace “macOS” with your VM name)
cd “C:\Program Files\Oracle\VirtualBox\”
VBoxManage.exe modifyvm “macOS” –-cpuidset 00000001 000106e5 00100800 0098e3fd bfebfbff
VBoxManage.exe setextradata “macOS” “VBoxInternal/Devices/efi/0/Config/DmiSystemProduct” “MacBookPro15,1”
VBoxManage.exe setextradata “macOS” “VBoxInternal/Devices/efi/0/Config/DmiBoardProduct” “Mac-551B86E5744E2388”
VBoxManage.exe setextradata “macOS” “VBoxInternal/Devices/smc/0/Config/DeviceKey” “ourhardworkbythesewordsguardedpleasedontsteal(c)AppleComputerInc”
VBoxManage.exe setextradata “macOS” “VBoxInternal/Devices/smc/0/Config/GetKeyFromRealSMC” 1
Got the installer to work, but had to change the SMC value from the CMD codes last line from 1 to 0. Using a Single CPU at the moment, but will review if the install ever finishes!
Great tutorial, thanks