Knowing how to share a printer over your network on a Windows computer can be useful. The only option for users to print from the same device without printer sharing is for them to connect the printer to their computers. In this guide, we’ll show you how to share your printer on Windows 11 amongst your network PCs so you don’t have to connect a printer to each one individually.
When a printer is shared via a network, just one PC or laptop is required to be connected. Anyone on the same network can use the printer as long as it is connected, and they do not need to set it up on their own computer.
Table of Contents
What is Printer Sharing on Windows 11?
Printer sharing is the process of providing other computers and devices on the same network access to a printer. Any node or device on the network can print using the shared printer and, to some extent, even change the printer settings, depending on the permissions granted by the administrator for each user.
There are two ways to share a printer. If you have a network printer and are connected to your network through a router, all PCs should be able to connect directly to the printer and add it separately.
If the printer is not a network printer and is linked or installed directly to one PC in the house, it can be shared with other PCs in the home or workplace via the PC to which it is connected. To allow others to add and print to the printer, first connect it to the primary PC, either wirelessly or via a USB connection, and then turn it on. Also, ensure that the primary PC is turned on, linked to the printer, and connected to the same network.
How to Share Your Printer on Windows 11
To be shared, a printer must already be installed and linked to the primary PC, and all computers must be connected to the same network. After you’ve installed and set up the printer, and your computer is linked to the same network as other computers, follow the steps below to share a printer over the network on Windows 11:
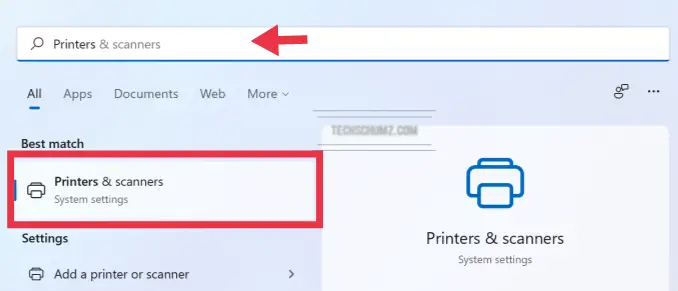
Step 1. Navigate to the ‘Printers & scanners‘ section of Settings. To do this quickly, open the Start menu, search for “Printers,” and then select “Printers & scanners” from the results. You can also launch the Settings app, navigate to “Bluetooth & devices,” and then select “Printers & scanners” from the list of options.
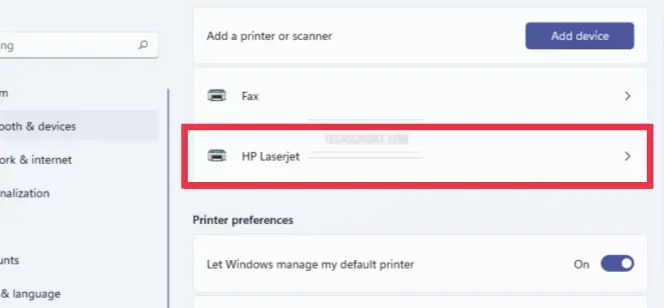
Step 2. Now, find and tap on the printer you want to share it with other computers on your network.
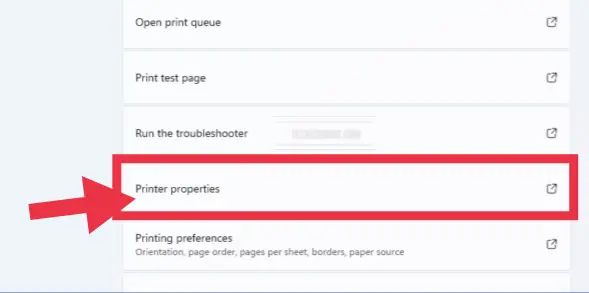
Step 3. Then you will see a printer detail pane, click the “Printer Properties” option.
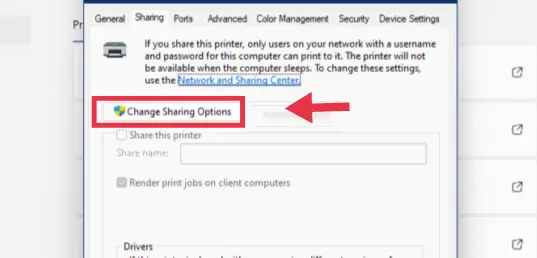
Step 4. On the pop-up windows, under the Sharing tab, select the “Change Sharing Options”.
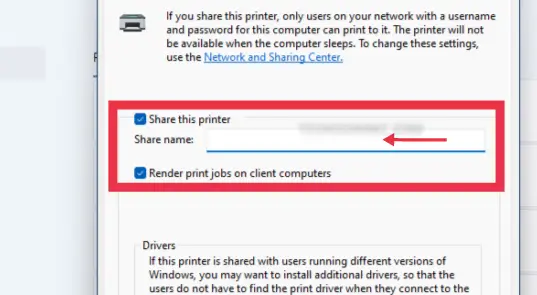
Step 5. Finally, to share your printer on Windows 11, click the box next to “Share this printer” and use a name that other PCs will see when connecting to your printer.
That’s it! Now your printer is ready for other PCs or laptops in your network. The shared printer can be used by other computers after they add it. If you don’t know how to add a shared printer then follow the below instructions for that.
How to Connect to a Windows 11 Shared Printer
Now that the printer has been shared, follow the instructions below to use the shared printer from a Windows 11 PC or laptop on the same network.
Here’s how you find and add a shared printer on a Windows 11 Computer:
- First, open the “Settings” app by searching for in the Start Menu or simply using “Win + I” shortcut keys.
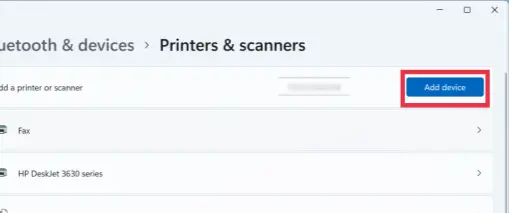
- Then, click on “Bluetooth & devices ” on left pane and tap on the “Printers & scanners” on the right pane.
- Next, click “Add device“.
- Wait for some moments, and then select “Add manually“.
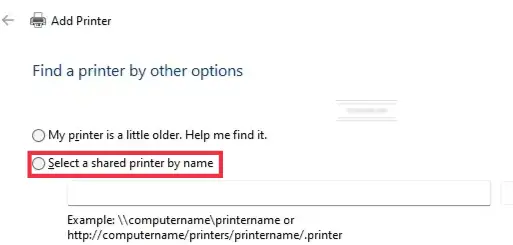
- Now, select “Select a shared printer by name, and type the printer’s shared name. It needs to include the computer hosting the printer. It will look something like this:
- \\computername\printername
- http://computername/printername/.printer
- Finally, click “Next” to add the share printer, and then tap “Next > Finish” on the final prompt.
By default, you need the user name and password of the primary PC to access the printer.
Once all is connected and added, you should be able to print to the printer from the secondary PCs on your network.
Fix: Unable to Find The Shared Printer on Windows 11
- As we mentioned before, make sure you’re on the same network as the printer.
- Restart the printer if necessary.
- Restart the computer. If you’re the only device on the network that can’t connect to the printer, the problem is most likely with your computer.
- Reboot the router. This is typically only helpfull if more than one user on the network is experiencing difficulties.
- Check if your printer is correctly configured or linked to your computer’s system.
- Install the printer driver if it was not already installed when you added the printer. The simplest approach to do this is to go to the printer manufacturer’s website and search for and download the necessary driver.
FAQs
What happens when I share a printer on Windows 11?
Network printer sharing allows another computer on your network to print to the printer linked to your computer.
What’s the difference between a local printer and a network printer?
A local printer is one that is directly linked to a computer via a USB cable. A network printer, on the other hand, is connected to a workgroup or network of computers that may all access the same printers at the same time.
How do I turn off printer sharing on Windows 11?
If you no longer wish to share your printer, you can disable it in Settings > Bluetooth & devices > Printers & scanners. Then, right-click on the printer’s tile and select Printer Properties. Finally, to disable sharing printer. uncheck the box next to “Share this printer“.
Conclusion
This article was all about how to share a printer over the network on Windows 11, and also how you can connect to the shared printer. We hope you find this article useful and if you encounter any questions or you have any tips, please use the comments section below.
Read also:
When I try to use the windows shared printer feature (an Epson WF-2830 via USB), which is connected to a windows-10 primary computer on a private peer to peer network, windows 11 hits a wall and never connects to the printer device. All I get is a mini advisory window that says in part . . . “windows could not connect to the printer”. That windows 11 OS is running on a surface pro 8 tablet computer which works A-OK as a peer in our at home wired network. The printer address is \\primary computer name\EPSON6C9720 and works just fine doing the shared device [printer] connection routine on the other win 10 peer computers in our household. What is it about windows 11 that blocks adding a shared printer device?