This Techschumz guide will show you how to download and install BlueStacks on Windows 11 so that you can use Android apps for productivity or play your favorite mobile game on your PC.
Android has apps for almost everything that you can download and use on your Android devices. But what if you only have a computer and want to test out those apps and games? BlueStacks comes in handy here. BlueStacks 5 is fully compatible with Windows 11. And installing BlueStacks 5 on Windows 11 is a simple process that will allow you to play your favorite Android games on your PC.
Table of Contents
BlueStacks for Windows 11
BlueStacks is an Android emulator that enables you to easily run Android apps on your PC. However, I t doesn’t look exactly like an Android device, but it’s close enough to the screen of a phone that even inexperienced users should have no trouble using it.
BlueStacks is a completely secure, dependable, and simple way to install and use Android apps on your PC using your mobile phone’s Google Play Store ID. While BlueStacks can run almost any Android app, its main target audience is Android users who want to play mobile games on their desktop computers.
Before you start downloading and installing BlueStacks on your PC, make sure that your system meets the system requirements listed below.
Minimum System Requirements for BlueStacks 5
- Microsoft Windows 7 or later
- Intel or AMD processor
- RAM: 4GB or greater
- 5GB of free HDD
BlueStacks 5 Recommended Operating System
- Microsoft Windows 10 or 11 as the operating system
- Intel or AMD processor
- Intel/Nvidia/ATI GPUs
- Virtualization: RAM enabled: 8GB
- SSD, Fusion, and Hybrid Drives
Steps to Download & Install BlueStacks on Windows 11 PC/Laptop
To install and use BlueStacks 5 on your Windows 11 computer, follow the below steps carefully.
Step 1. Meet the prerequisites
Before installing BlueStacks, make sure that you have met the prerequisites listed below.
- Temporarily disabled Real-time Windows Defender.
- To avoid package loss or file corruption, you must have active Internet access.
- You must be logged in as an administrator.
- Ensure that your GPU has been updated to the most recent version.
Step 2. Enable virtualization on your PC
BlueStacks runs faster with hardware virtualization technologies found in modern CPUs. However, in order to use this feature, you must first enable it on specific PCs. Please keep in mind that your system must have virtualization enabled. Click on the link below to check if it’s enabled on your PC and enable it:
=> Enable virtualization on your PC
Also, enable hyper-V on your system. For that, open the Settings app and go to “Apps > Optional features“.
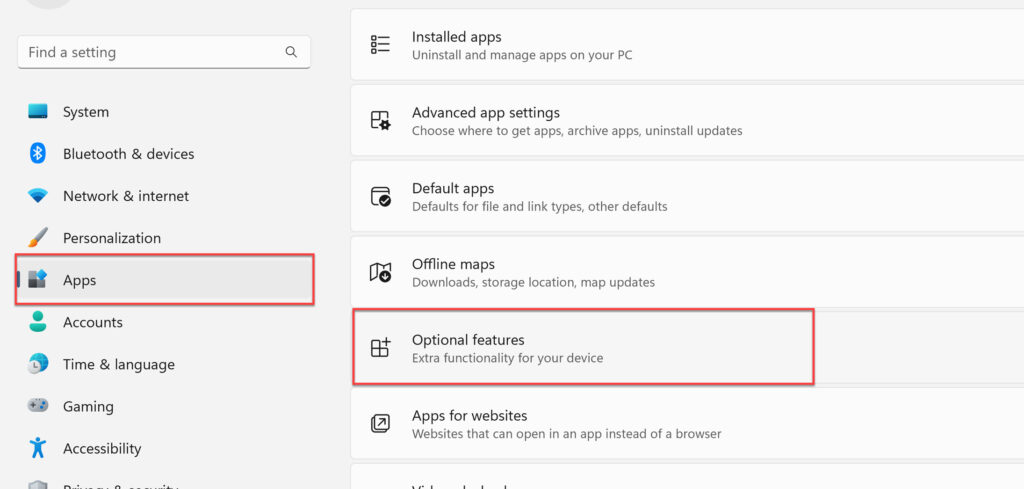
On the next page, scroll down and click on “More Windows features” to continue.
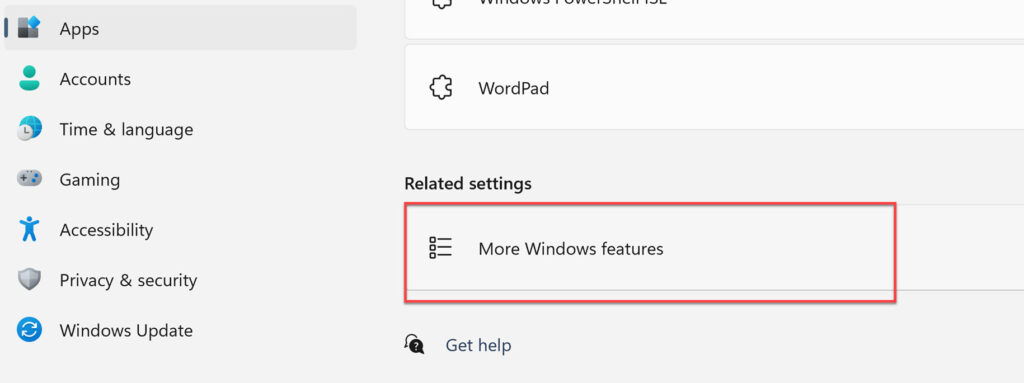
In the new pop-up window, find the “Hyper-V” option and click on the checkbox and click the “OK” button.

Step 3. Download and Install BlueStacks on your PC
To run BlueStacks on Windows 11, you need to download and install the latest version from the official website and install it on your PC. To do so, follow the below steps:
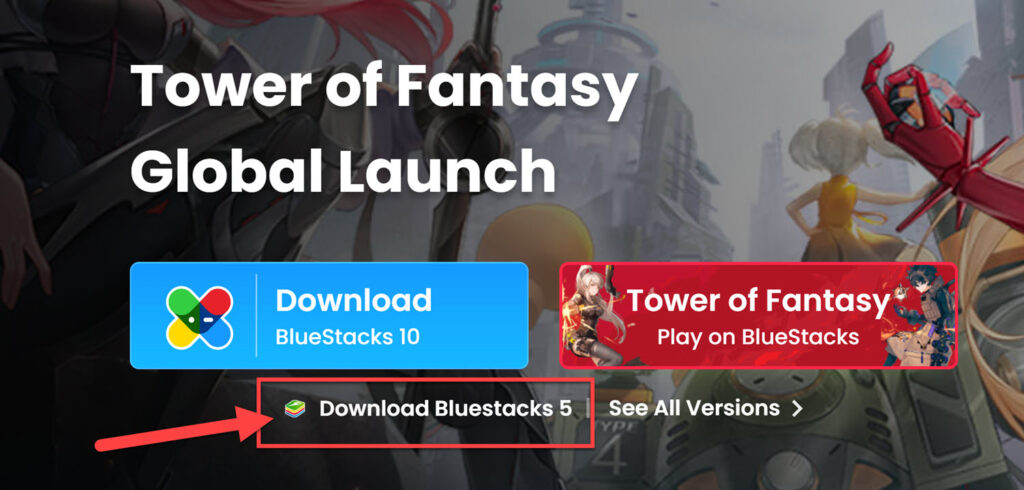
- To download BlueStacks, go to the official BlueStacks website and click on “Download BlueStacks 5“. This will start the BlueStacks download automatically.
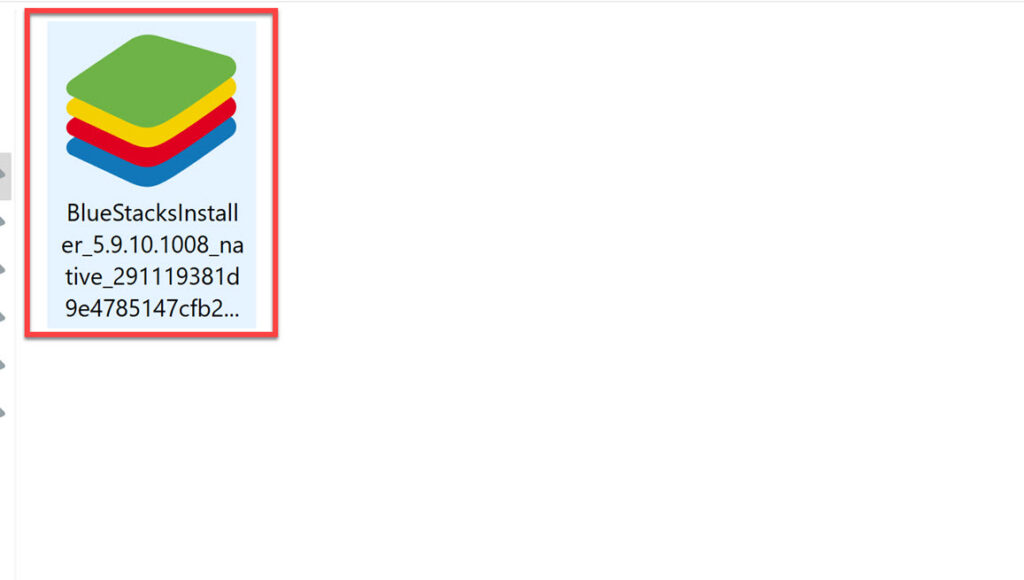
- Then, double-click “BlueStacksInstaller.exe” to begin the installation process on your computer.
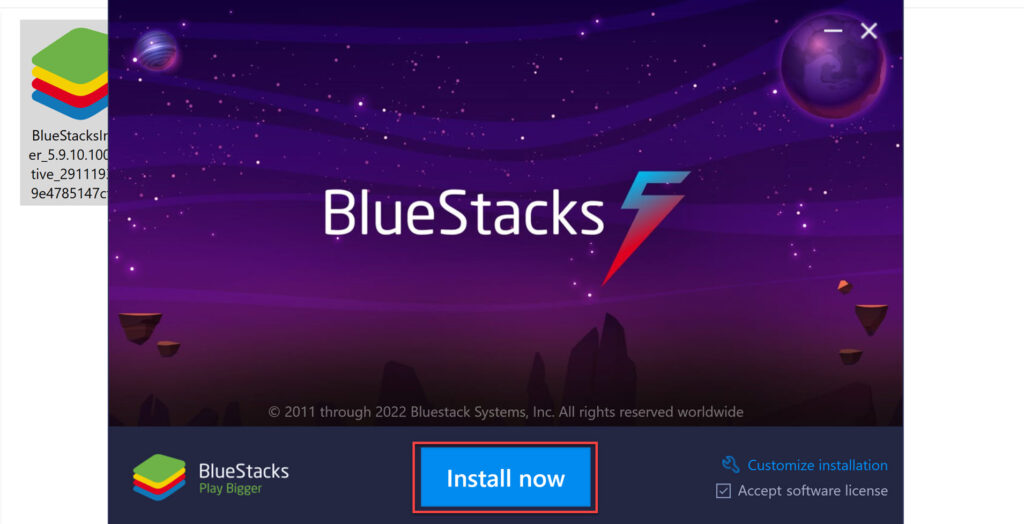
- To begin the installation, simply click the “Install now” button. This will download and install BlueStacks on your PC and may take a few minutes to complete.
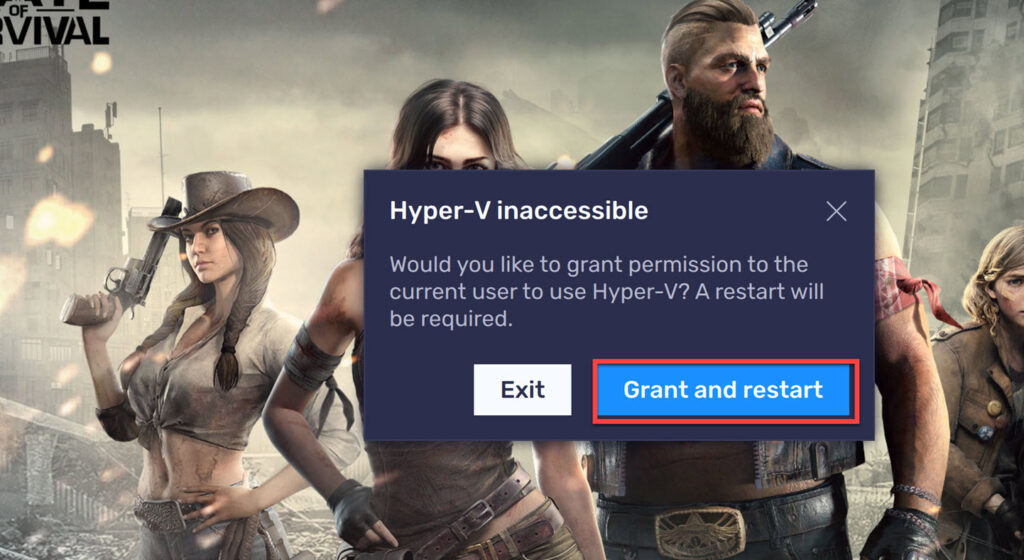
- If a “Hyper-V inaccessible” warning appears during installation, click the “Grant and restart” button to continue. This will immediately restart your computer.
- A UAC (User Account Control) screen will appear on your screen. If you are not already logged in, enter the credentials for an admin account. Otherwise, click the “YES” button to continue. Your computer will restart immediately.
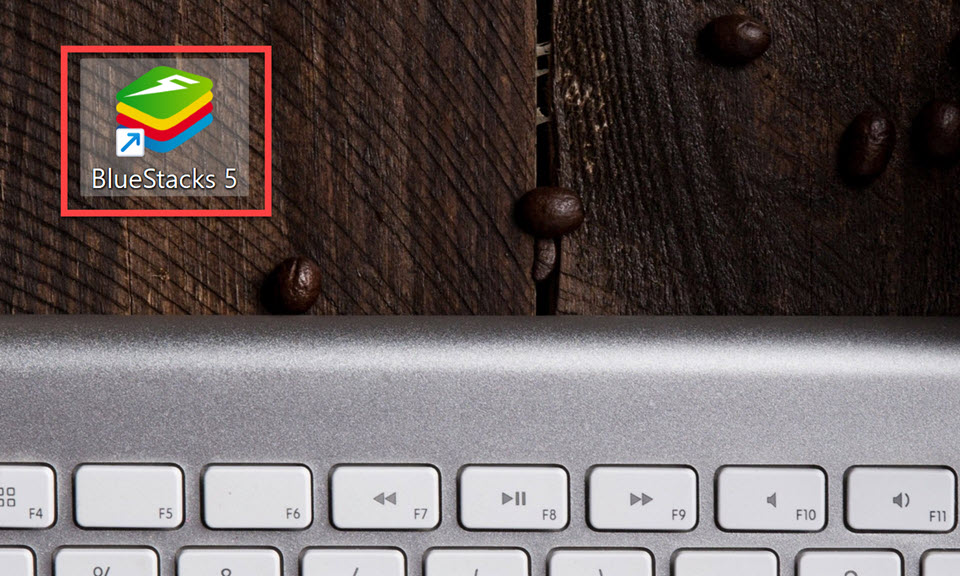
- After restarting your computer, BlueStacks will be installed. To use BlueStacks, open the app by double-clicking the Desktop icon.
Step 4. Set up and use BlueStacks on your Windows 11 PC
After successfully installing BlueStacks on your computer, it is time to learn how to set it up and use it.
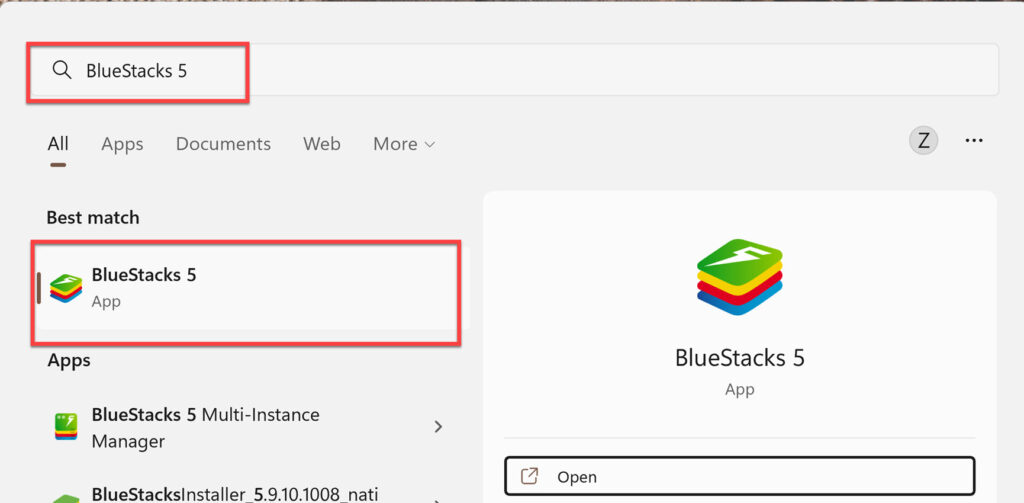
- Begin by searching for the BlueStacks app in the Start Menu.
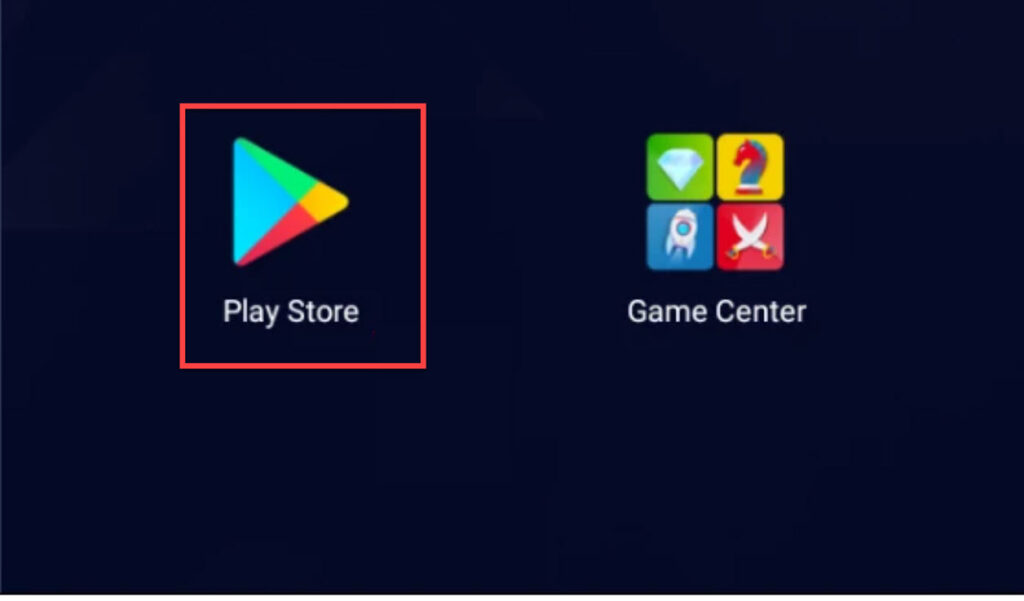
- Next, click on the “Play Store” icon on the BlueStacks home screen.
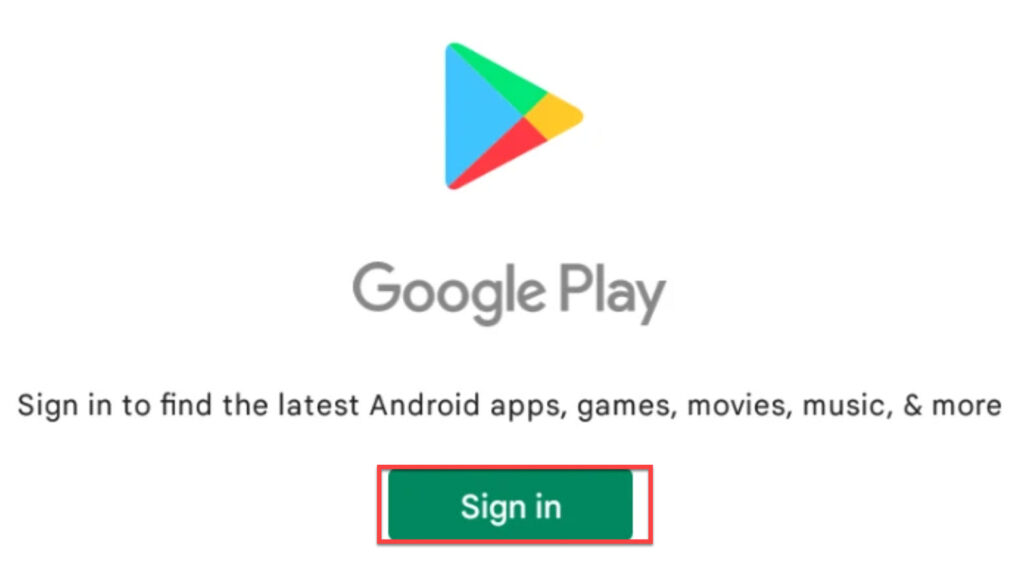
- Here, click on the “Sign in” button to continue.
- Now, type in your Google account credentials, and click “Sign in” to continue.
- Then, on the setup screen, you’ll be asked if you want to backup the data for your apps to Google Drive, which is enabled by default. If you don’t want it, simply turn it off. When you’re finished, click the “Accept” button to proceed.
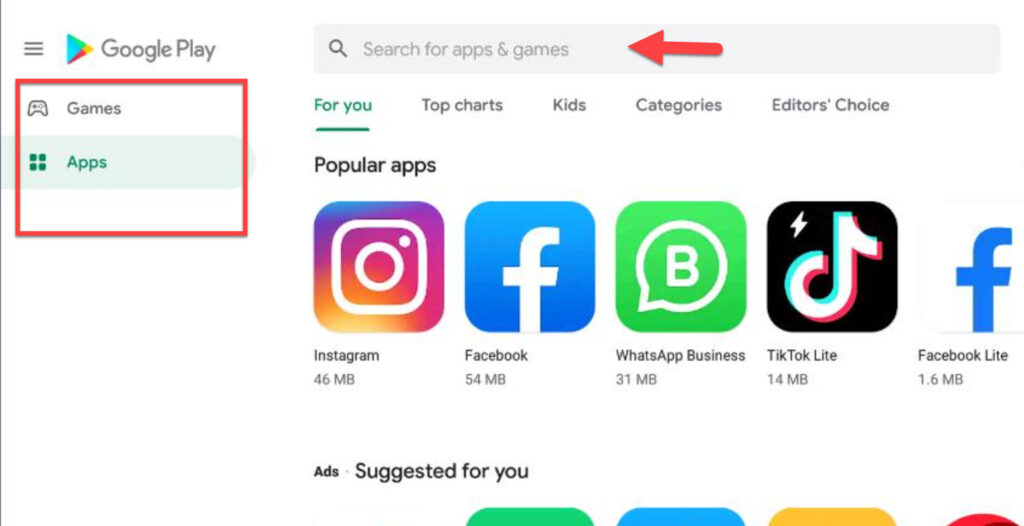
- After signing in, you can now use the search bar to find your favorite app or game.
- After finding it, simply click on the “Install” button to download and install the app or game on your PC.
- Once installed, they will appear on the BlueStacks app’s home screen. To launch it, click on the app tile.
Final Words
That’s it! This is how you can install and use BlueStacks on your Windows 11 PC or laptop. With BlueStacks, you can now install your favorite mobile apps on your PC and use them, or play the best Android games, like PUBG and Free Fire. Lastly, we hope you’ve found this guide useful and if you have any questions, leave them in the comments section below.
Read also: