VMware Workstation Pro is a popular x64 virtualization software or hosted hypervisor available today. It allows professional system administrators or power users to run many separate virtual machines simultaneously on a single physical computer. If you want to run it on your Windows system but don’t know how, then this guide is for you. This Techschumz guide will show you how to download and install VMware Workstation Pro on a Windows 11 PC or laptop.
Table of Contents
What is VMware Workstation Pro?
VMware Workstation Pro is a 64-bit hosted hypervisor designed to virtualize endpoint PCs such as desktop computers running Microsoft Windows and Linux. Because it is installed on top of a host operating system, such as Windows 10 or 11, it is classified as a Type 2 (hosted) hypervisor. After installing Workstation Pro, it is just another program that allows users to create VMs and resources.
VMware Workstation Pro is primarily designed for the simultaneous creation and management of multiple virtual machines (VMs). It can support large VMs with 16 virtual CPUs (vCPUs) and 64 GB of RAM and 4K screens, USB 3.0, and smart card support. Workstation Pro requires a 64-bit Intel Core 2 Duo or AMD Athlon 64 FX Dual-Core CPU running at 1.3 GHz or faster and at least 2 GB of memory.
IT administrators can use Workstation Pro to test data center architecture design or configuration verification. Software developers can also use it to create and maintain local test environments for new products. Workstation Pro is also frequently used to provide standardized corporate desktop or workload instances to employees, partners, guests, contractors, or other users who may bring their own endpoint machines into the company environment.
Oracle Virtual Machine VMware Workstation Pro’s main competitor is VirtualBox. It is free, and an open-source edition is available. While some experts say that VirtualBox offers a more robust feature set, many VMware administrators choose VMware Workstation Pro.
How to Download and Install VMware Workstation Pro on a Windows 11 PC
VMware Workstation Pro is not free, but it is reasonably priced for most users to purchase and use at home or the business. The steps to install VMware Workstation Pro on your Windows system to operate multiple virtual machines are described below.
Step 1. Enable Virtualization
VMware Workstation needs that Hardware Visualization is enabled on the host system. This capability is available on the majority of PCs nowadays. However, it is possible that it is disabled in the BIOS. It is possible that you will need to reboot into the system BIOS and enable Virtualization Technology (VTx) in the system BIOS settings. For that, we also have a step-by-step guide. Click on the link below.
=> How to enable Virtualization on Windows 11
Step 2. Download VMware Workstation Pro for Windows 11
Once you enable hardware virtualization, it’s time to download the VMware Workstation from its official site and install it on your system.
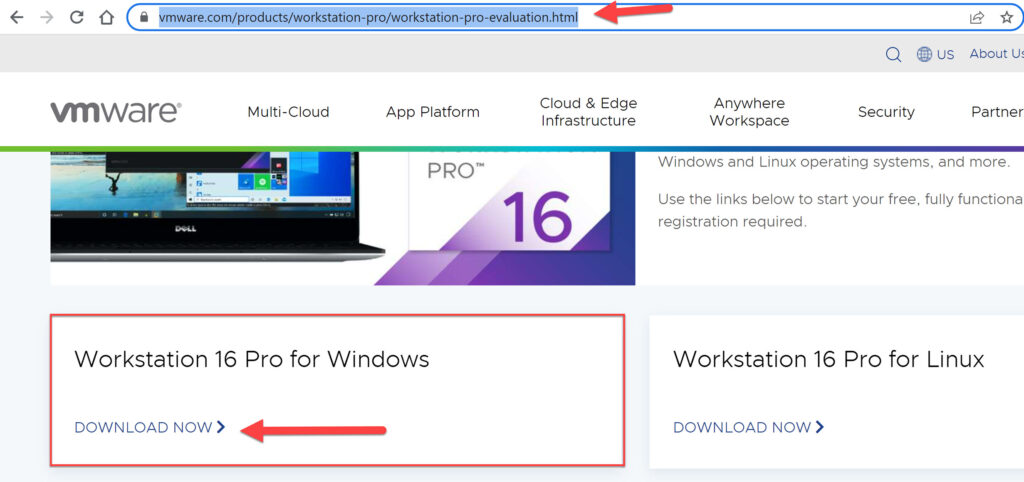
- First, download the most recent version of VMware Workstation Pro for Windows by clicking the link below.
=> https://www.vmware.com/products/workstation-pro/workstation-pro-evaluation.html
- Scroll down and click on the “DOWNLOAD NOW” button under Workstation 16 Pro for Windows.
Step 3. Install VMware Workstation Pro on Windows 11
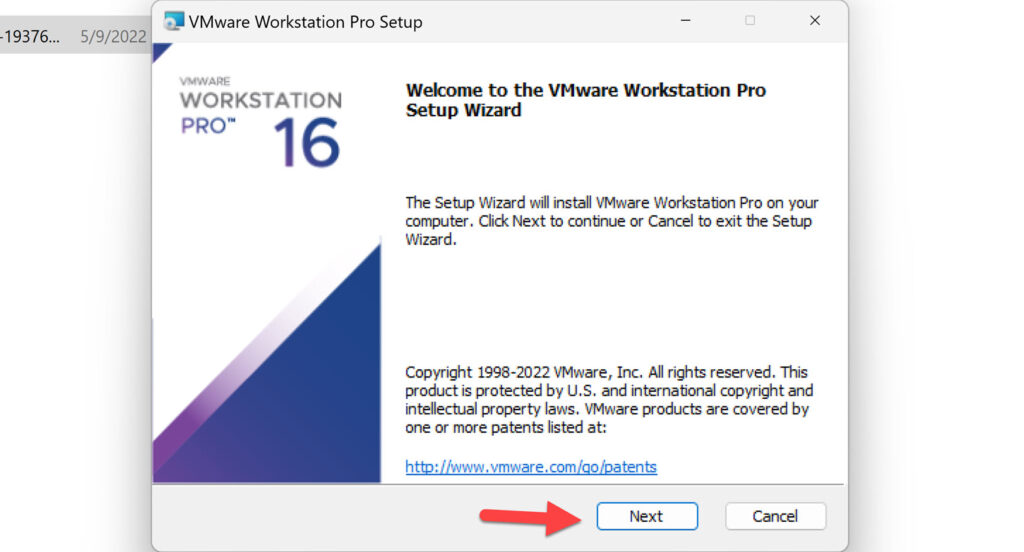
- To begin, locate and run the installer after it has been downloaded, and click “Next” to begin the installation.
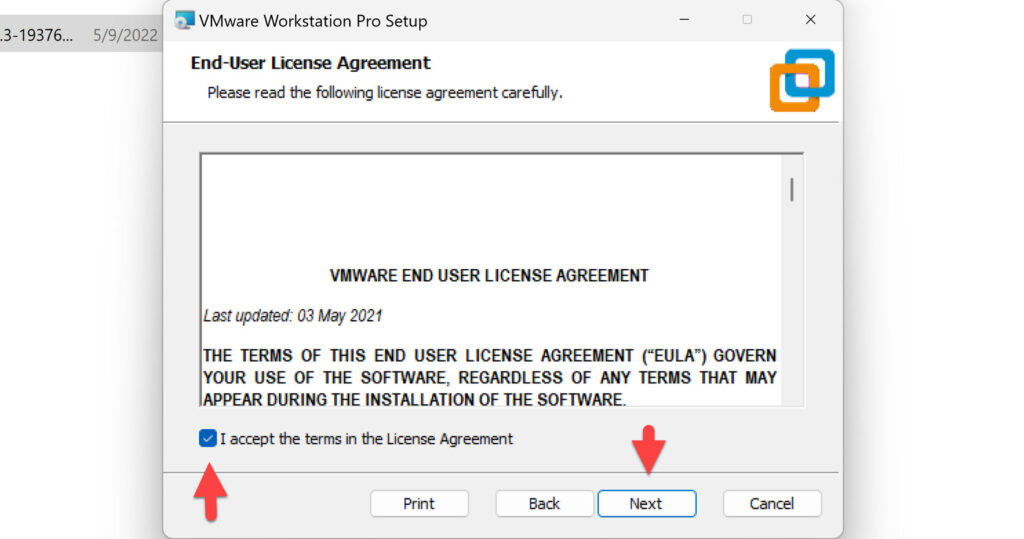
- Following that, you must agree to the License Agreement conditions and proceed to the next screen by clicking “Next.”
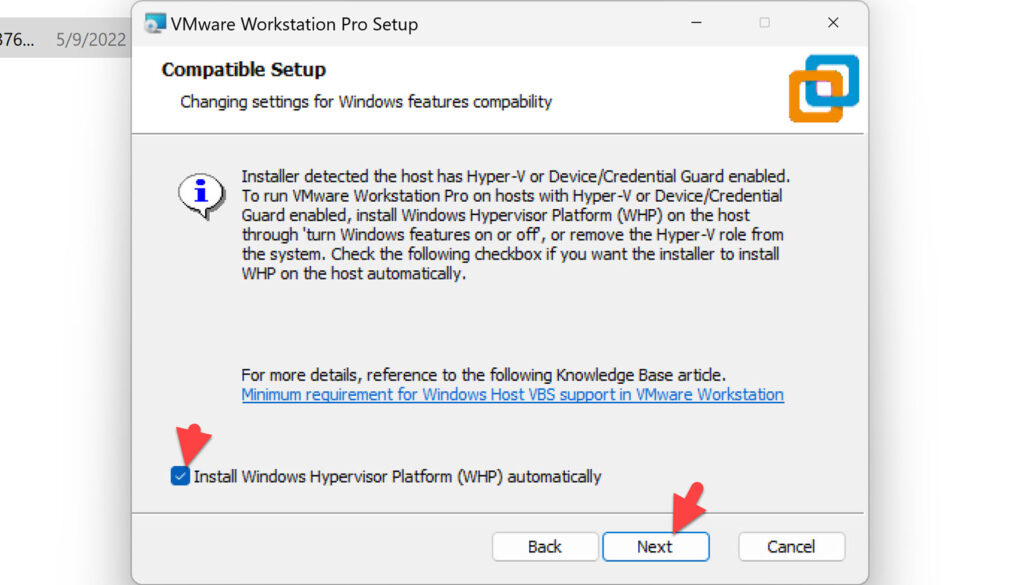
- Check the box for “Install Windows Hypervisor Platform (WHP) automatically,” and click “Next.”
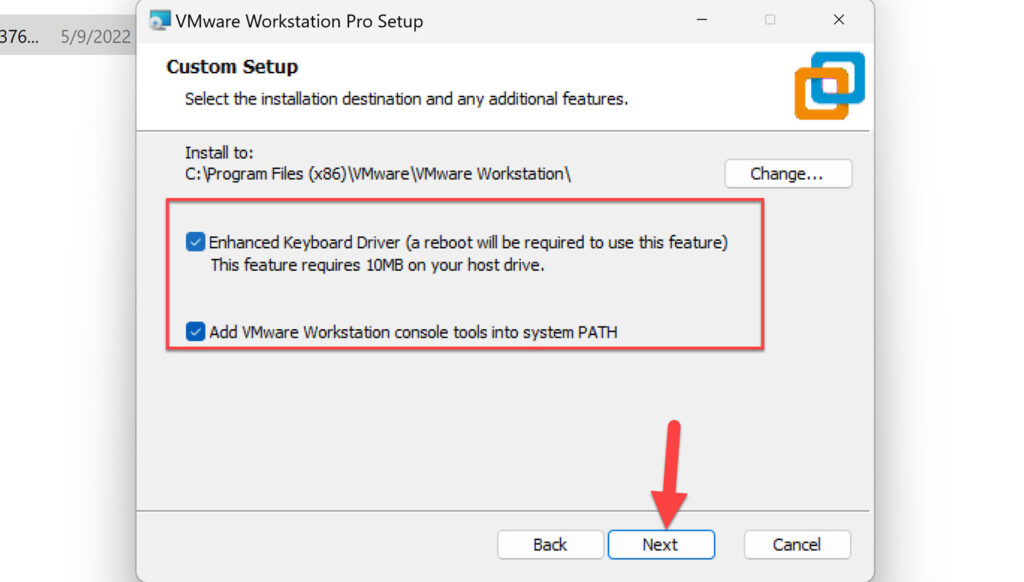
- Tick the box next to “Enhanced Keyboard Driver” to integrate the keyboard effectively. In addition, select the option to add other console tools to the system PATH. Click “Next” to continue.
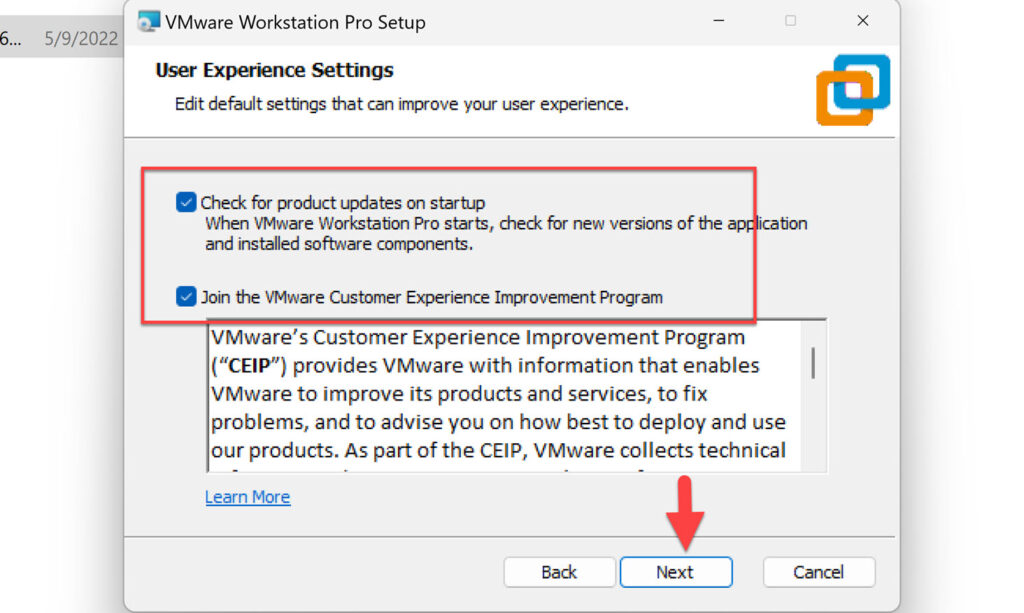
- In User Experience Settings, select your preferred settings and click “Next” to proceed.
- You can accept or change the default installation location on the following page. When done, click “Next.”
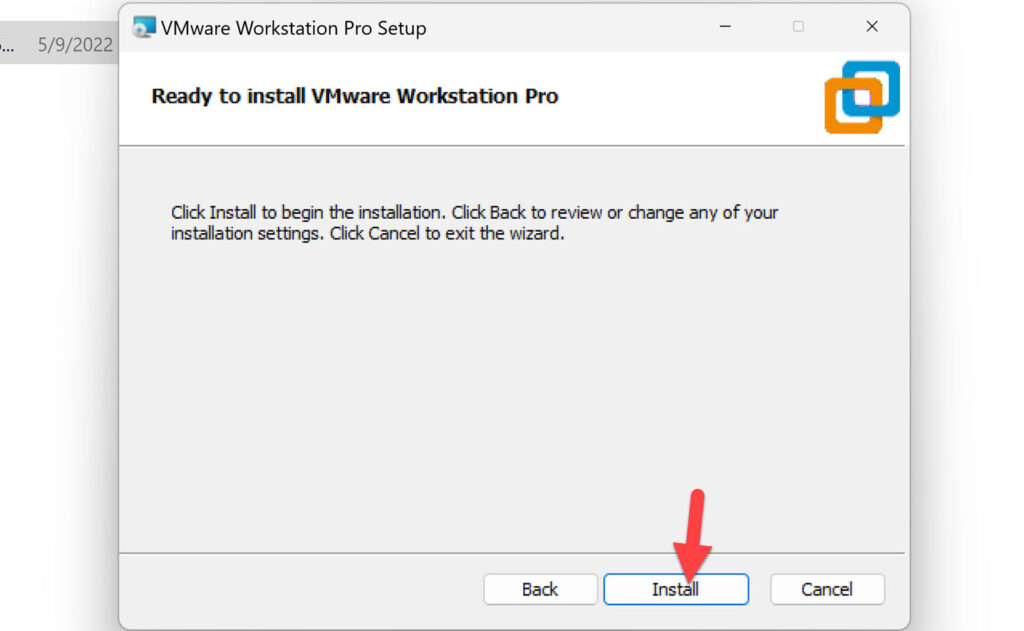
- Finally, click the “Install” button on the screen to begin the installation.
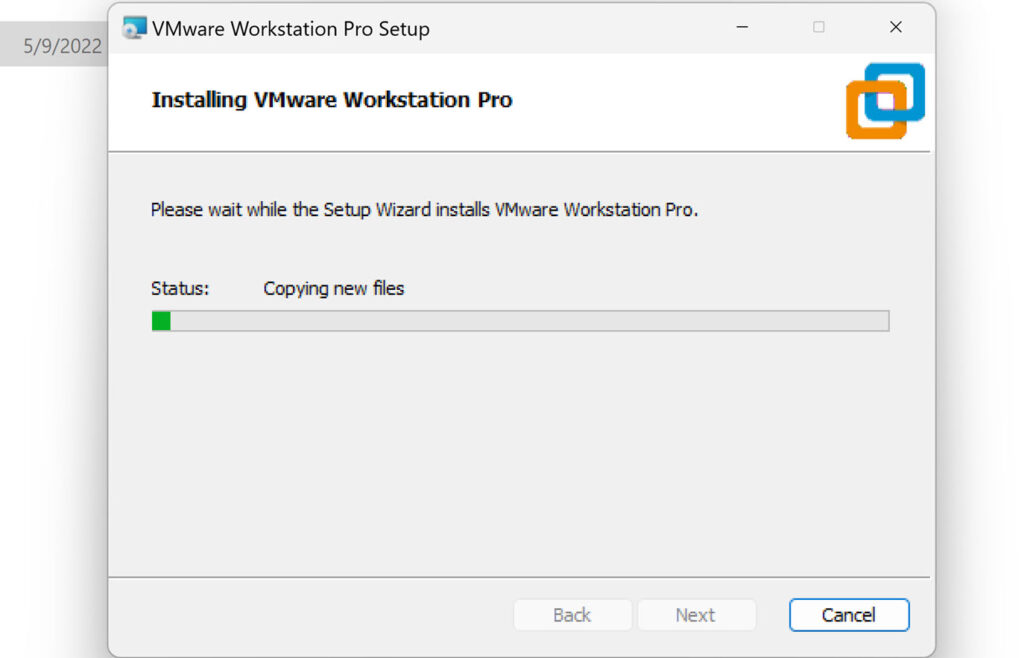
- The VMware Workstation Pro installation process should take only a few minutes. Click the “Finish” button to complete the configuration.
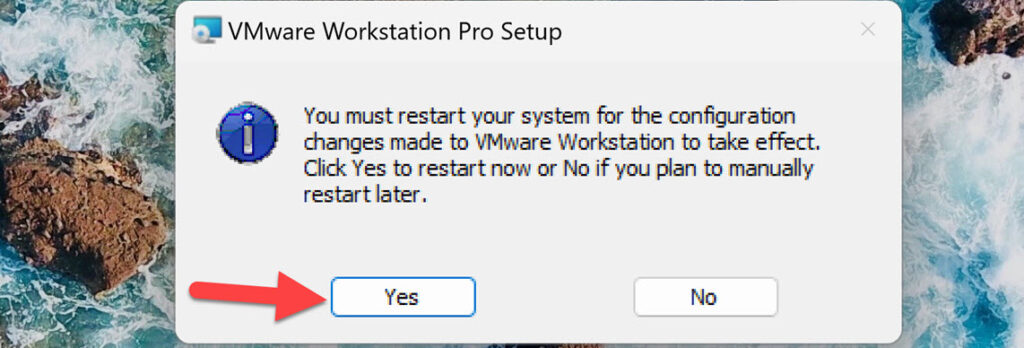
- Next, you need to restart your system for the changes to take effect. For that, click “Yes.”
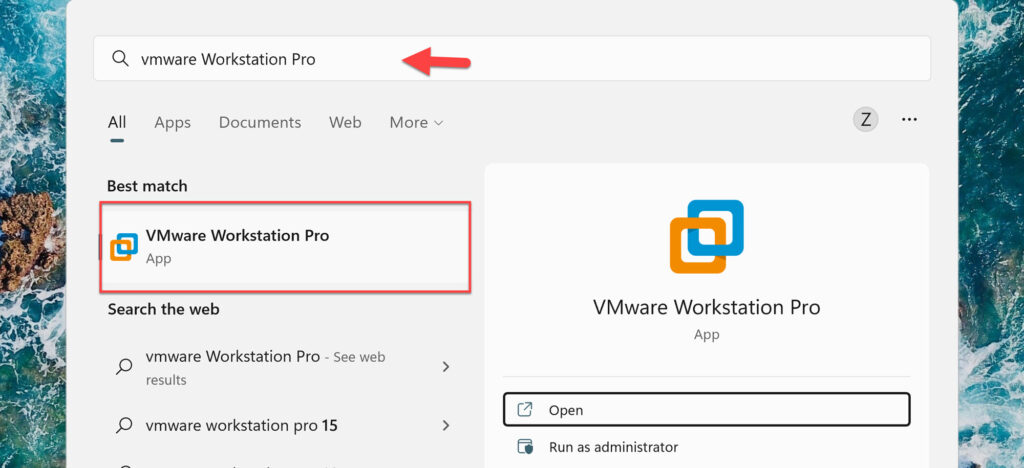
- After your computer has restarted, open VMware Workstation Pro by searching for it in the Start Menu.
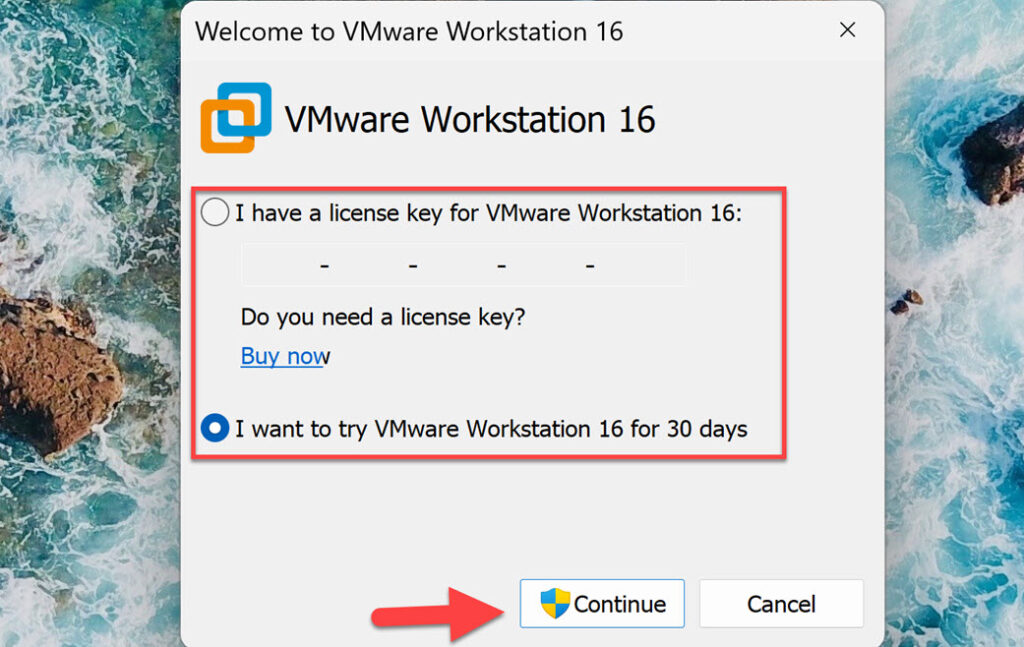
- If you have a license for VMware Workstation Pro, select the License option to add a license key, and if you don’t have one, you can get a 30-day trial. When done, click “Continue.”
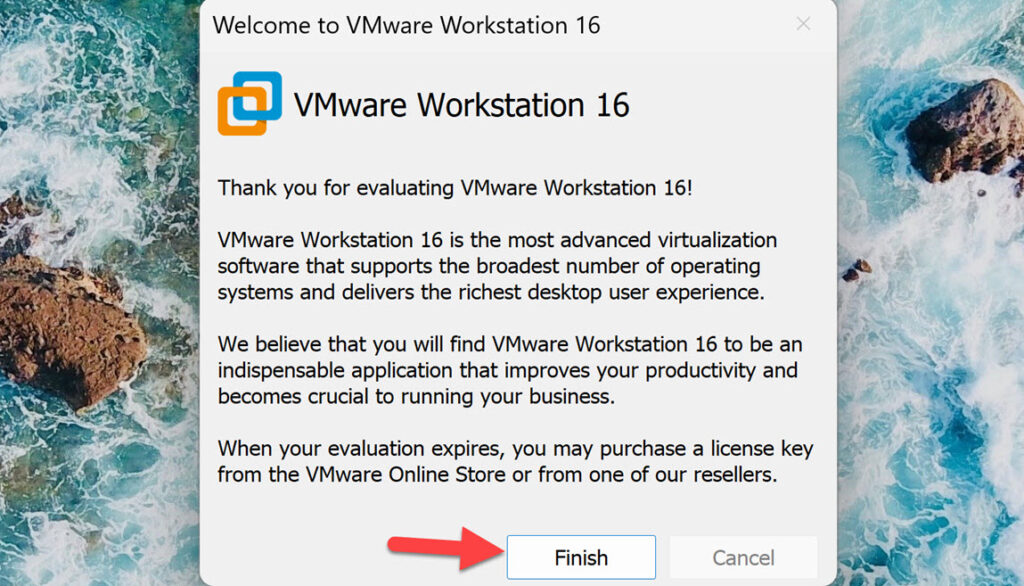
- Finally, click “Finish,” and the program will start automatically.
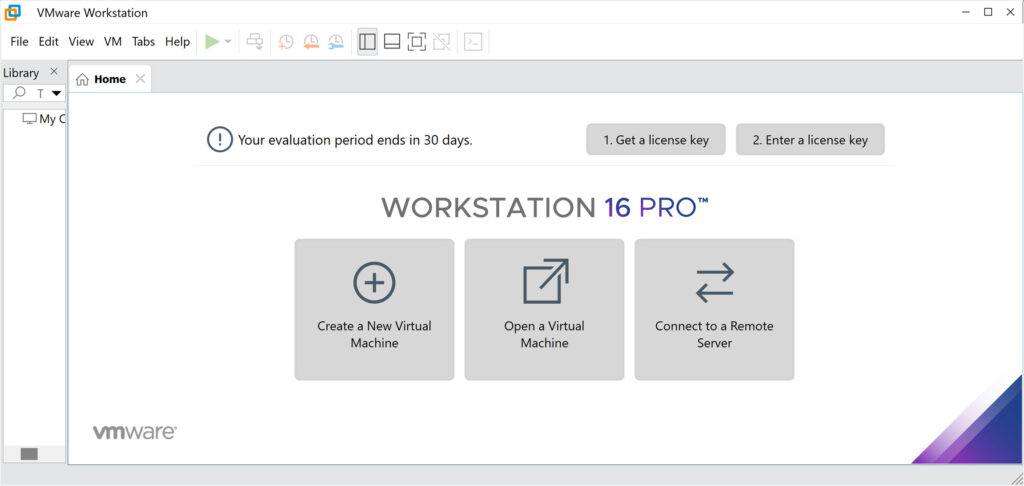
- That’s it! VMware Workstation Pro is installed on your PC. Now, you can create a new virtual machine and try another operating system along with Windows.
Related: ow to Install macOS Monterey on VMware on Windows PC
Final Words
VMware Workstation Pro is a great software that allows you to try another OS along with Windows 11. And this article showed you how to install VMware Workstation Pro on a Windows 11 PC. Lastly, if you encounter any errors or have any questions, please leave them in the comments section below.
Read also: