All Windows versions allow users to connect two or more monitors to their system, with one serving as the primary monitor and the other as an external monitor. You can also select which monitors to use as primary and which as secondary. In this guide, we will show you three different and quick methods over how to change the primary monitor on Windows 11 with ease.
Meanwhile, Multi-monitor setups are commonly used by gamers and streamers. As it will allow them to monitor the health of the stream on one monitor while playing games on their secondary high-end monitor. Below you’ll learn more about dual monitor on Windows 11.
Table of Contents
Dual Monitor on Windows 11
All versions of the Windows operating system currently supported by Microsoft support dual and even multiple monitors. This means that you can have more than one monitor connected to your computer and display whatever you want to increase productivity and ease of use. Windows 11, the latest in a long list of Windows operating systems, also supports multiple monitors. Windows 11 is quite capable of supporting multiple monitors. Multi-monitor support is a boon for power users, as most of them. multiple-monitors attached to your computers.
When you connect extra than simply one monitor to a laptop walking at the Windows Operating System, Windows makes one of the monitors the number one monitor (in nearly all cases, that is the monitor that became linked to the laptop first) and the relaxation of the video display units the secondary, tertiary and so forth video display units. The number one monitor is the default screen Windows presentations the entirety on, that is why being capable of decide which display linked for your laptop you need to be the number one display is immensely important.
Thankfully, Windows 11 now no longer best permits customers with a couple of video display units to select their number one display at any given time however the method used to accomplish that is likewise quite simple.
You can customise how the desktop appears on the monitor. These are the various settings available to you.
- PC screen: See things on one display only
- Duplicate: See things on all displays
- Extend: See your desktop across multiple displays
- Second screen only: See everything on the second display
In most cases, you’ll want to use your displays in extended mode and designate one monitor as the main or primary display. The primary display serves as the active desktop, displaying the clock and taskbar corner icons. The active display displays the sign-in message, CTRL + ALT + DEL, and all apps and items will launch automatically on the active or main display.
To get your main display in Windows 11, follow the steps below:
Method 1. Change the Primary Monitor on Windows 11 via Settings
Again, as mentioned above, it’s always good to use the extend mode and have one display as a main or primary display when using Windows with dual monitors.
To do that, follow the steps below:
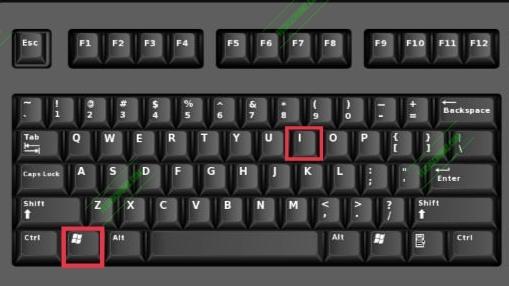
Step 1. Open the Settings app by using the ‘Windows + I‘ shortcut keys.
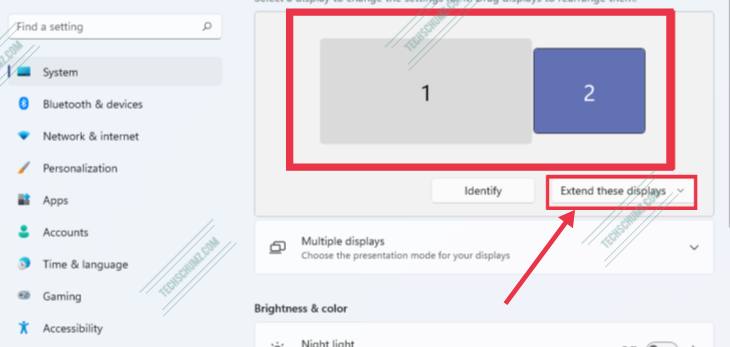
Step 2. In Windows Settings window, click ‘System‘ from the left pane, select ‘Display‘ on the right pane of your screen.

Step 3. On the Display window, you will see two displays. You can use the ‘Identify‘ button to identify each monitor by number. You can then use select the option to Extend these displays as highlighted below.
Step 4. Finally, click the display you want as your main or primary display, then check the highlighted box to ‘Make this my main display’.
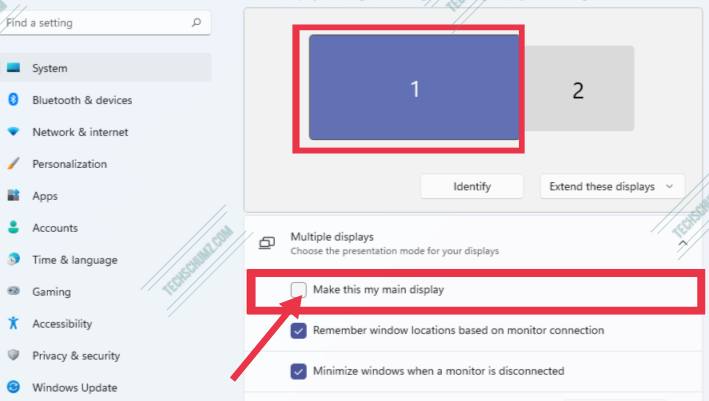
This will immediately switch your app icons and make it the main display. In some cases, you’ll need to restart to fully see all apps icons and clock switched over to the main monitor.
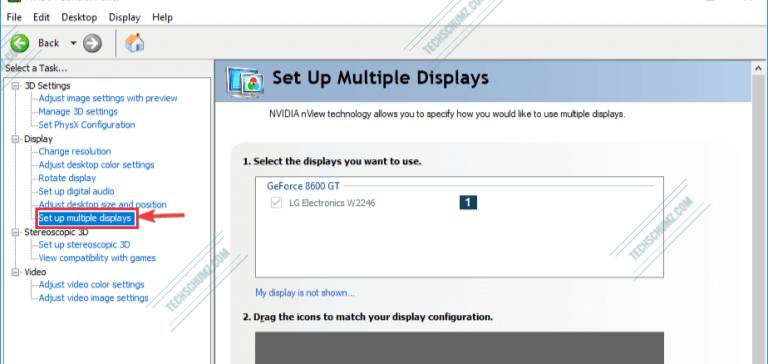
Method 2. Change The Main Display on Windows 11 using NVIDIA Control Panel
This option is only available if you have NVIDIA graphics and drivers installed.
- Open the ‘NVIDIA Control Panel’.
- Click on the ‘Set up multiple displays‘ link.
- Right click on the display number you want to make the main display, click on Make primary, and click/tap on Apply.
- That’s it! Now you can close the NVIDIA Control Panel.
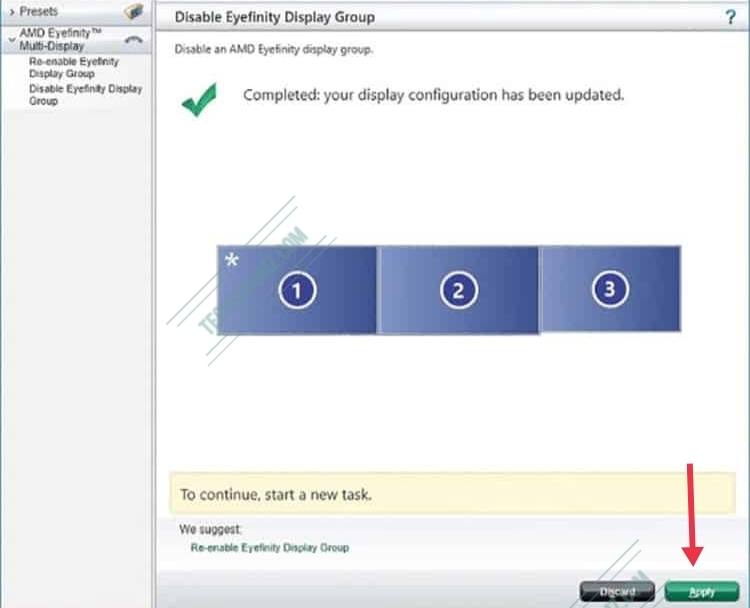
Method 3. Set a Monitor as Default Display on Windows 11 via AMD Radeon Settings
This option is only available if your computer has AMD graphics and drivers installed.
- Open AMD Radeon Settings.
- Click on Display, and select the Display Number you want to make the main display.
- Toggle on the Preferred Display button to Enable.
- That’s it, you can close the AMD Radeon Settings.
Conclusion
Thay’s it! This guide showed you how to set or change the primary monitor on Windows 11 with dual displays using three different ways. We hope you find this guide useful. If you encounter any questions, please let us know in the comments section below.
More Windows 11 related articles:
This doesn’t help for gamers, seeing as they want to have the taskbar not on the primary Monitor where all games start.