The reality of our device-rich world is this: you will sometimes have a phone or tablet that is not the same make as your computer. To make matters worse, you might have pictures on your iPhone or iPad that you want to transfer to your Windows 11 PC. In this guide, we will show you three different and quick methods on how to transfer photos from an iPhone to a Windows 11 PC or laptop.
Table of Contents
iPhone Photos Compatibility with Windows 11
iPhone images are saved in a variety of formats, including jpg, png, and mov, as well as HEIF and HEVC. Now, the standard formats that you can freely view on your Windows 11 PC are jpg, png, and mov. However, HEIF and HEVC are not supported by all devices.
After transferring these range types to your PC, you can either convert them to compatible formats. Alternatively, you can ensure that your iPhone converts these before any transfer.
Scroll down to ‘Photos’ in the Settings app on your iPhone. Scroll down in the Photos settings. Select ‘Automatic’ under ‘Transfer to Mac or PC.’
3 Ways to Transfer Photos from an iPhone to a Windows 11 PC & laptop
Having an iPhone and a Windows PC can seem like a nightmare in terms of compatibility. It’s just been drilled into our heads that “Apple devices don’t play well with others.” But that has to be the furthest thing from the truth.
Transferring data from your iPhone to your Windows PC, or from your Windows PC to your iPhone, is not difficult. The same can be said for your iPhone photos. There are several methods for transferring photos or videos from your iPhone to your Windows 11 PC.
Method 1. Sync Photos from an iPhone to your Windows 11 PC via iTunes
iTunes is the default tool for transferring photos from a computer to an iOS device. However, because it erases all previous data on your iPhone, iTunes is not a user-friendly software for most iOS users. However, if you purchase a new iPhone and need to transfer files from your computer to it, you can do so by following the steps outlined below. Before proceeding, make certain that your iCloud Photos on iPhone is turned off.
Step 1. Connect your iPhone 11 to the computer via a USB cable > Run iTunes > Click the “Device” button > Select “Photos.
Step 2. Check “Sync Photos” > Select the photos and videos you want to transfer from the option “Copy photos from.
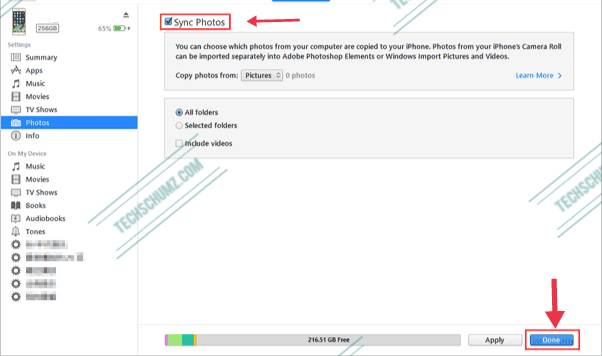
Step 3. Click “Apply” to start syncing photos to the iPhone.
That’s it!
Method 2. Transfer iPhone or iPad Photos to a Windows 11 Computer
As long as you’ve backed up your photos on your iPhone or iPad to iCloud, Windows 11 can use iCloud to wirelessly sync them. Here’s how to go about it.
Step 1. Launch the Microsoft Store and Search for iCloud on the Microsoft Store.
Step 2. Click Get, and iCloud will now be downloaded on your PC. After it’s downloaded, open the application.

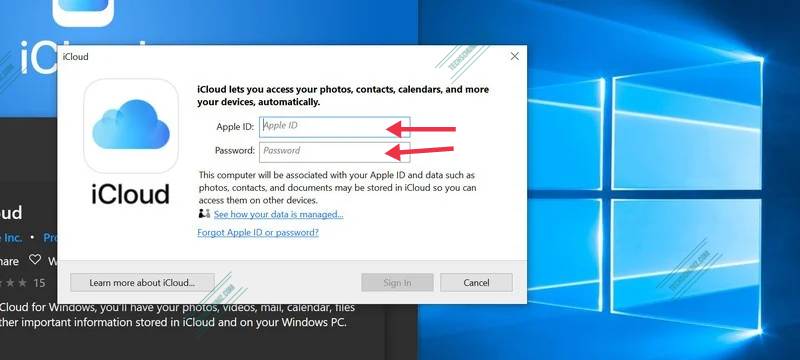
Step 3. Sign in to your Apple account by typing your Apple ID and its password.
Step 4. Click the box next to iCloud Photos so that a checkmark appears.
Step 5. Now, tap on the box next to Upload new photos from my PC so that the checkmark disappears. You can set these options how you’d like, but this ensures you’re just getting the photos off your iPhone or iPad onto your PC.
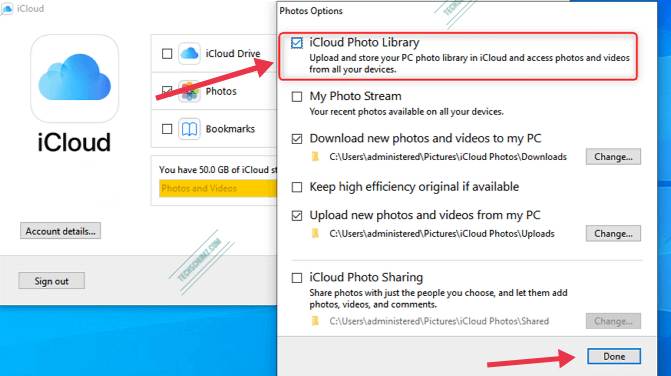
Step 6. Click Done, and click on the ‘Apply’ button then any photos in your iCloud will now be downloaded on your Windows 11 PC as well.
That’s it! This is how you can transfer iPhone or iPad photos to a Windows 11 computer.
Note: If you’re using an earlier version of Windows 11, you can also get iCloud from Apple. Users of older versions of Windows will need to download and install the traditional application, which has the same features.
Method 3. Transfer Photos and Videos from an iPhone to Windows 11 PC Using File Explorer
There’s no need to worry if you’re more familiar with File Explorer and find the Photos app confusing. You can also transfer your iPhone photos from Windows 11’s File Explorer. Again, you’ll need to connect your iPhone to your PC via USB cable for this method. You must also have the latest iTunes app installed on your computer.
Step 1. Connect your iPhone to a PC or laptop by using a USB cable and then open Windows 11’s File Explorer.
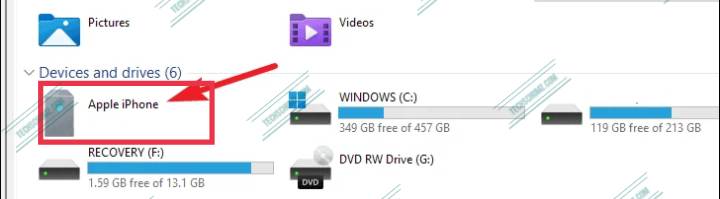
Step 2. Now, click on ‘This PC‘ from the left navigation pane.
Step 3. Then, go to your iPhone by clicking on it under the ‘Devices and Drives‘. The name of your iPhone can be written either as an “Apple iPhone” or with the name of your device.
Step 4. After open your iPhone drive, click on ‘Internal Storage’ to open it,

Step 5. After Internal Storage opens, find and open a folder by the name of ‘DCIM‘.

Step 6. In the DCIM folder, you also see additional folders for your photos and videos. Now To transfer photos and videos from an iPhone to Windows 11 PC, you can copy/paste individual photos, subfolders, or the entire DCIM folder to your computer.

That’s it!
Note: You can also cut/paste or drag and drop the photos instead of copying them. However, be aware that doing so will delete the photos from your iPhone as you transfer them. If you move photos by accident, you won’t be able to transfer them back to your iPhone by putting them in the DCIM folder. That would necessitate the use of iCloud Photos.
Conclusion
So, there you have it. These are three easy methods to transfer photos from an iPhone to a Windows 11 PC or laptop. The iPhone does not get along with others. If anything, it has the opposite effect. There’s something for everyone when it comes to transferring your photos to a Windows 11 PC. You may proceed in whichever way you find most convenient.