Windows 11 supports changing the default language. You no longer have to worry about the default language when buying a computer. If you want to use a different language, you can change it at any time. In this guide, we will show you how to change the system language on Windows 11 PC or laptop. You will learn how to change the display language, Widget language, Welcome screen, and language for a new user.
This is especially useful in environments where multiple users access one computer and users prefer different languages. You can download additional languages for Windows 11 to view installations, menus, dialogues, and other user interface items in your preferred language.
Table of Contents
Change the System Language on Windows 11
Most settings of Windows 11 have a centralized location. From system settings to using clipboard and clearing cache, everything can be done in your system settings panel. To add or install a language on your Windows 11 computer, follow the below steps:
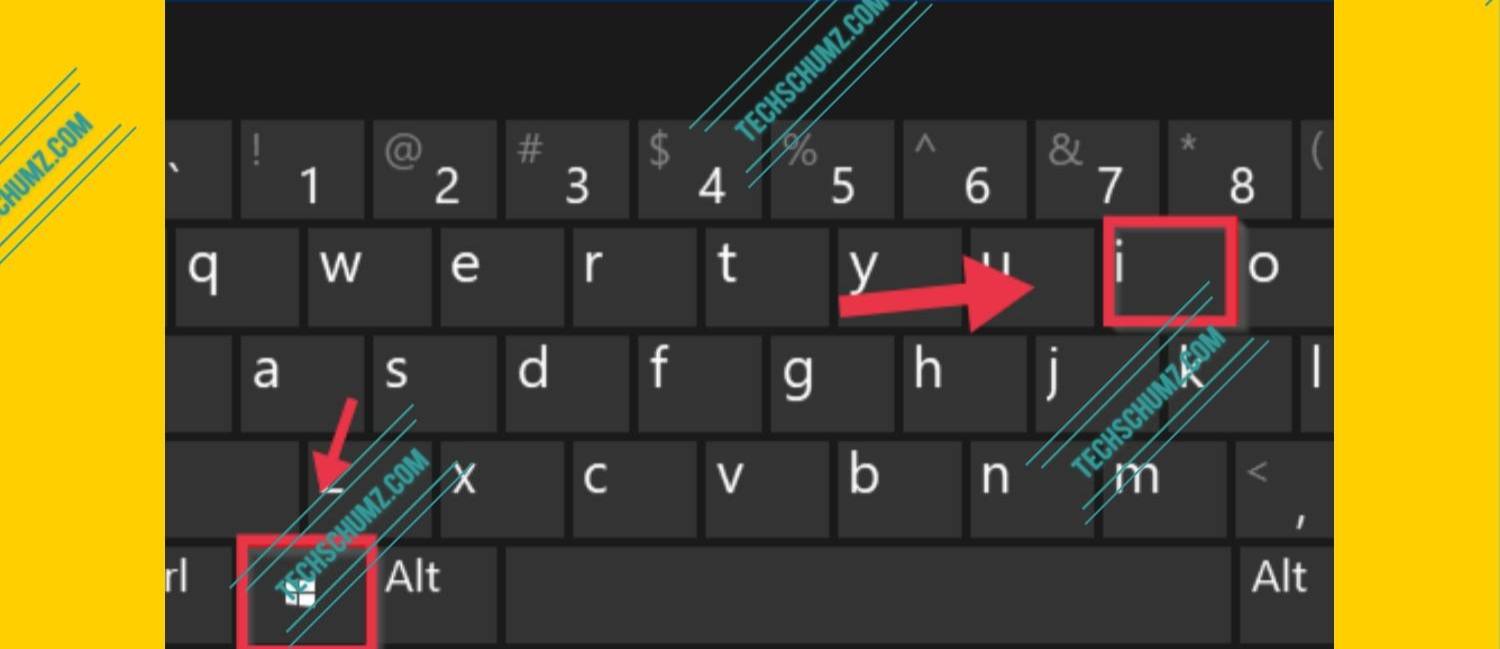
Step 1. Open Settings app by using the Windows + I shortcut keys.
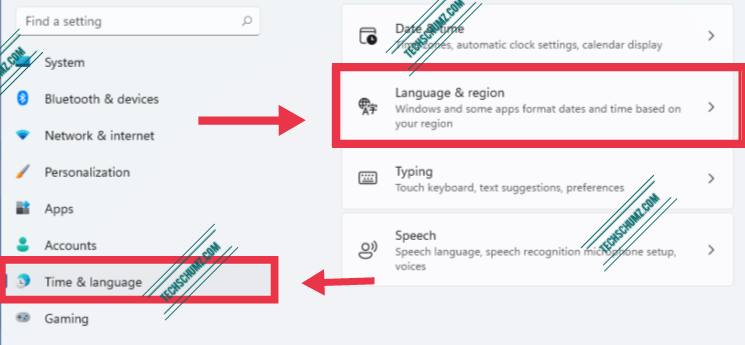
Step 2. Now, find and tap on Time & language, then click on Language & region on the right pane of your screen.
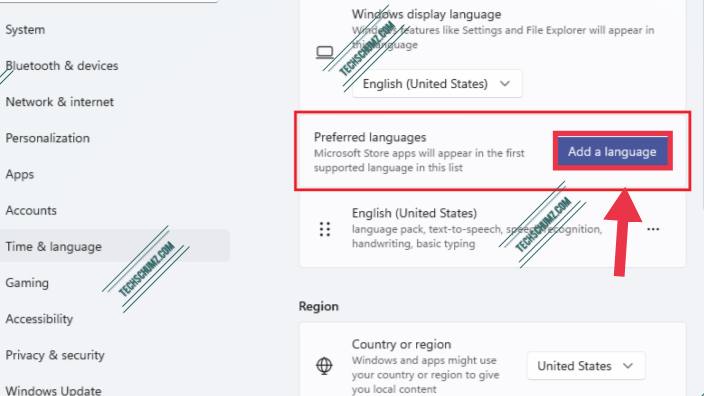
Step 3. Click on the Add a language button, and select the language you want to add to your Windows 11 from the list to install, then click Next.
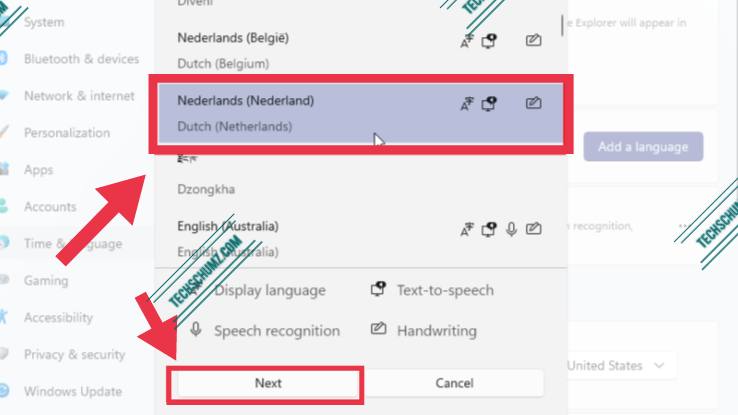
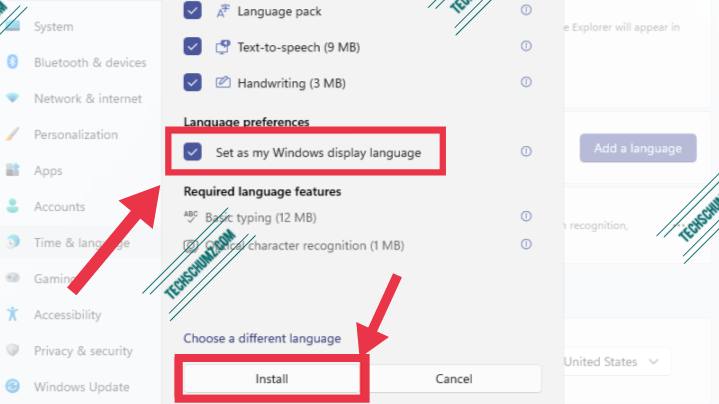
Step 4. Then on the next screen that opens, check the “Set as my Windows display language” option and tap on Install.
Step 5. Wait for Windows to finish downloading and installing the language pack. After the download is complete, you need to sign out and log in again for the changes to take effect.
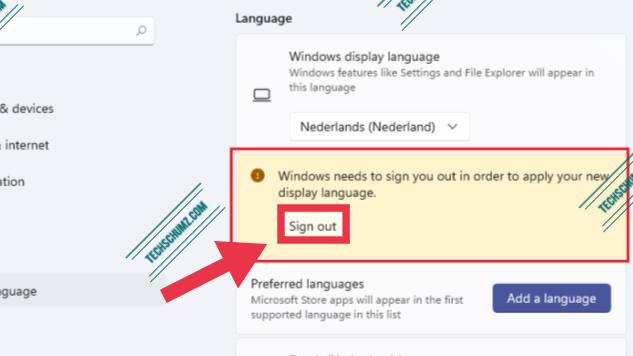
After completing the steps, Windows 11 display language will be set to the language you chose.
Note: Several folders in your home folder, such as Music, Photos, and Documents have a standard name depending on the language. When you log in again, the folder will be renamed to the standard name for the selected language.
Change the Keyboard Language on Windows 11
After you installed your preferred language to your Windows 11 PC, now if you want to add a keyboard for that language, follow the below steps:
- Open the Settings app by using the Windows + I shortcut keys.
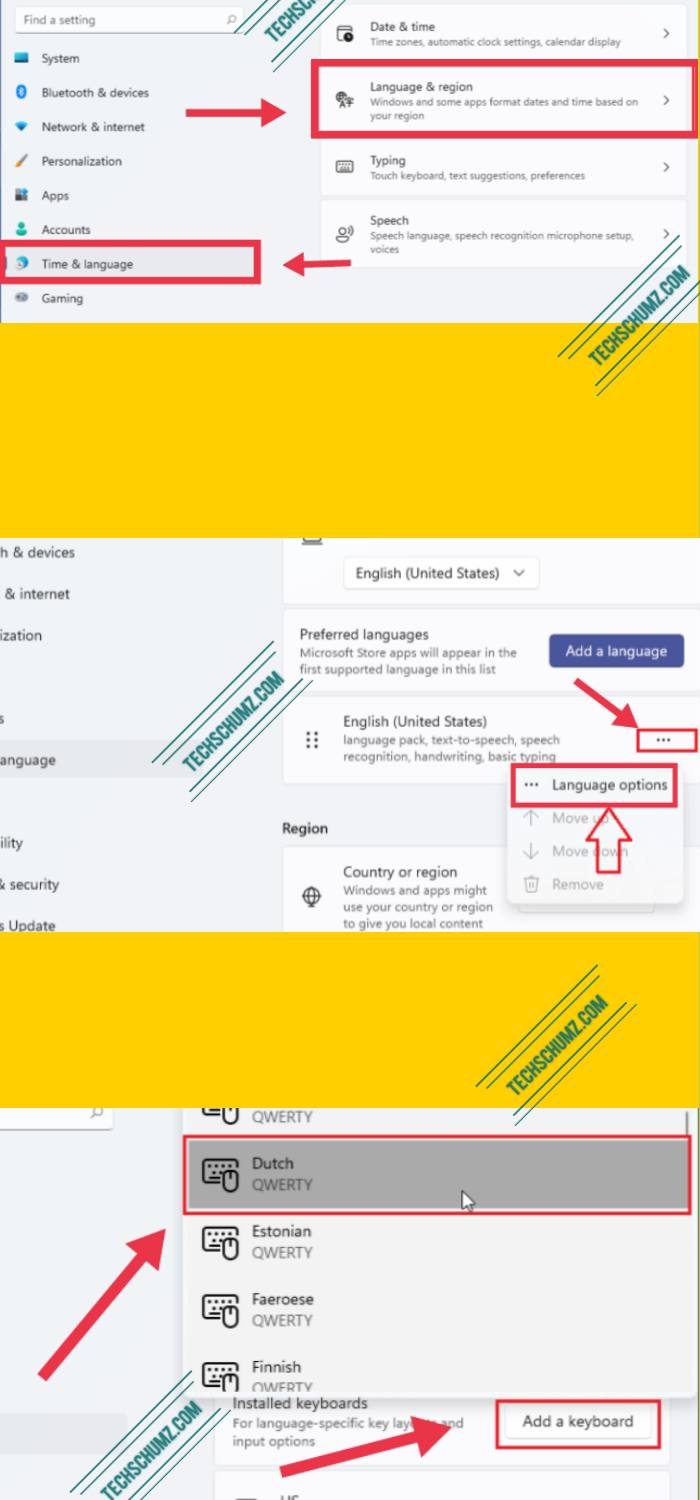
- Now, find and tap on Time & language, then click on Language & region on the right pane of your screen.
- Click on the 3 dots menu in front of the language you added, and select the language option.
- Now click on Add keyboard. Your keyboard layout should match the preferred language you selected earlier.
If Windows cannot automatically install the language packs you choose, you must manually download and install them in Windows.
Change the Welcome Screen and New User Accounts Language
The above language change only applies to your current user account. For new user accounts, the language setting must be changed from the control panel. The same is true of the Windows Welcome, log in and Logout, Shutdown, and Start screens.
- Open Control Panel by searching for it in Start.
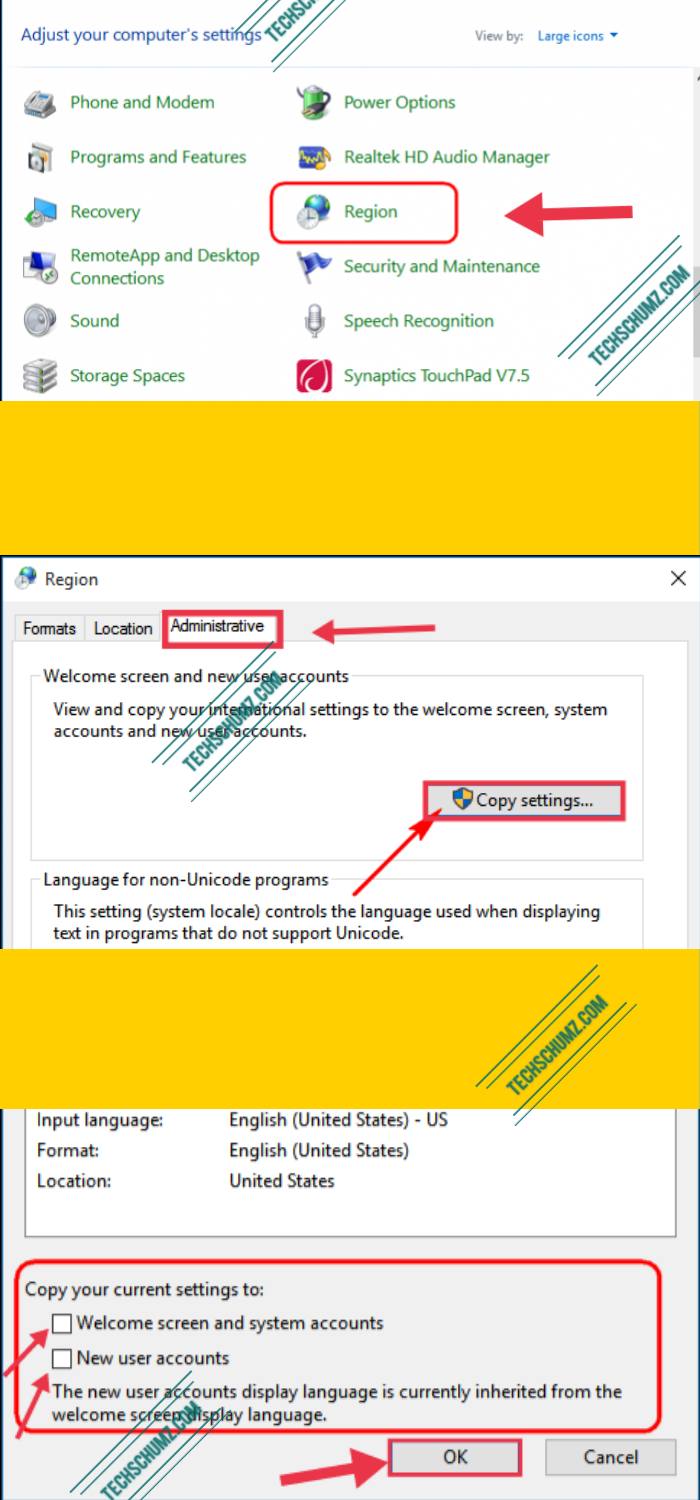
- Next, click on Clock and Region, and then select Region.
- On the small that appears, on the “Administrative” tab, tap on the “Copy settings” button.
- In the pop-up window that opens, at the bottom of the window, check the ‘Welcome screen and system accounts‘ and ‘New user accounts‘ under copy the current settings.
- After checking the boxes, click OK.
Following all these steps, you can change language settings for your current and new account settings and Welcome screen on Windows 11.
Note: To apply the language setting to the Welcome screen and new user accounts, you must first change the display language setting. otherwise, the current language will continue and there is no preferred language
Change News and Interests Feed Language on Windows 11
- Press Windows Windows + W shortcut keys to open the Widgets settings page.
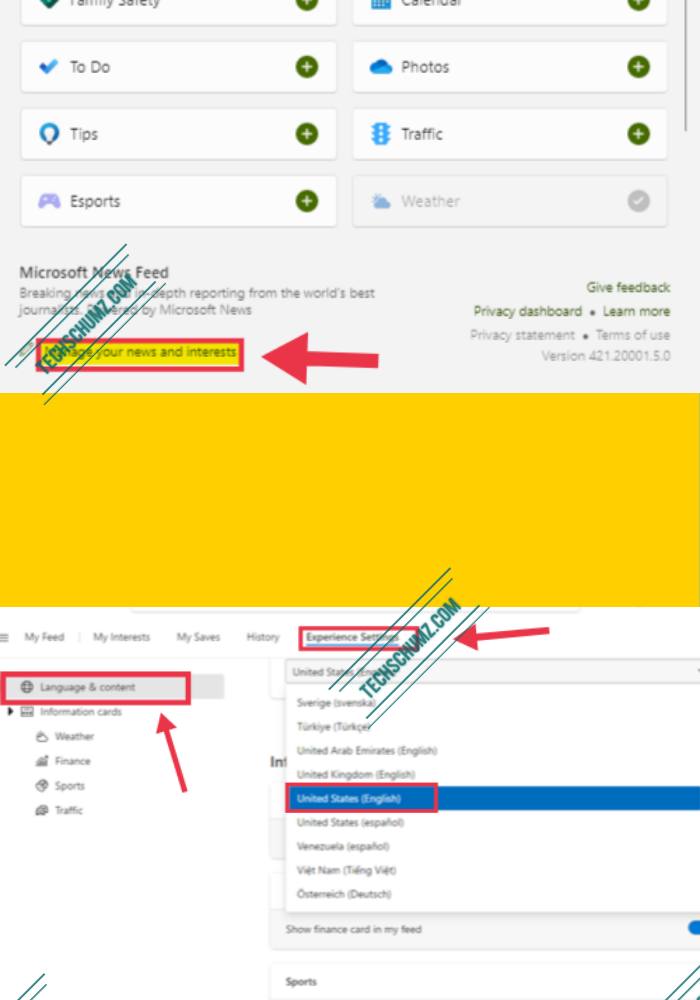
- Next, on the Widget settings window, tap on the Manage your news and interests link at the bottom left corner.
- On the new page that opens, go to the Experience settings tab.
- Now under Language and content, click on the drop-down menu and select your preferred language for your Widgets. The page will refresh automatically and changes will take effect.
After completing the steps, when you open the widgets again, you will see the language selected above.
Conclusion
This article showed you how to change the system language on Windows 11, also how you can change the language of other users account, keyboard and News and Interest Feed. Generally, users never have to worry about changing or installing other languages. However, the ability to change language-related settings can be useful for organizations that work with people who need to use different preferences. It is also a useful feature for matching your locale if you move to another region or purchase new equipment shipped from a different country.
The Widgets setting for language does not work. NO matter that I have ALL settings to English, it seems the Widget just keeps reverting to the Regional settings(Hong Kong) and just assumes I am Chinese. I have read several issues regarding this in other regions where English is a second language.