If you use a laptop, tablet, or even a desktop computer, you may have a WiFi connection because it is the easiest way to access the network and the Internet without wasting time with cables. In this guide, we will show you how to quickly connect a Windows 11 computer to WiFi using your Taskbar and Command Prompt.
However, as long as you know the steps to connect, it is very convenient. If you are using Windows 11, there are some ways to quickly connect to the internet using a WiFi connection, whether you are setting up your device for the first time, connecting in a new place, or simply looking for an effective way to connect multiple devices to the same network.
Related: How to Enable and Disable WiFi or Ethernet in Windows 11
Table of Contents
Some of the Advantages of WiFi Network
- Easy to Set Up: Setting up a wireless network as a wired network is as simple as adding a computer to the network. There is no need to fasten wires, and users can move around the signal range at their discretion.
- Coverage: Although coverage is limited, wireless technology has improved over the last decade and allows good coverage within a specified range. You can also use extenders and range boosters if you need a wider range of applications.
- Unlimited Users: Unlike wired networks, wireless networks allow you to add more users without changing your hardware, but with too many users bandwidth and speed can be an issue.
- Convenience, Flexibility and Efficiency: Wireless networks can be very useful for companies that have hot desks or share other offices. If you need to move around in the workplace, wireless networks allow you to move around without worrying about access points or wires.
- Cost: Wireless routers have become so cheap in the last few years that the costs associated with setting up wireless networks will not necessarily be prohibitive. In some cases, it is cheaper to install a wireless network.
1. Connect to WiFi on Windows 11 PC or Laptop using Taskbar
Connecting your Windows 11 PC or laptop to a WiFi network is one of the easiest ways that you can use it. This is how you do it:
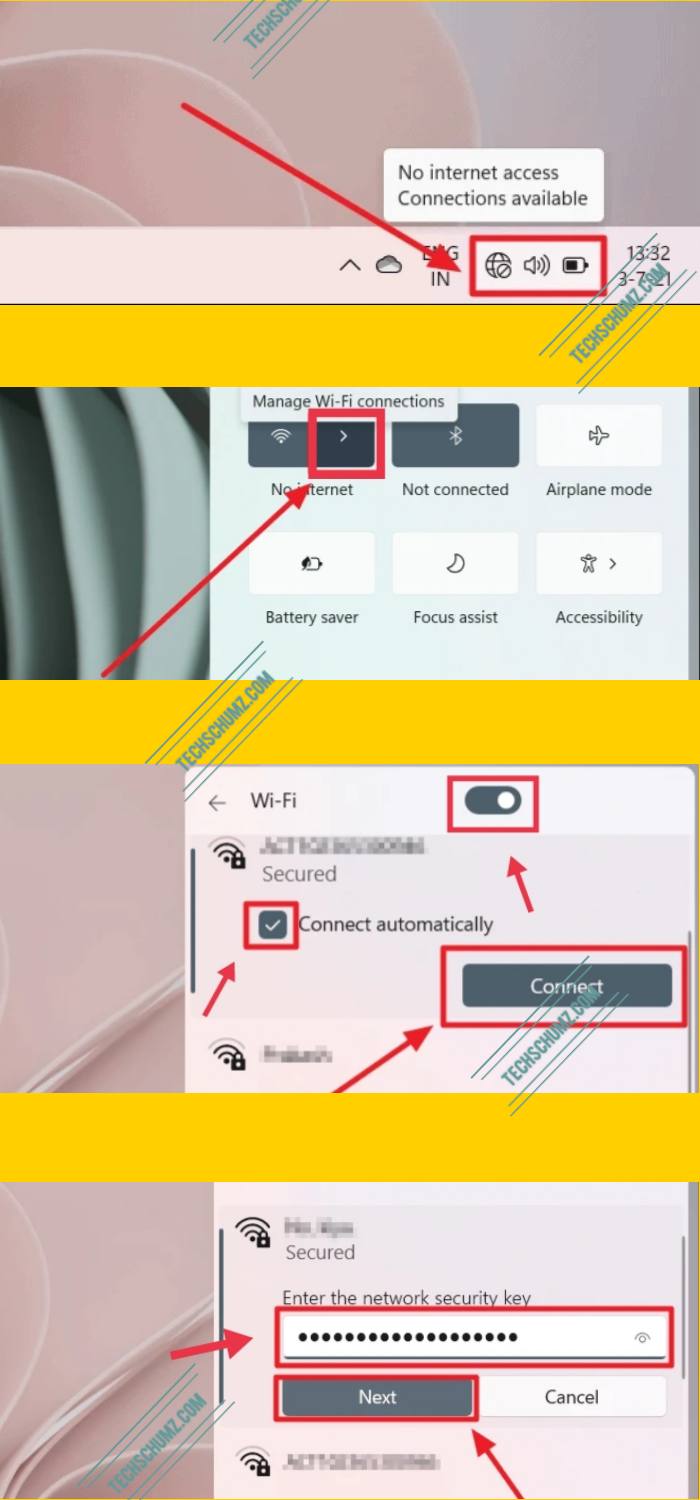
- Tap on the Network icon on the taskbar corner, and click on the right angle bracket symbol (>) beside the Wi-Fi icon in the pop-up box
- Next, click on the WiFi network you want to connect to, then tap the on Connect button.
- Then enter the password of the selected WiFi (If asked) and click on the Next option.
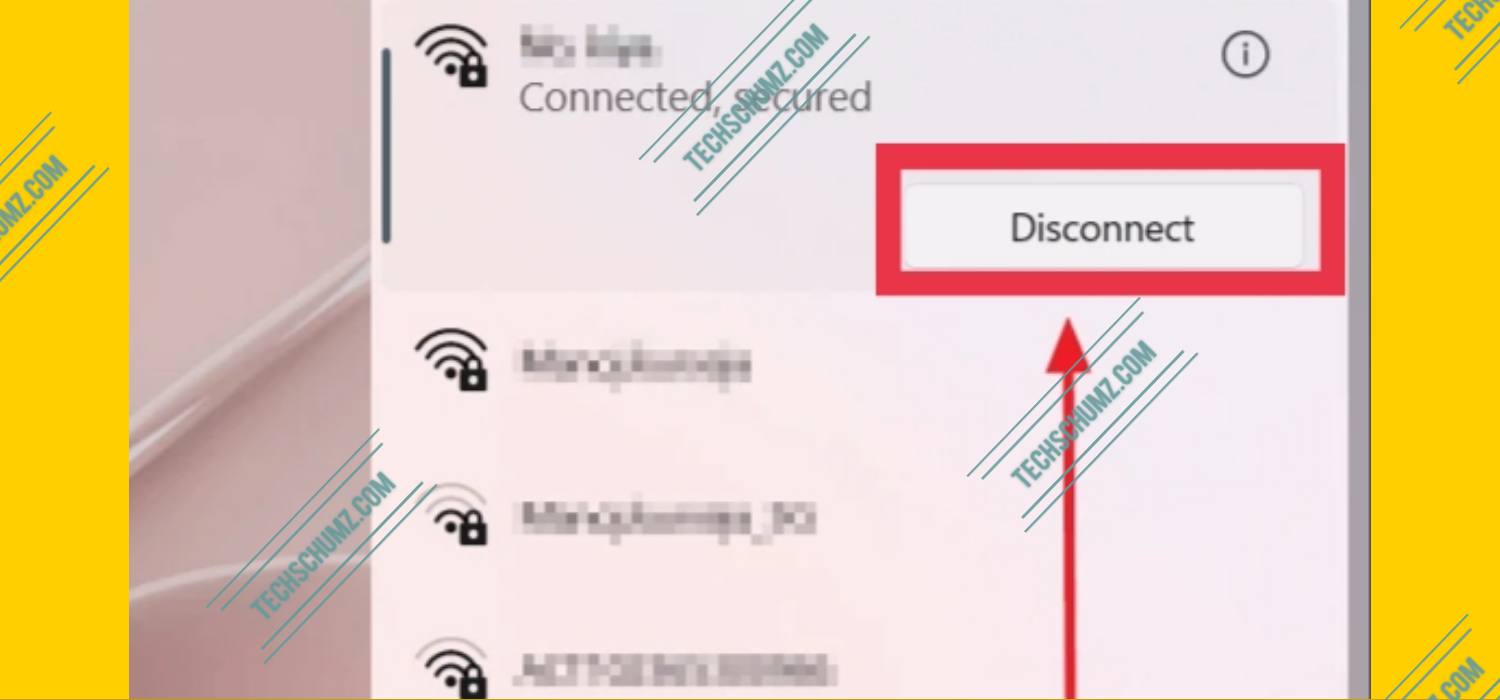
- Now, if you have entered the WiFi password correctly, then you will see a ‘Connected, secure’ status under the WiFi network.

Note: If you want to disconnect WiFi from your Windows 11 PC or laptop, tap on the WiFi icon on the Taskbar, select the connected WiFi and simply click on the Disconnect button.

2. Connect a Windows 11 Computer to WiFi using Command Prompt
The second option for you is to use Command Prompt to connect your Windows 11 computer to a WiFi connection. This is it can be done:
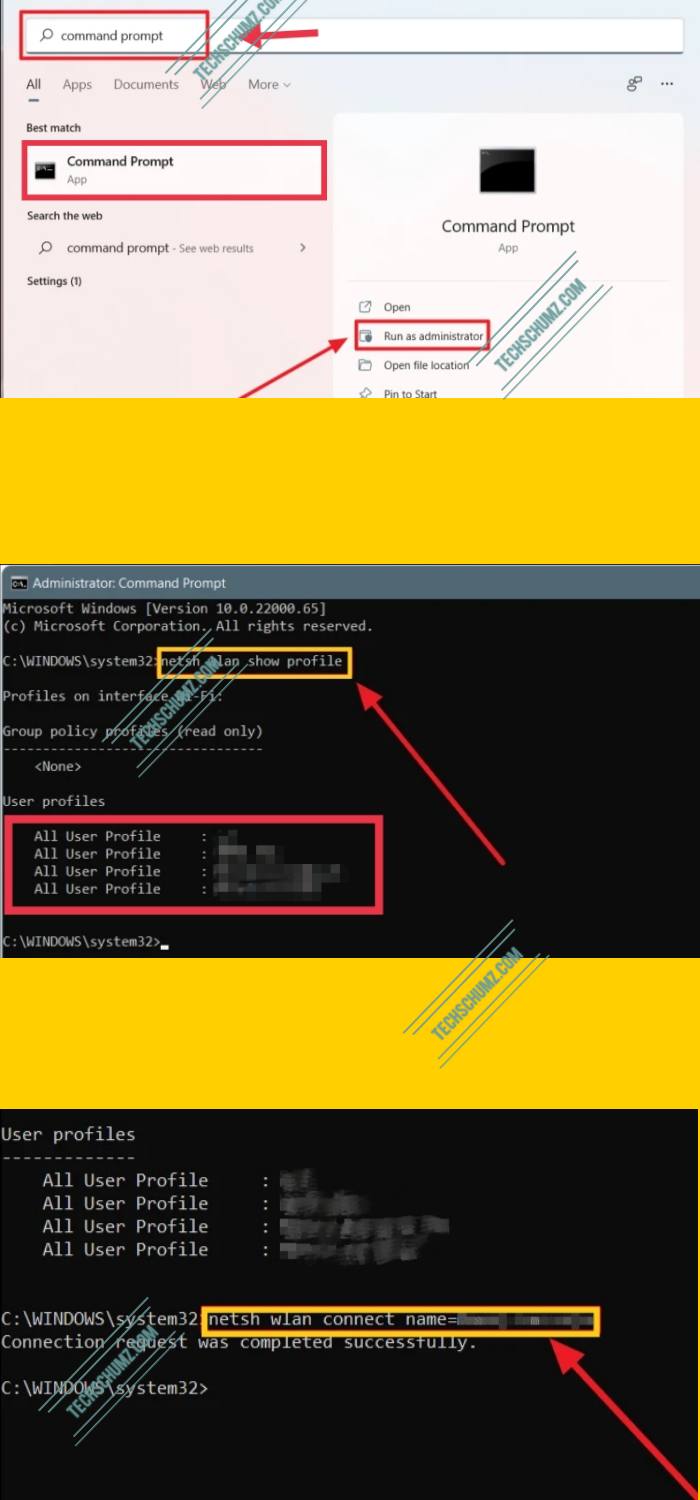
- Open Command Prompt by searching for ‘cmd’ or ‘command prompt’ in the Start Menu.
- Next, tap on the cmd icon and select ‘Run as Administrator’ below the app name on the right.
- Then, click on the ‘Yes’ button in the prompt asking for your permission to make changes to your system.
- Now, copy and paste the command below and then press Enter to see the available WiFi networks.
- netsh wlan show profiles
- Finally, type the User Profile name of that particular network after ‘name=’ in the following command.
- netsh wlan connect name=<user profile name>

That’s it!
Final Words
That’s it! These are two quick ways that you can use to connect to WiFi on Windows 11 PC or laptop. You can use any of the above methods to enjoy the internet on your computer. I hope this guide will help you and please do write your questions in the comments section below if you encounter any. Good Luck! Enjoy Windows 11!
Read also:
