This Techschumz article will discuss how to create a contact group on iPhone (iOS 16)
A group message on an iPhone would take time because each member would have to receive the news individually from the iPhone. On the other hand, you can do this by creating a group of contacts on your iPhone and sending them. There was no way to form groups on the iPhone before this; you had to use a computer or a mac to accomplish this. However, Apple recently released iOS 16, which has several new features, one of which is the ability to create contact groups.
The use of contact groups saves time by eliminating the need to enter the contact information for each recipient manually. After it has been created, all that is required of you is to key in the name of the contact group and then add all their names and relevant information. You can group your contacts. You could, for example, create a group called “work,” “GYM,” or “family” and put all of your work contacts in it. Continue reading until the end to find out how to create a contact group on iPhone (11, 12, and 13), which runs iOS 16.
Table of Contents
Create a Contact Group on iPhone (iOS 16)
To make a new Contacts group on iPhone (11, 12, and 13) running iOS 16, follow the instructions below.
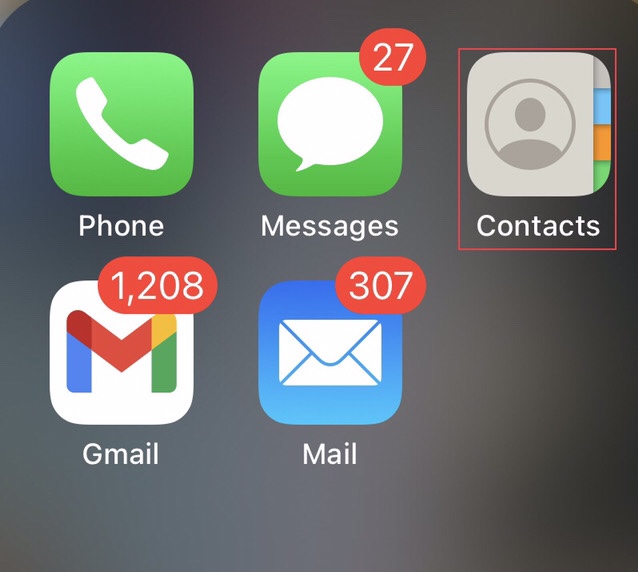
Step 1. Go to the “Contacts” app on your iOS device first.
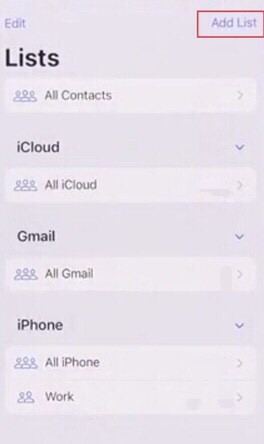
Step 2. Then tap on the “Add List” option on the right corner of the contacts menu.
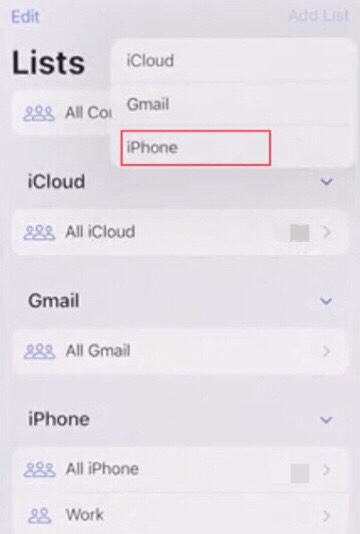
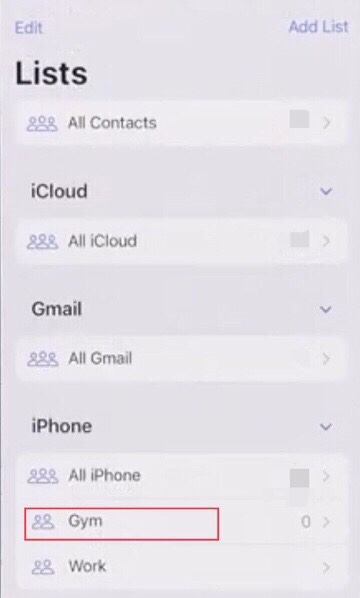
Step 3. Now select the “iPhone” from the provided options.
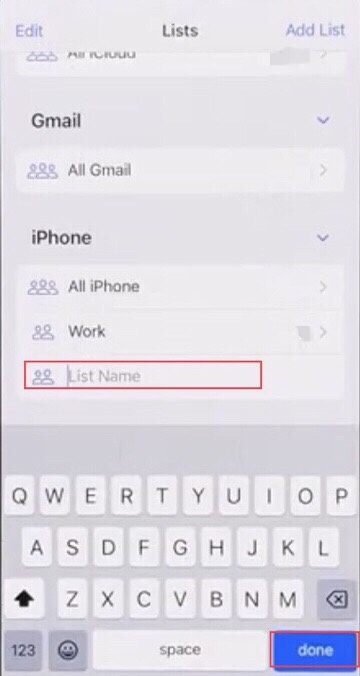
Step 4. Now “Add” a name for your contact group.
Step 5. After that, tap on the “Group” you created earlier
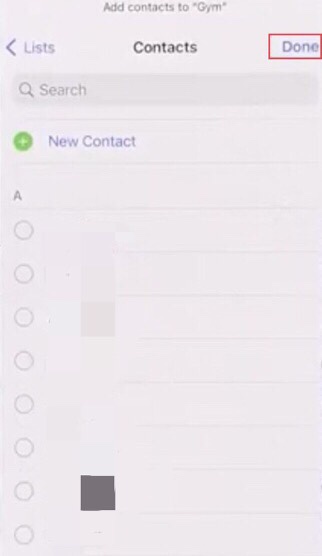
Step 6. To add the contacts to the group, tap on the “Add contacts.”

Step 7. Now select the contacts you want in your group and then tap on the “Done” button.
Step 8. Now you see the group is created; you directly send a message once to all the contacts in the group.

That’s it; you have created a group of contacts on your iPhone without using iCloud.
Final Words
As a result of reading this article, you are now aware of how to create a contact group on your iOS 16 device. This contact group will allow you to text your contacts more quickly while keeping your communications organized. Please leave your feedback and questions in the section provided below.
Read also:
WELL AND GOOD BUT i do not want to call all just1I created a group “doctor_medical”–5 ENTRIES How do I call just 1