Pairing AirPods, AirPods Pro and AirPods Max with a Windows PC may not be as simple as pairing with an iOS device, but it is only slightly more difficult. However, you can connect the AirPods via Bluetooth. In this guide, we will show you how to pair and connect AirPods to a Windows 11 PC or laptop by just following some straightforward steps.
Meanwhile, remember that the Apple products, AirPods and AirPod Pros will lose some functions with Windows 11. They are great for listening to the audio files but not as good as the microphone quality you get on iOS or macOS. Therefore, although Apple’s AirPods can handle Zoom calls in a pinch, we will avoid them as your primary Windows headset.
Related: How to Connect Galaxy Buds Live to your Windows 10 Computer
Table of Contents
AirPod Features
Apple released two versions of AirPods: the original AirPod (released in 2016) and AirPod 2 (released in 2019). Visually, they look the same, but they have some important differences. The first-generation AirPods used Apple’s original W1 wireless chip, while the AirPods 2 were built around the new H1 wireless chipset, which Apple claims runs at roughly twice that speed.
Both AirPods include an accelerometer to detect gestures, optical sensors to see if they are plugged into your ears, and microphones for calls and Siri.
AirPods are equipped with a charging case with a built-in battery, which can extend the battery life of the headset when the headset is away from the power outlet. The original AirPods charging case was charged via a data cable, and AirPod 2 provides an optional wireless charging case for an additional charge.
If you let the AirPods fully charge in the charging case, the total battery life of the two versions of AirPods is roughly the same, meaning more than 24 hours of listening time. AirPods 2 can provide a slightly longer talk time on a single charge, about 3 hours instead of 2 hours.
Do Apple AirPods Work With Windows 11 PC?
AirPods are designed to work seamlessly with iPhones and other Apple devices, but you can pair and connect AirPods to any Windows 11 PC via Bluetooth. AirPods can remember Windows 11 PCs, iPhones and other devices, so you can switch them at any time.
But before you connect or pair your AirPods with Windows 11 PC, you need to make sure that your PC has the Bluetooth driver updated. Modern computers have Bluetooth, so if you don’t actually use an old PC, your PC will have Bluetooth.
How to Connect AirPods to a Windows 11 PC or laptop
You can easily pair your AirPods with Windows 11 via Windows Settings. Remember that you can connect AirPods, AirPods Pro and AirPods Max with your PC the same way.
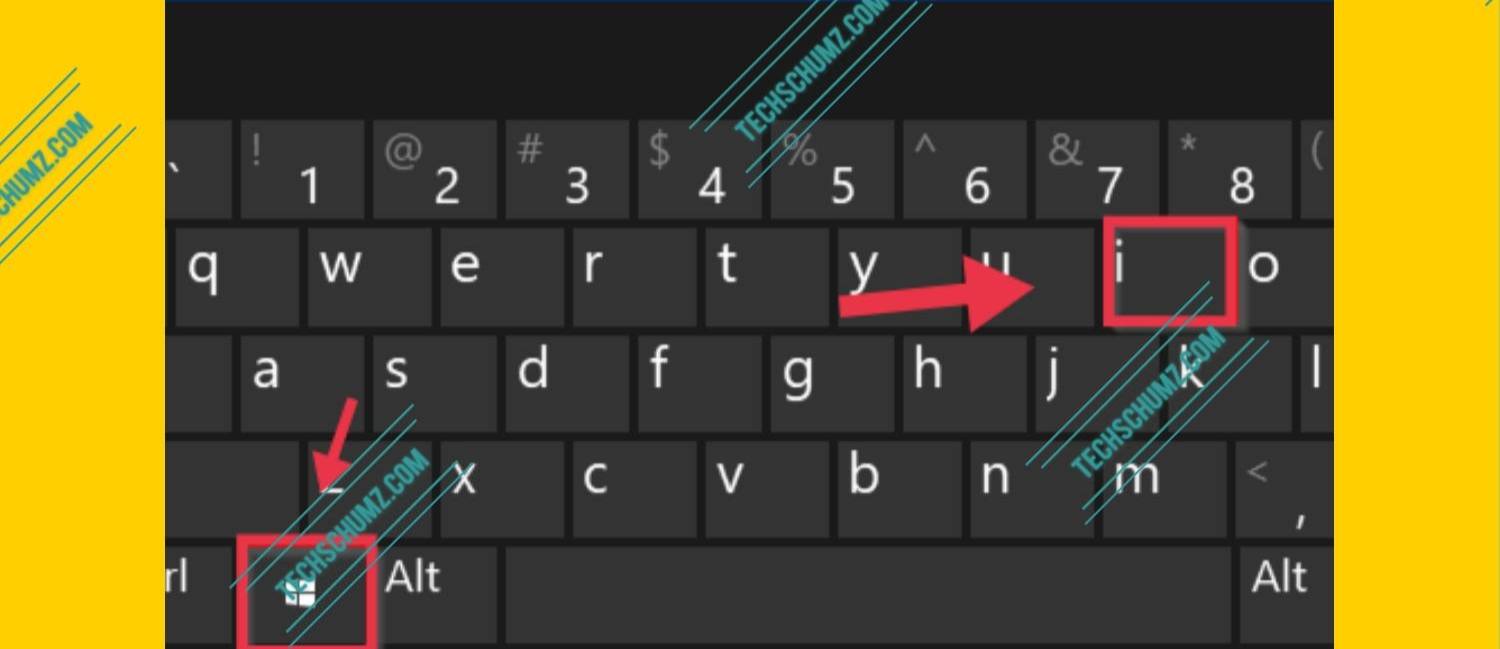
Step 1. Open the Settings app by using the ‘Windows + I‘ shortcut keys.
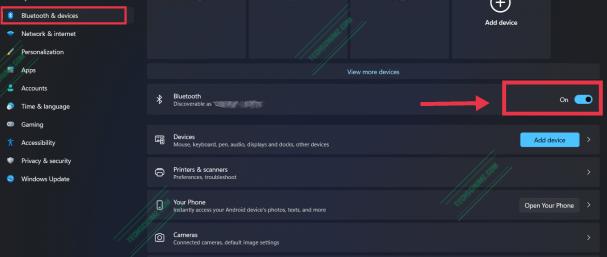
Step 2. On the Windows 11 Settings window, Click ‘Bluetooth & devices‘ on the right pane, and click on the Bluetooth toggle to turn it on.
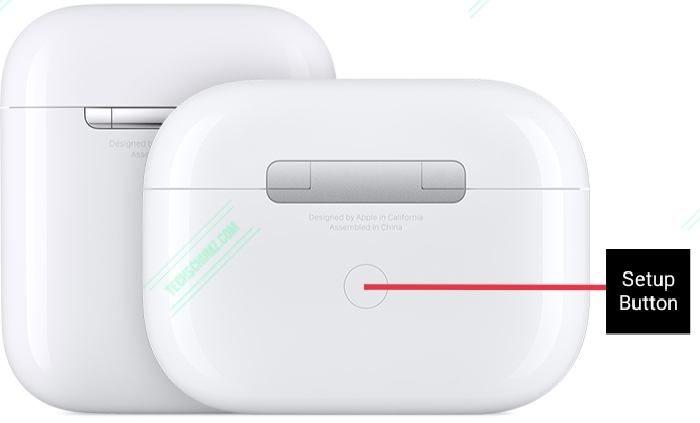
Step 3. After turning on the Bluetooth, you will have to bring your AirPods to the pairing mode. To do this, put your AirPods in the case, open the case and press and hold the button on the AirPods case. Release the button when the case light flashes white.
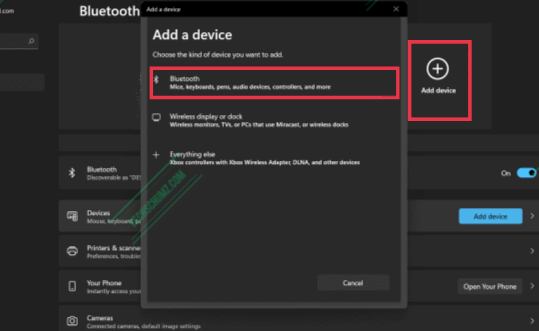
Step 4. Now, click on the ‘Add device‘ option, and click ‘Bluetooth‘ from the three listed options.
Step 5. Now, you need to wait for your Windows 11 PC to search for available devices and then click on your AirPod when it appears in the list.
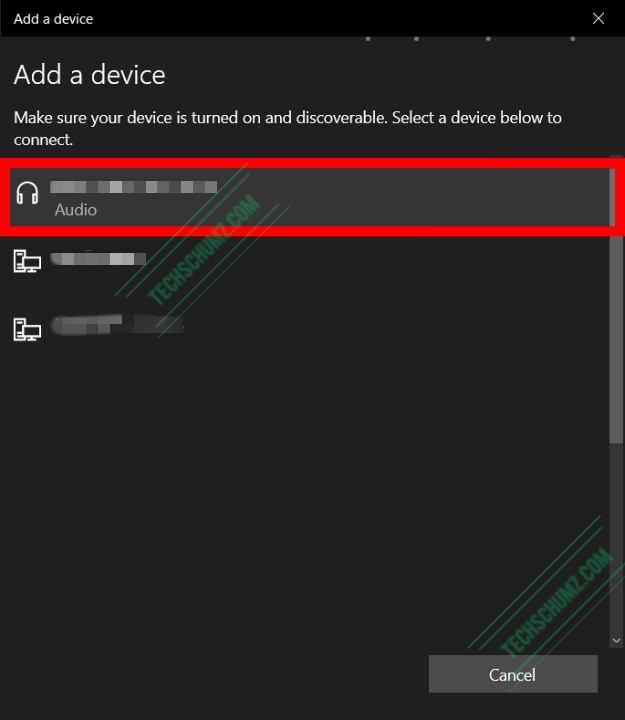
Step 6. Finally, wait for the connection to be established, then click ‘Done‘, and your AirPods are now connected to your Windows 11 computer, and ready to use.
How To Use AirPods With Windows 11 PC
After pairing your AirPod with your PC using the steps above, you can use it to listen to music and do much more with Spotify and other music apps on your PC. To use your AirPods on your PC, simply turn on Bluetooth on your PC by turning on the Bluetooth toggle from the action center at the right corner of the taskbar.
After selecting Bluetooth, open the lid of the AirPods case. Your AirPods will automatically connect to your PC. If it won’t automatically connect to your PC, you can connect it manually. To do this, follow these steps:
- Open Settings by using the ‘Windows + I’ keys.
- Head to the ‘Bluetooth & devices’ section, and click ‘Devices‘.
- Here you will see all the devices paired to your PC. Now select your AirPod and click on the three ellipses right next to your AirPod.
- Then click the ‘Connect‘ option to connect your AirPods and use them on your PC. When connecting AirPods to Windows 11, make sure the lid of the AirPods case is open.
How to Disconnect Your AirPods From a Windows 11 PC
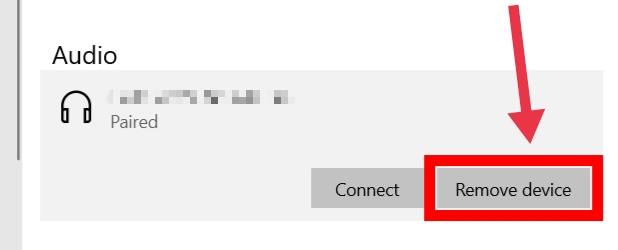
To disconnect or remove your AirPods from your Windows 11 computer, open Settings > Bluetooth & Devices > Devices, then select your AirPods and select Remove device. Finally, click Yes to disconnect your AirPods from your Windows computer.
- Go to the Settings app.
- Next, click ‘Bluetooth & devices‘, and Then click ‘Devices‘.
- Then find and select your AirPods.
- Next, click ‘Remove device‘.
- Finally, click ‘Yes‘ to remove your AirPods from your Windows 11 PC.
Why do AirPods keep disconnecting from Windows 11 PC?
Bluetooth connection is very convenient, but not perfect, which means your AirPods may disconnect from time to time.
A quick way to re-sync AirPods is to put them back in the case and close the lid for a few seconds. When you delete them, they should automatically re-sync with each other and with your PC, but if this does not happen, you may need to manually reconnect via the Bluetooth device menu.
If your AirPods keep disconnecting, it may be due to the number of Bluetooth devices connected to the PC or laptop. If you connect multiple Bluetooth devices at the same time, such as a Bluetooth mouse, keyboard, and your AirPods, the Bluetooth module is likely overwhelmed and unable to provide stable connections for multiple devices at the same time.
A simple fix is to disconnect any Bluetooth devices that are not currently in use and switch to wired (or wireless supporting 2.4GHz) peripherals.
Do AirPods Pro and AirPods Max work on Windows 11?
Yes, just like ordinary AirPods, AirPods Pro and AirPods Max are also working with Windows 11 laptops, and they support transparency and ANC modes.
The AirPods Pro pairing process is almost the same as standard AirPods, but for on-ear AirPods Max, you need to press and hold the noise control button to activate pairing mode.
Conclusion
This is how you pair and connect AirPods to a Windows 11 PC or laptop. The process is simple and your AirPods can easily automatically connect to Windows 11 after that. If they don’t connect automatically, we showed you how to connect your AirPods manually. We hope you find this guide useful. Now, If you have any questions, you can use the comments section below to ask them.
More Windows 11 related articles:

They paired easy enough with windows 11. But, in Windows 10 they showed up as a hands free mono headphone with mic and also as high quality stereo headphones..
In Windows 11 I just get the hands free mono headphone with mic. Windows 11 fails with the ability to play decent stereo sound from my airpod max headphones.
On the plus side the notification did pop up to say, “BT device ‘Airpods Max’ is connected to the ‘Stereo Audio’ service on this computer.”. Also, “BT device ‘AirPods Max’ is connected to the ‘Audio Gateway’ service on this computer.
But, can’t get any stereo music to play. The headphones sound awful!
The sound troubleshooter has no clue what’s going on.
Got any idea how to fix it?
See if the playback device is set to headphones.
Or install Dolby Atmos on your system. That may help you with the sound quality!
How to Install Dolby Atmos on Windows 11