This techschumz article will show you how to change or remove reactions on Facebook stories and posts as well as on Facebook Messenger.
If we want to stay in touch with our loved ones, Facebook is the best platform. Facebook’s stories and posts have reaction options in addition to the news feed and messaging. Facebook’s reaction tool, which allows users to respond to posts and messages with short videos depicting their emotions, is a novel way to share their thoughts and feelings. Responding to a tale with an appropriate emoji conveys one’s feelings without necessitating a verbal exchange.
The reactions to stories appear at the bottom of the screen, and a fast press launches them, so it’s easy to react to the wrong news or posts accidentally. As luck would have it, you may now undo your reactions if you accidentally clicked on the wrong emoji or changed your mind about how you felt about a post or story. Therefore, keep reading this article until the end to learn how to remove the reactions to Facebook stories and posts.
Table of Contents
Remove reactions on Facebook stories and posts
Unreact to Facebook stories
To delete the reaction to a story, follow the instructions below:
Step 1. Open the “Facebook” app on your device and find the story you reacted to, then tap on the three dots icon in the right corner of the story.

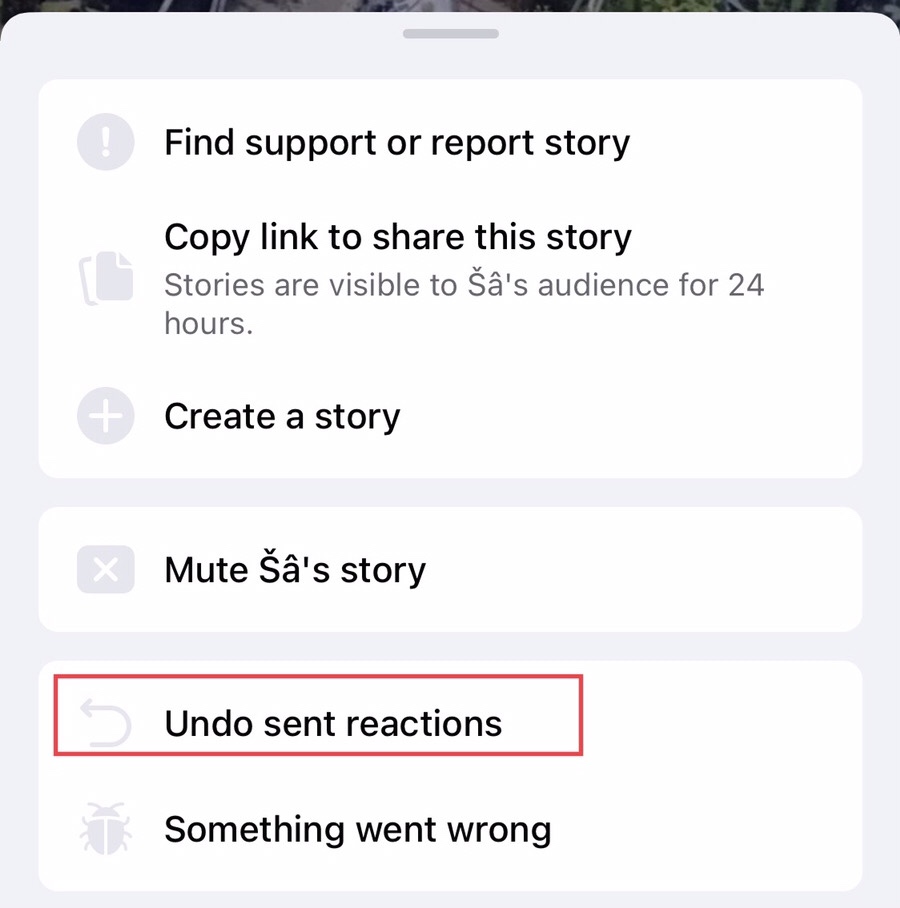
Step 2. Now tap on the “Undo sent reactions” option to remove your reaction to the Facebook story.
Step 3. Now to confirm that you want to unreact to the story, tap on the “Undo” option.
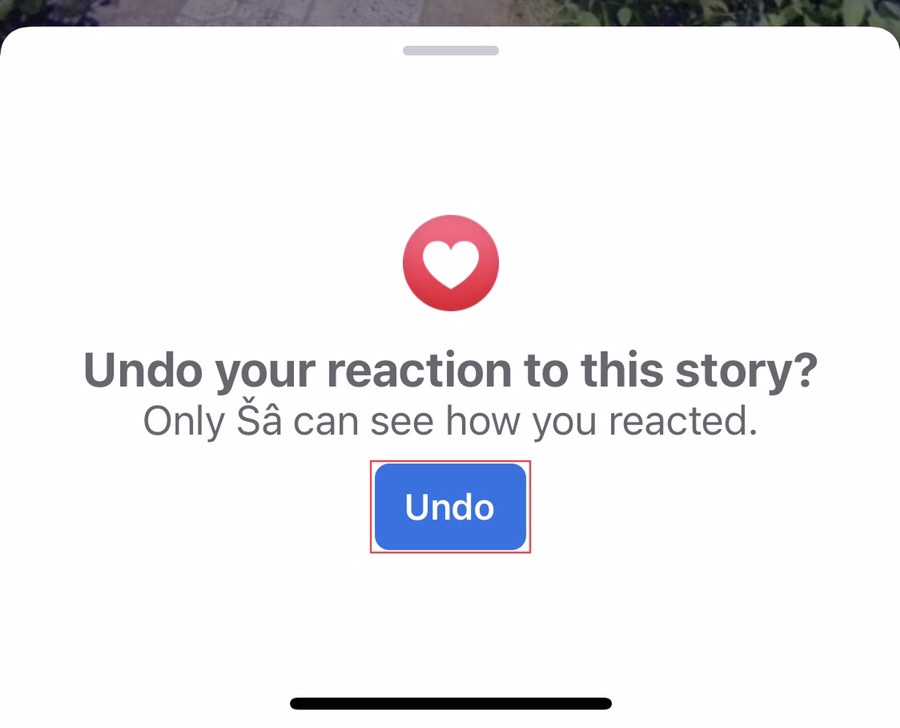
Step 4. That’s it! This will remove the reaction to the Facebook story.

Remove reaction on Facebook post
To remove your reaction to the Facebook post, you need to go through the steps:
Step 1. Now go to your “Profile” on the Facebook app, and tap on the “Three dots” under your profile.

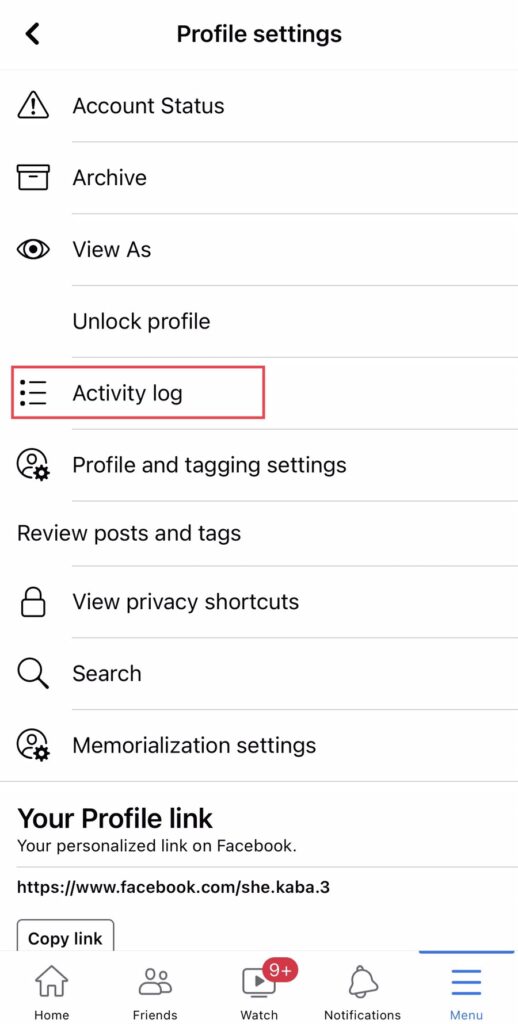
Step 2. In the profile settings, select the “Activity log,” which shows your activity on Facebook.
Step 3. Then select “Manage Interactions” from the “Activity Log” menu.
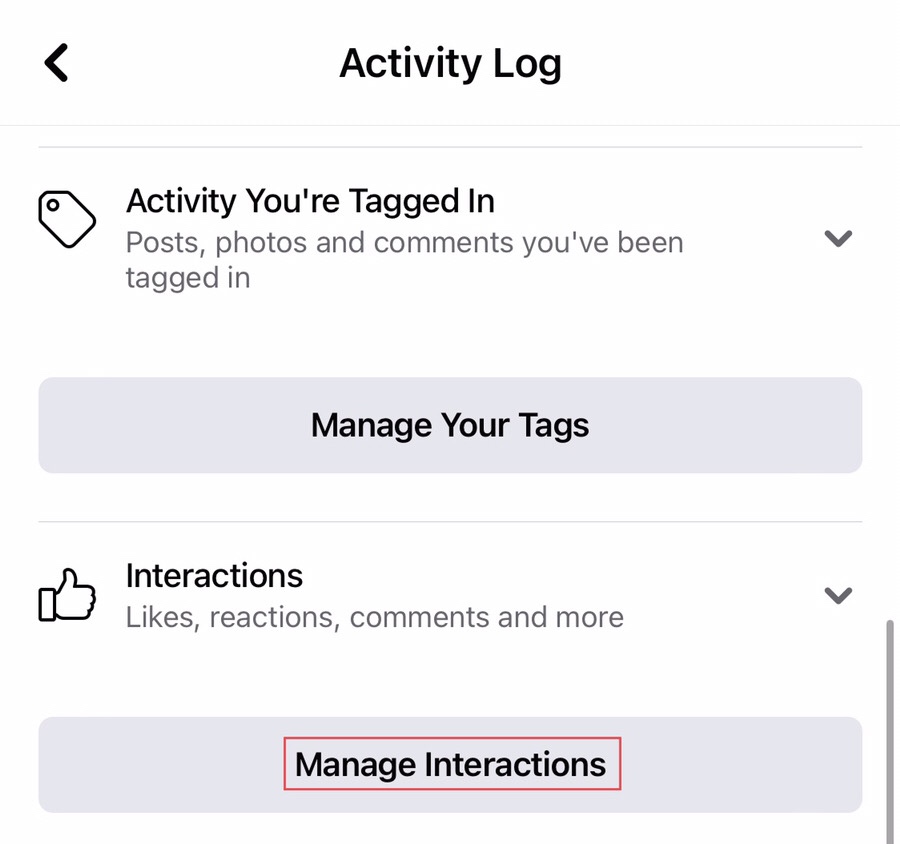
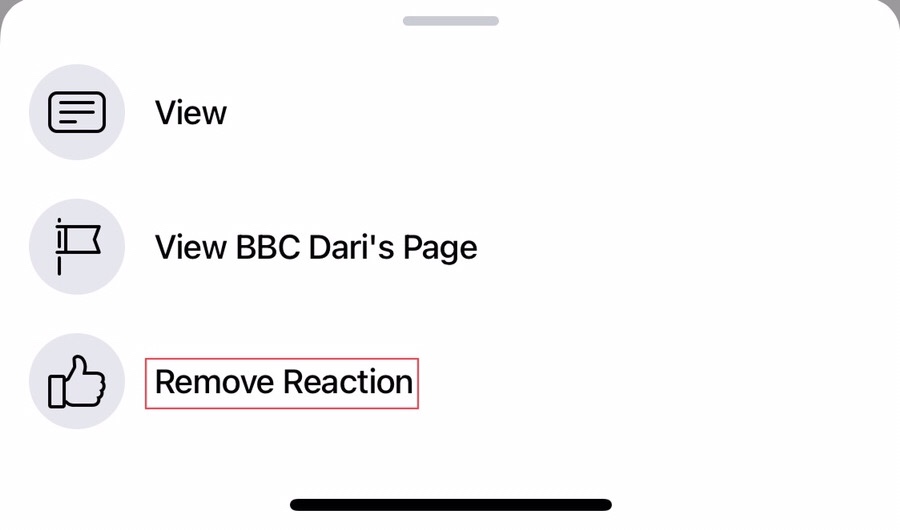
Step 4. Here you see the posts you have reacted to, then tap on the “Three dots” beside the post you want to remove the reaction.

Step 5. Now tap on the “Remove Reaction” to unreact to the post.
How to remove reaction on Messenger story
Because Messenger does not have this feature, it is not possible to delete reactions on Messenger stories. If you want to delete a reaction, you will need to do so through Facebook because Messenger does not support it.
So here you have it, you have removed the unwanted reaction on both Facebook story and post
Final words
As a result of reading this article, you now know how to remove reactions on Facebook stories and posts. This is helpful information because it is sometimes required to remove responses to stories or posts left mistakenly. Now, if you have any inquiries or recommendations for us, please leave them in the comments box down below.
Read also:
