![Remove fingerprints on android [Android 13] How To Remove Saved Fingerprints On Samsung Galaxy Phones](https://techschumz.com/wp-content/uploads/2023/05/Remove-fingerprints-on-android-1024x768.webp)
This Techschumz has outlined the steps to delete the registered fingerprints on your Android 13 devices.
Because someone can access your personal information using your fingerprint while you are asleep, you might want to occasionally remove your fingerprints from your phone to keep it secure. However, your Android phone can still be opened with your voice. Alternatively, if you want to add a new fingerprint while you already have four, you must remove the unnecessary fingerprint from your phone.
Table of Contents
Remove saved fingerprints on Android 13
To add a new fingerprint, you need to remove the saved one, and to do that, follow the following steps.
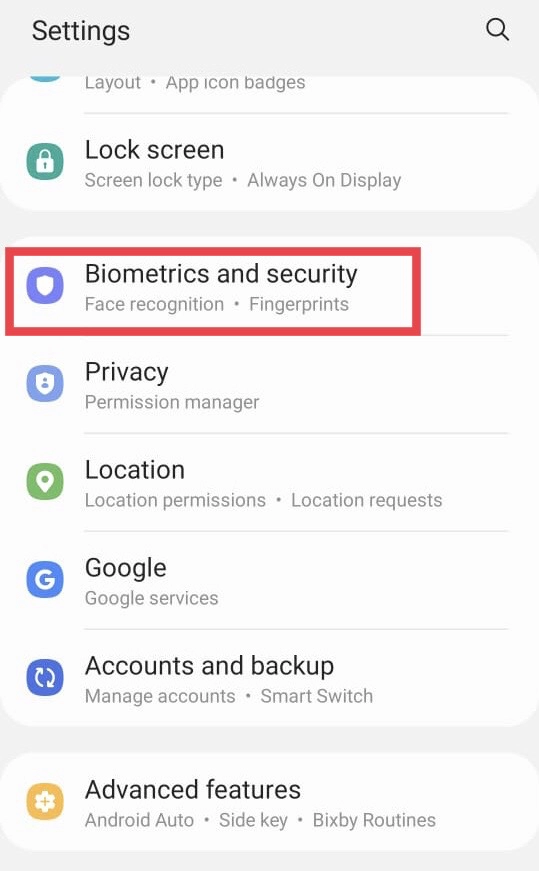
Step 1. Navigate to “Settings” and select “Biometrics and Security.”
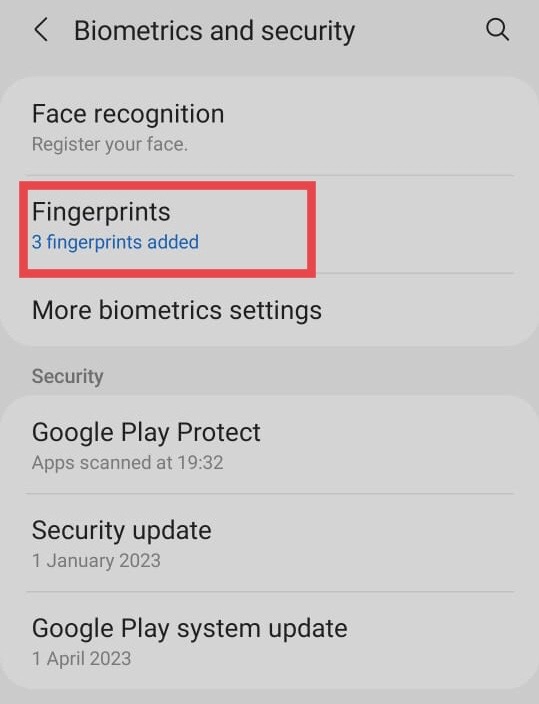
Step 2. Now tap on “Fingerprints.”
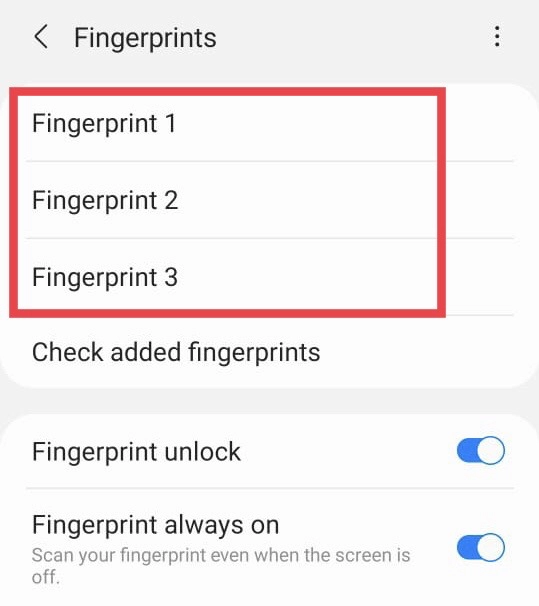
Step 3. Next, select which “Fingerprint” you want to remove.
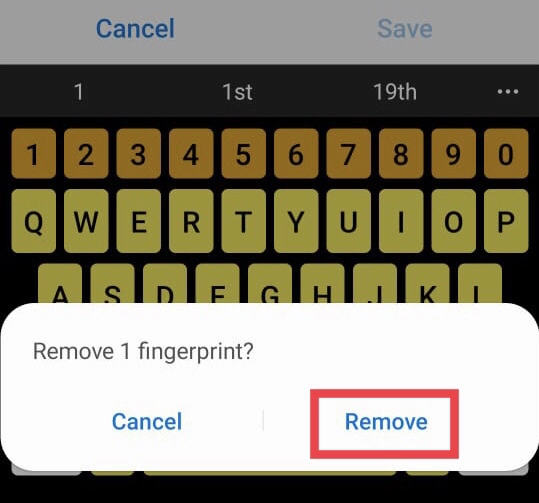
Step 4. After that, tap on the “Remove” button.

Step 5. Finally, select “Remove” for the action confirmation.
You have deleted the saved fingerprint from your Samsung One UI 5.1 phone.
Final Words
You have removed the registered fingerprints on your Samsung phone in Android 13, so now you can add your new fingerprint. Finally, if you have questions or suggestions, post them in the comments section.
Read also:
How To Move Address/URL Bar To The Bottom In Samsung Internet
How To Control Individual App Volume On Samsung Galaxy Phones