Is your computer’s mouse acting strangely? Do you want to reset your mouse’s settings to their default? If so, then this tutorial is for you. This Techschumz tutorial will show you how to reset mouse settings to default on Windows 11 when you don’t like an option you have changed in the mouse properties.
Step 1.
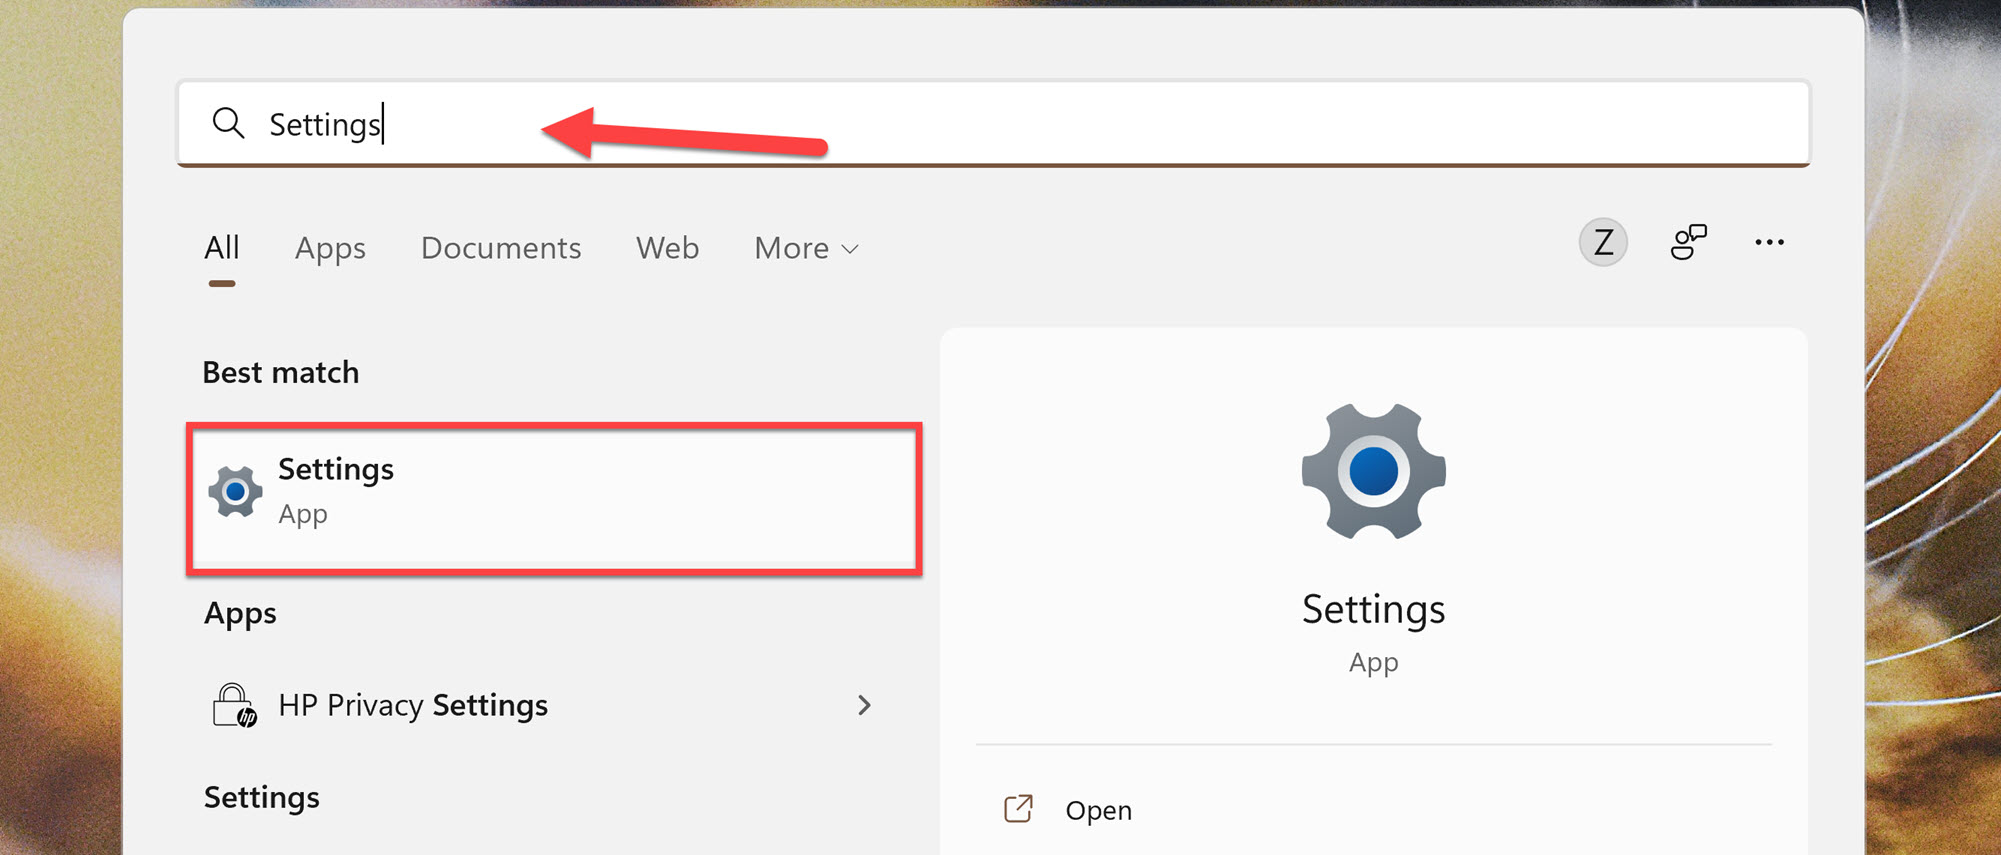
Open the Settings app by searching for it in the Start Menu. Alternatively, you can also open Settings using the “Windows + I” shortcut keys.
Step 2.
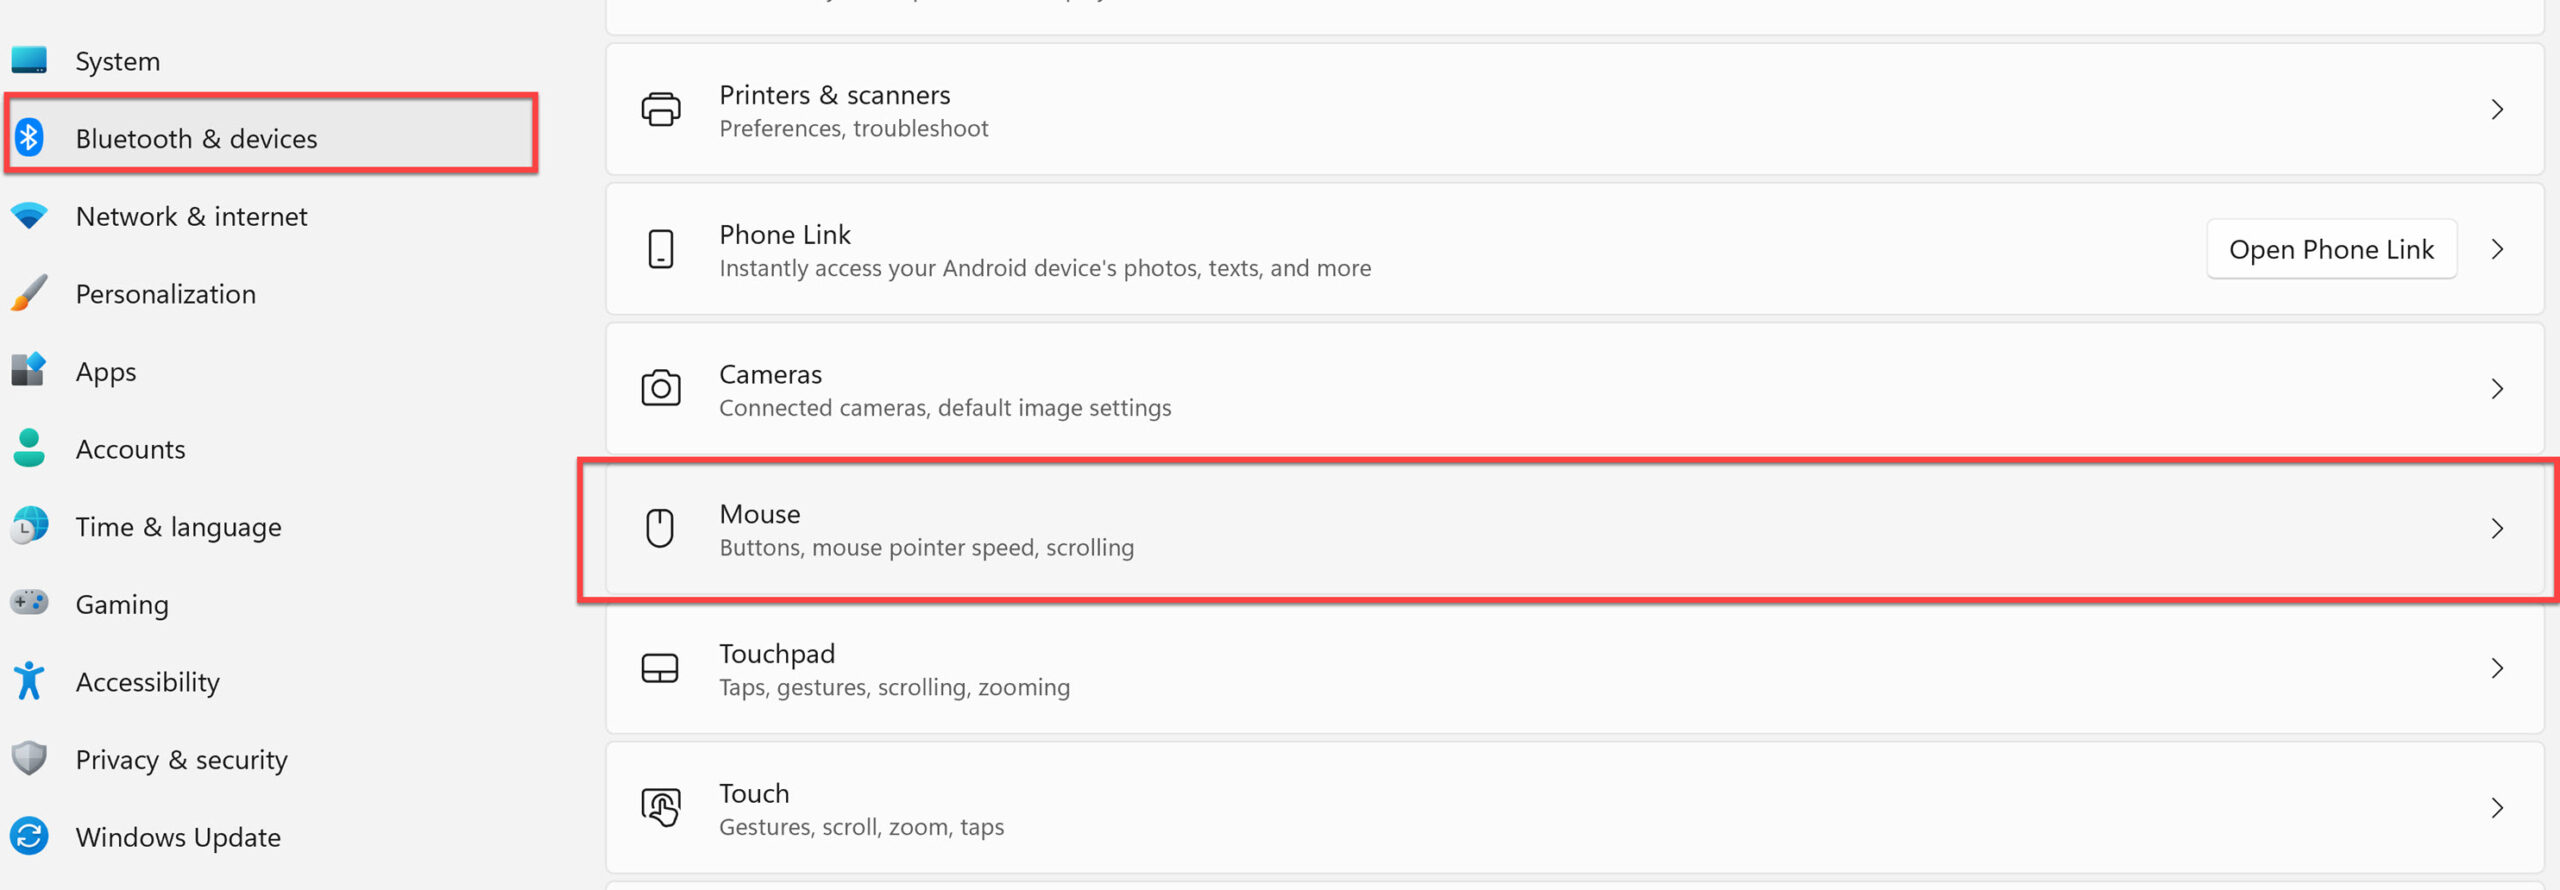
Next, go to “Bluetooth and devices” on the left pane of your screen, and select “Mouse” from the right pane.
Step 3.
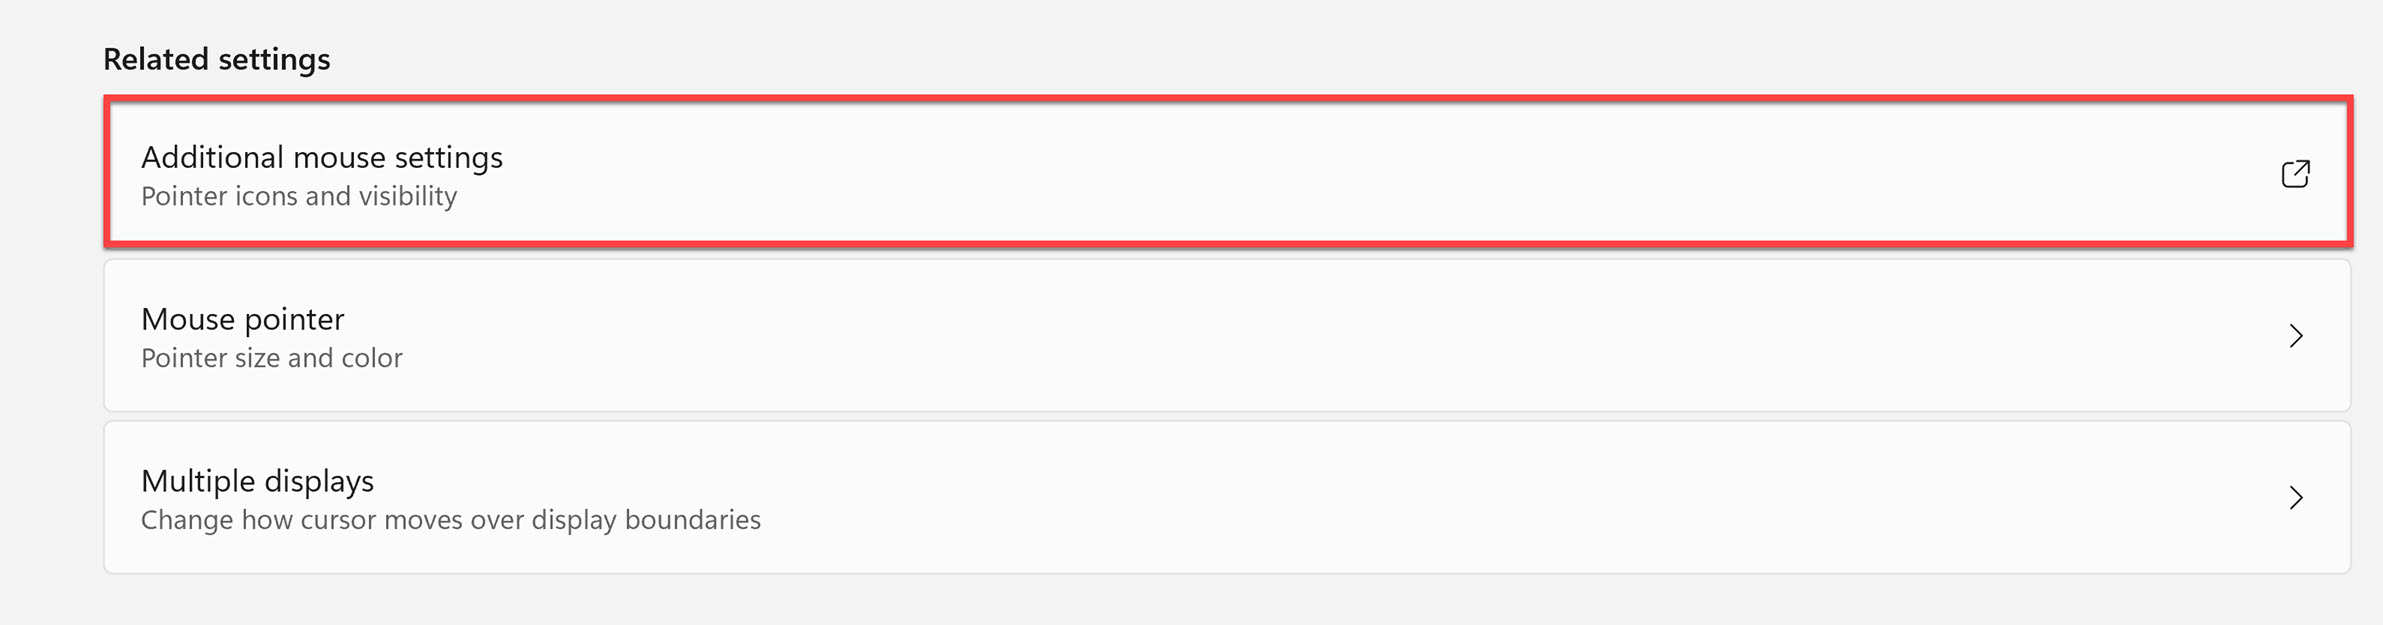
On the Mouse settings page, scroll down and click on the “Additional mouse settings” under Related settings. This will open up a new pop-up window.
Step 4.
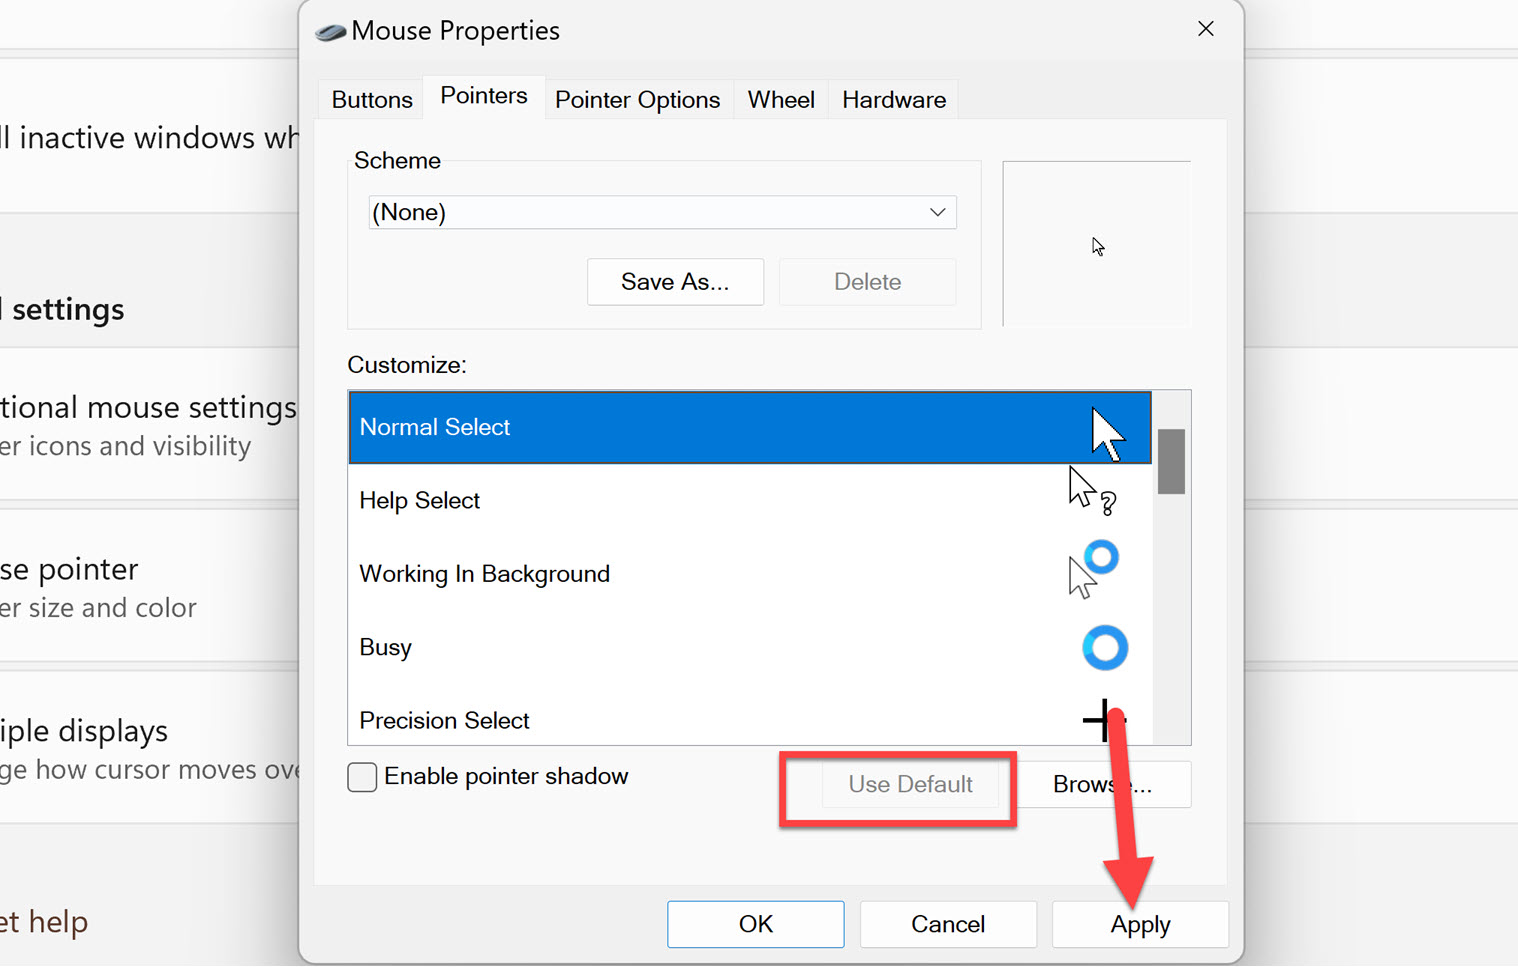
Go to the “Pointers” tab, and click “Use Default” If you’ve changed the appearance of your mouse pointer. Save these changes by clicking the “Apply” button in the bottom right corner.
That’s it! This is how you reset mouse settings to default on windows 11.
Note: In some cases, the mouse settings in Windows 11 keep changing. This problem is caused by a faulty mouse driver. You can revert the driver to a prior version and see if that resolves the issue. A driver rollback will also help you resolve the more common issue of mouse lag in Windows 11.
Read also: