In the Techschumz post, you’ll learn five different ways to take screenshots on iPhone 14 series.
A screenshot is a digital photograph of the information seen on a computer or mobile device screen. As a result, there are occasions when you might want to take a picture of, say, a document, the passwords for your social media and banking accounts, or anything else you don’t want to forget. However, the current models of iPhone mobile phones lack a home button, making screenshots difficult for users of older iPhone models. Fortunately, Apple has introduced many other capabilities that make it possible to take screenshots of just about everything. Learn about the many methods for taking a screenshot by reading this article thoroughly.
Table of Contents
Five ways to take a screenshot on iPhone 14 series in iOS 16
Method 1. Screenshot via Power button and volume up button
This is the easiest way to take a screenshot on an iPhone 14, 14 Pro, or Pro Max. All you need to do is to press the “Power” and “Volume Up” buttons at the same time, and this will capture a screenshot immediately. Once you’ve taken a picture, you can immediately “Share, Edit, Save, or Delete” it by simply pressing the image on your home screen.
Method 2. Capture screenshot on iPhone 14 via Back Tap
Step 1. Open the “Settings” on your iOS device.
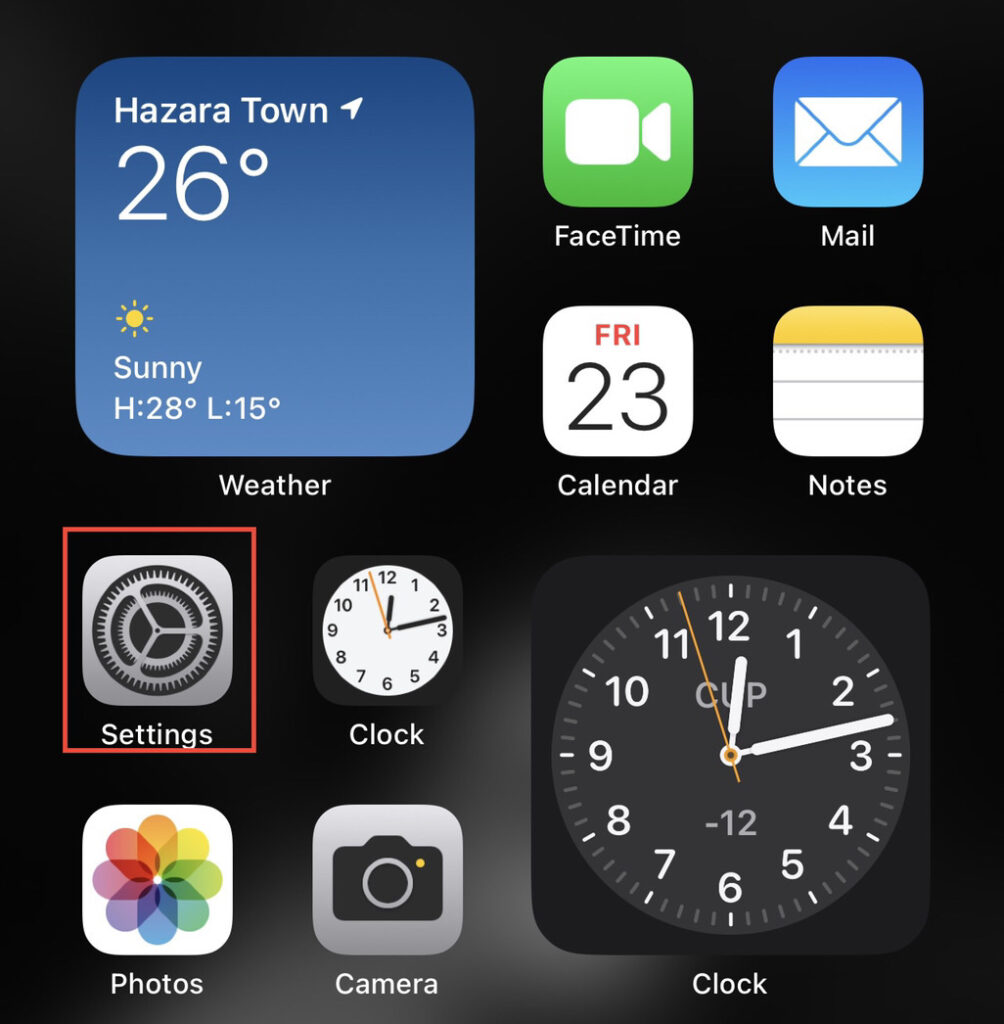
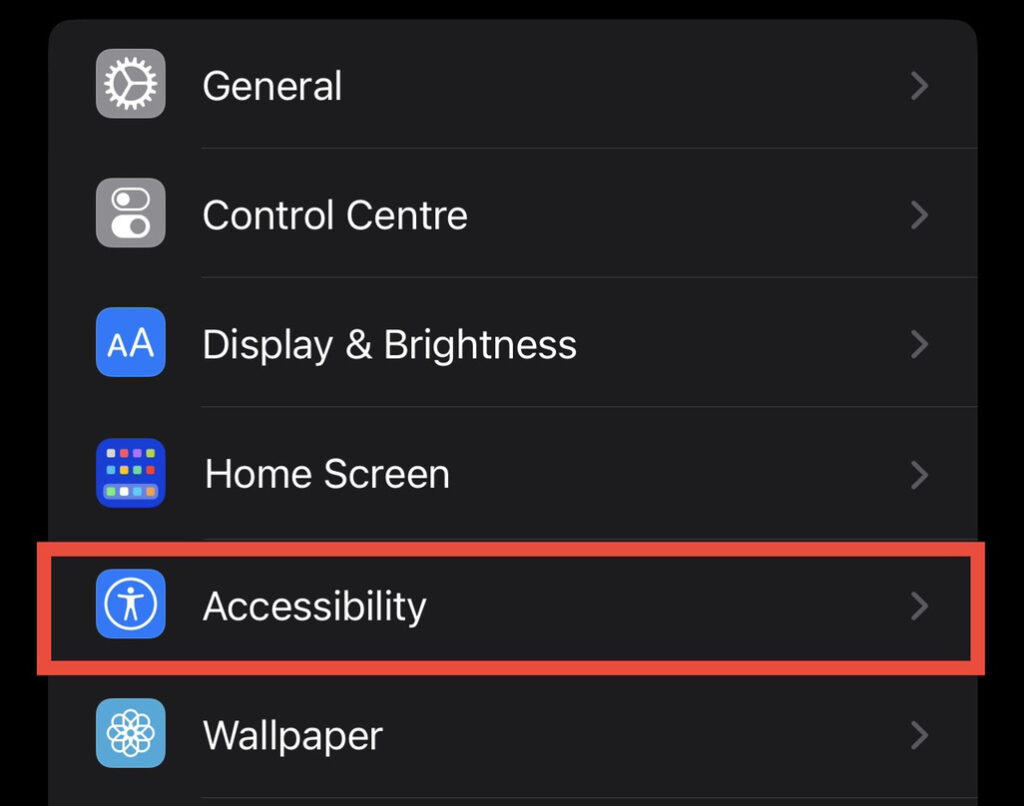
Step 2. Scroll down the settings menu to “Accessibility” and select it.
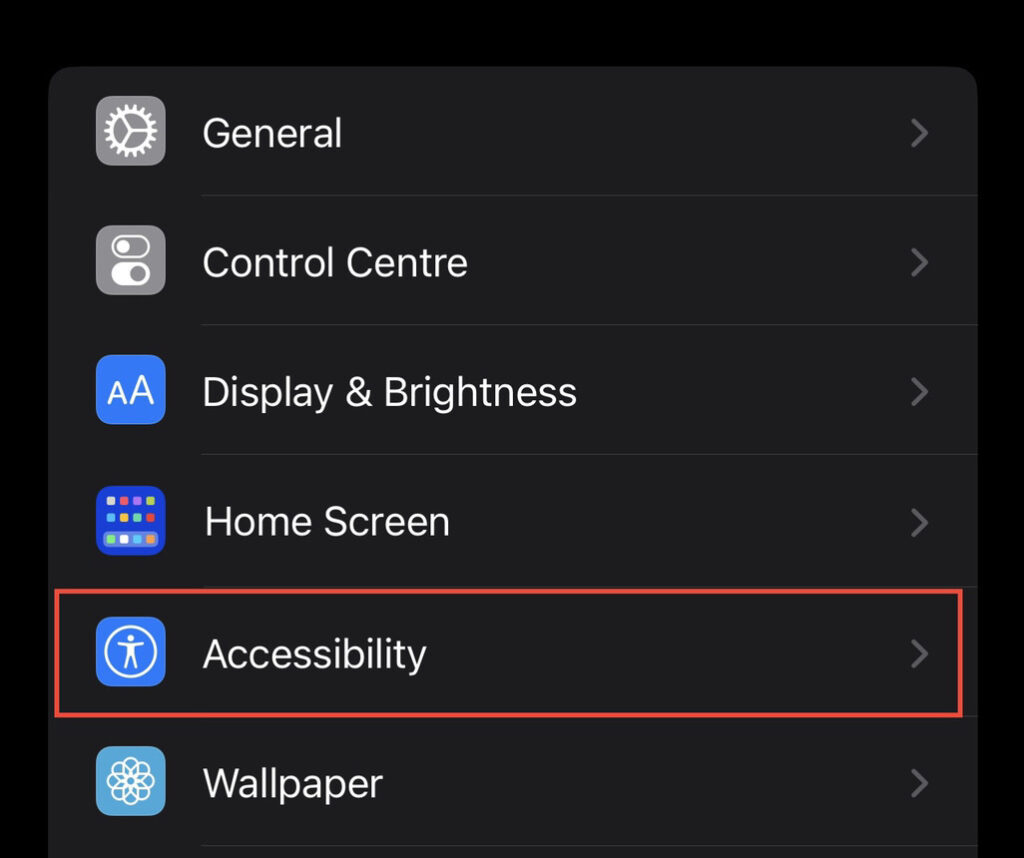
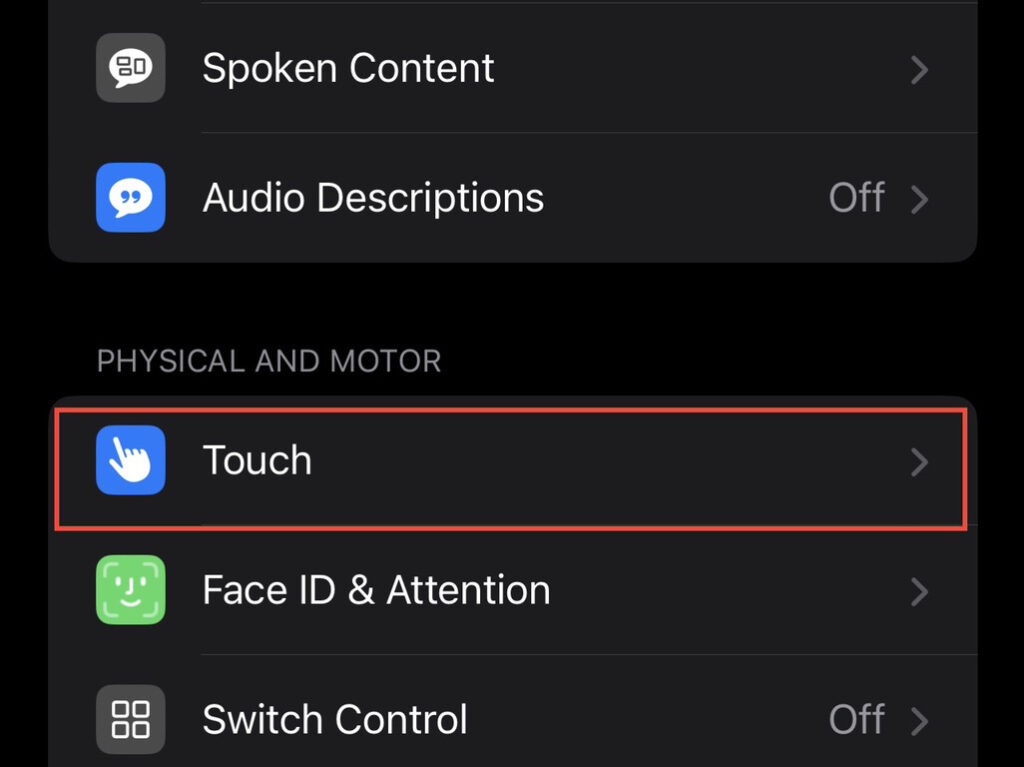
Step 3. Now, tap on the “Touch” option from the accessibility menu to access the touch settings.
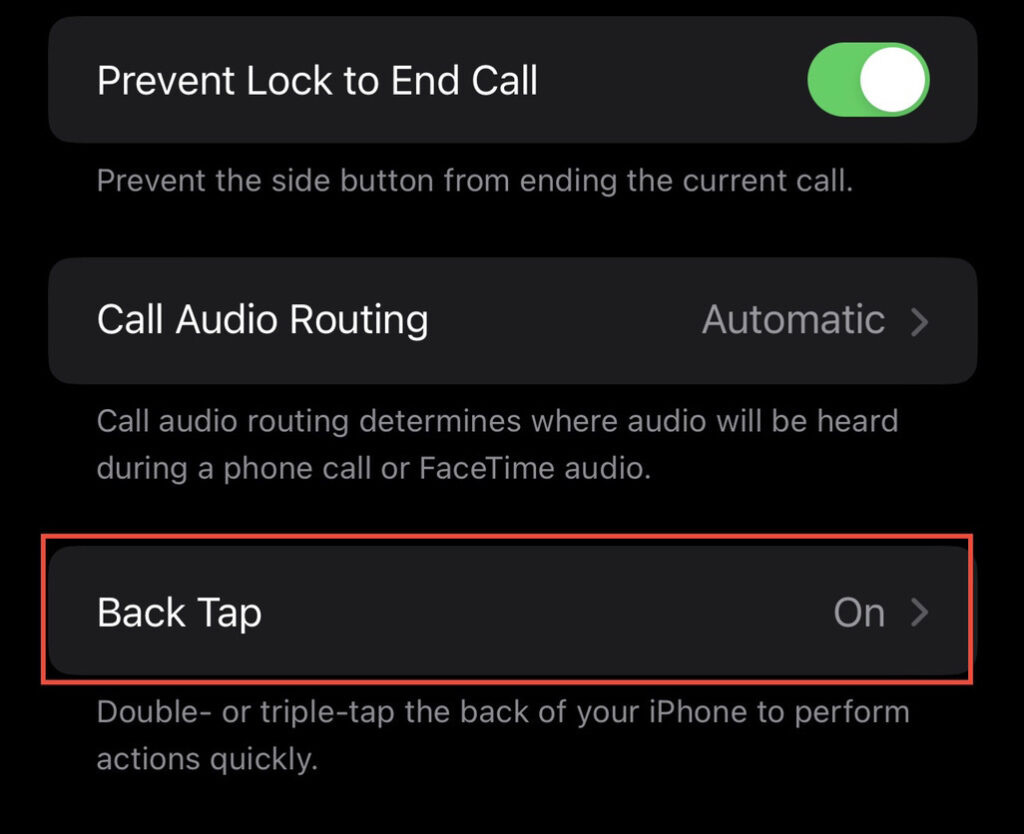
Step 4. Next, select “Back Tap” at the bottom of the touch settings.
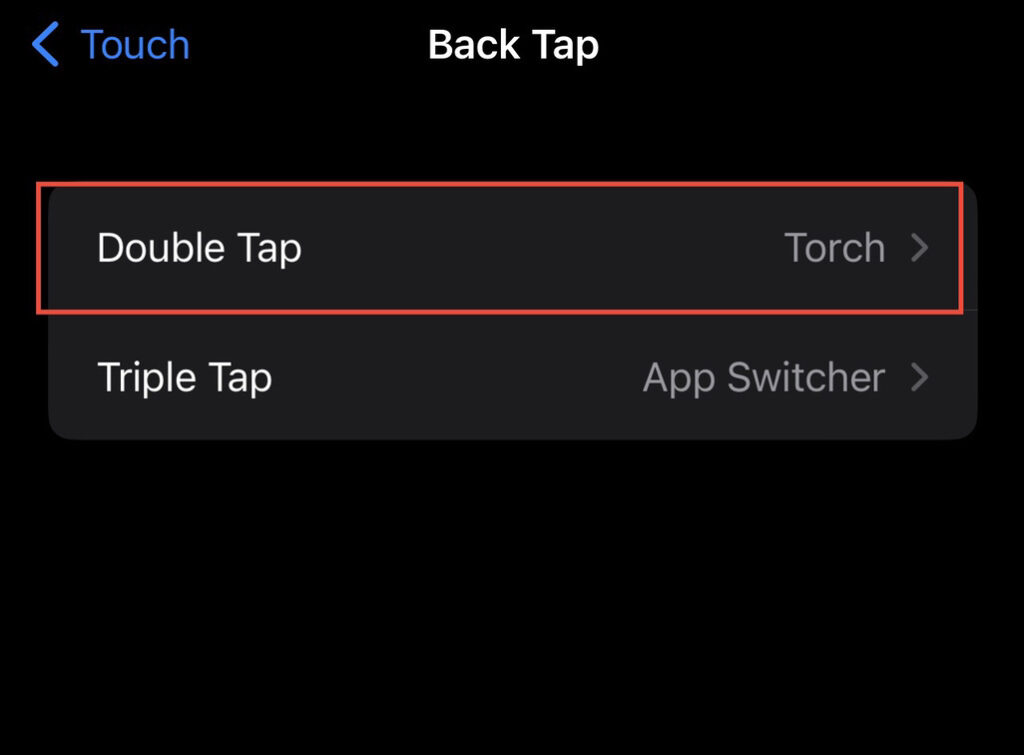
Step 5. Then, tap on “Double Tap” or “Triple Tap” any of the taps which you would like to have for the back tap.
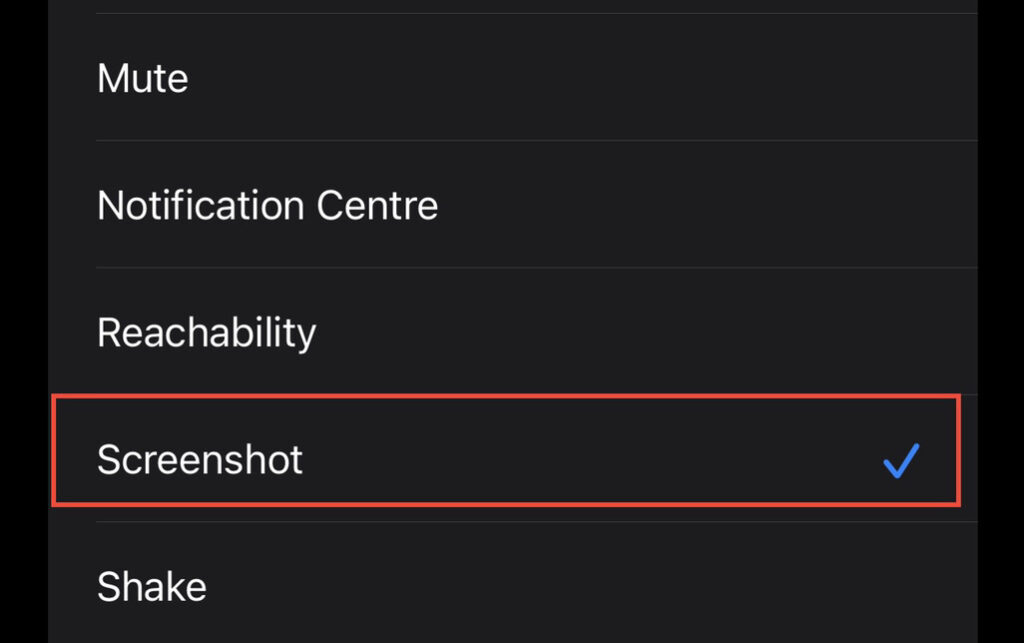
Step 6. Now, select the “Screenshot” option from the options list. That’s it! Now, you can take screenshots by double-tapping on the back of your iPhone 14.
Method 3. Take a Screenshot of your iPhone’s screen via Assistive Touch
AssistiveTouch is a great solution if you’re having problems using your iPhone because of poor finger mobility. With this software button, you can do a number of things, including taking screenshots. To do this, follow the steps below.
Step 1. Launch your iPhone’s “Settings” app and select “Accessibility” from the settings menu.
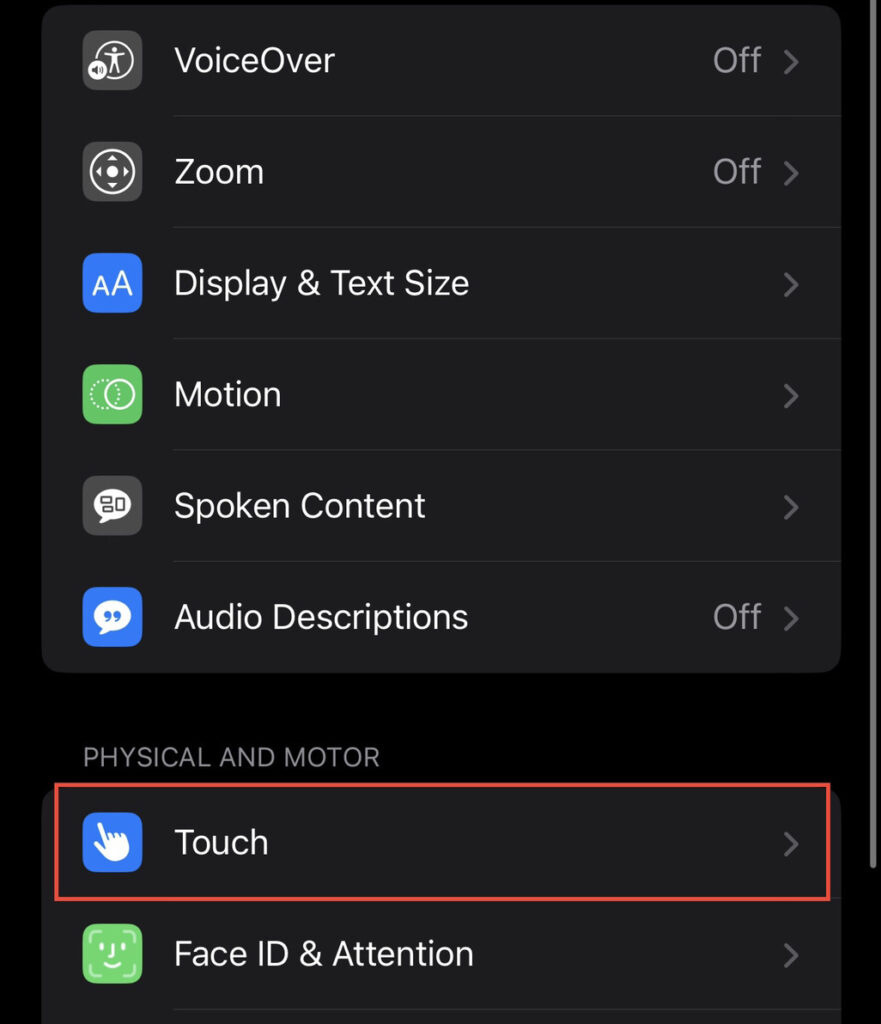
Step 2. Now, tap on “Touch” under the physical and motor section to access the assistive touch.
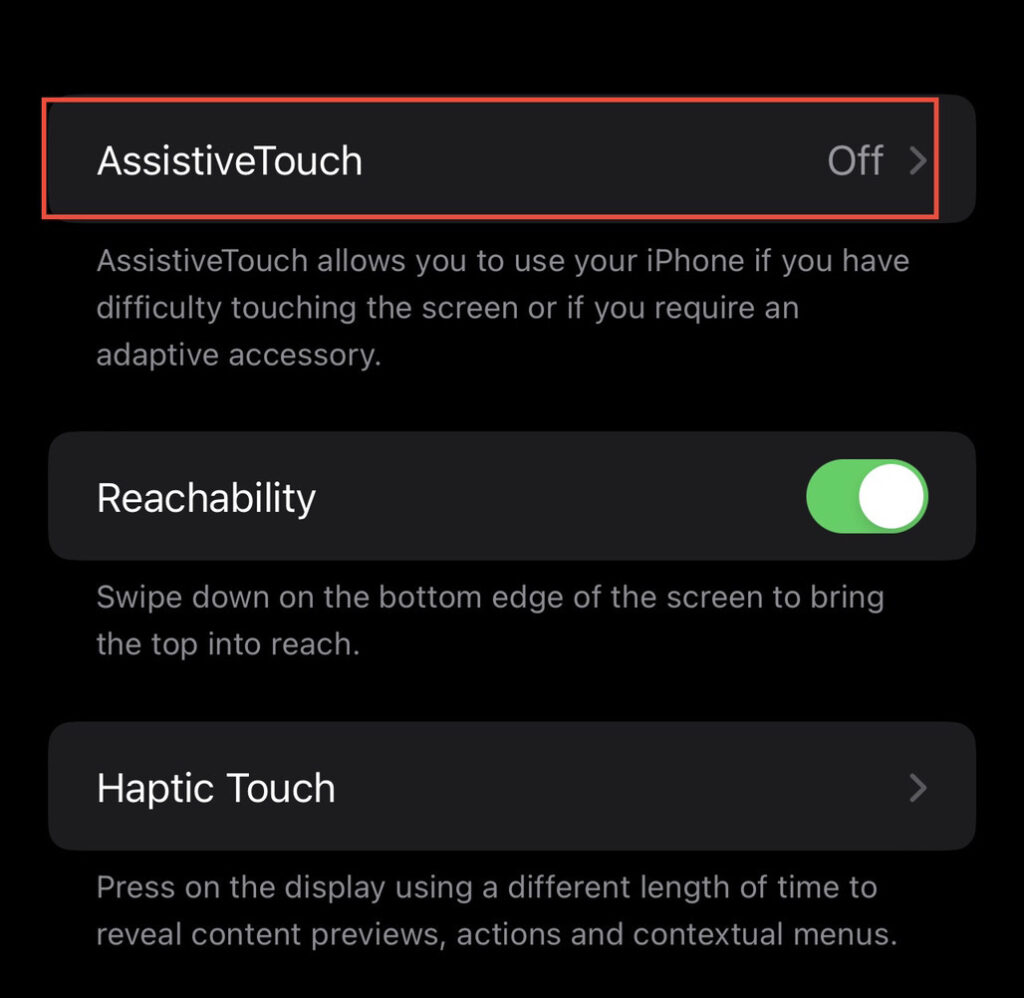
Step 3. Next, you see “Assistive Touch,” which is turned off. Tap on it to continue.
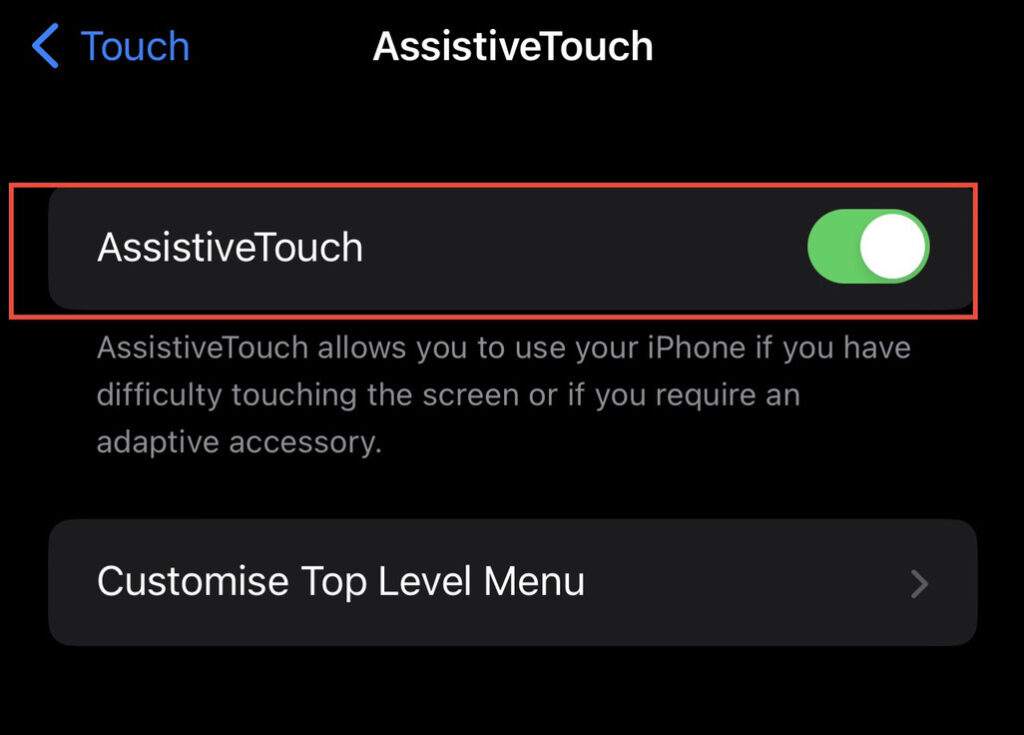
Step 4. Here, enable your iPhone’s “Assistive Touch” function by turning it on. This will show a button on the screen, which will let you take screenshots.
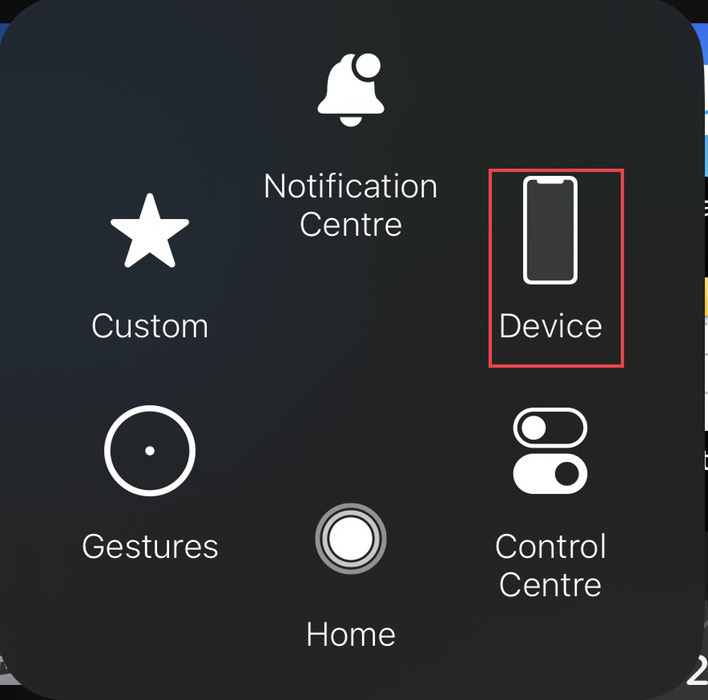
Step 5. Return to your device’s home screen by pressing the “Home” button, and from there, select “Device” to see other options.
Step 6. To continue, select “More.”
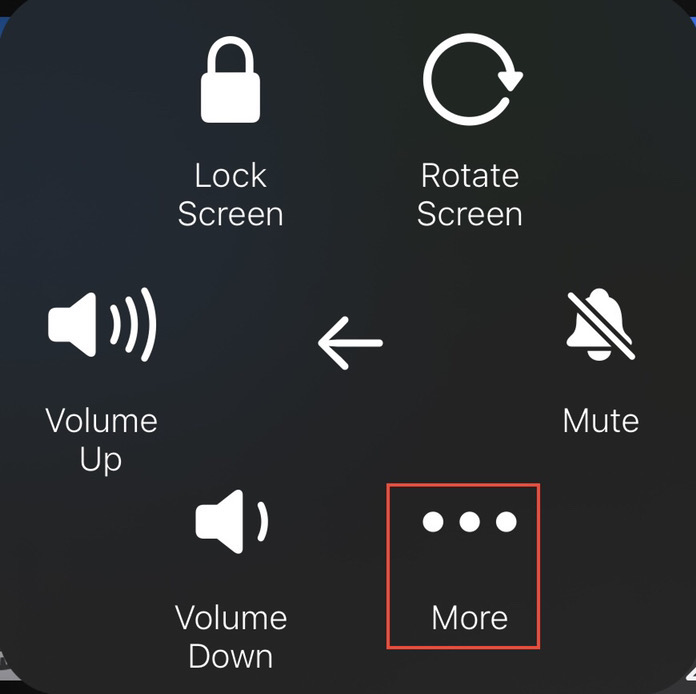
Step 7. Finally, tap on “Screenshot” to capture an image of your iPhone’s screen.
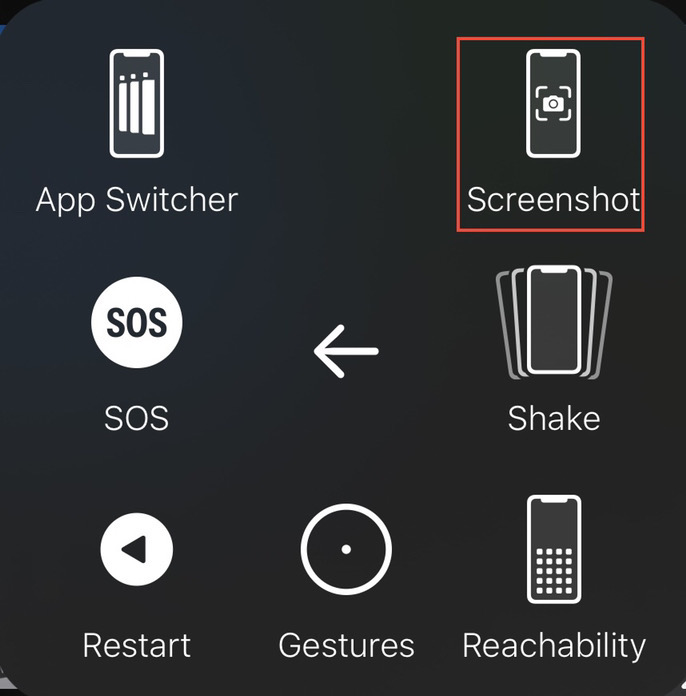
Method 4. Screenshot Via Assistive Touch’s Custome Actions
Step 1. Open the Settings app and navigate to “Accessibility > Touch > Assistive Touch“.
Step 2. You can take a screenshot with three taps using your assistive touch. Select the desired tap operation (from “Single tap,” “Double tap,” and “Long Press”) under the custom actions.
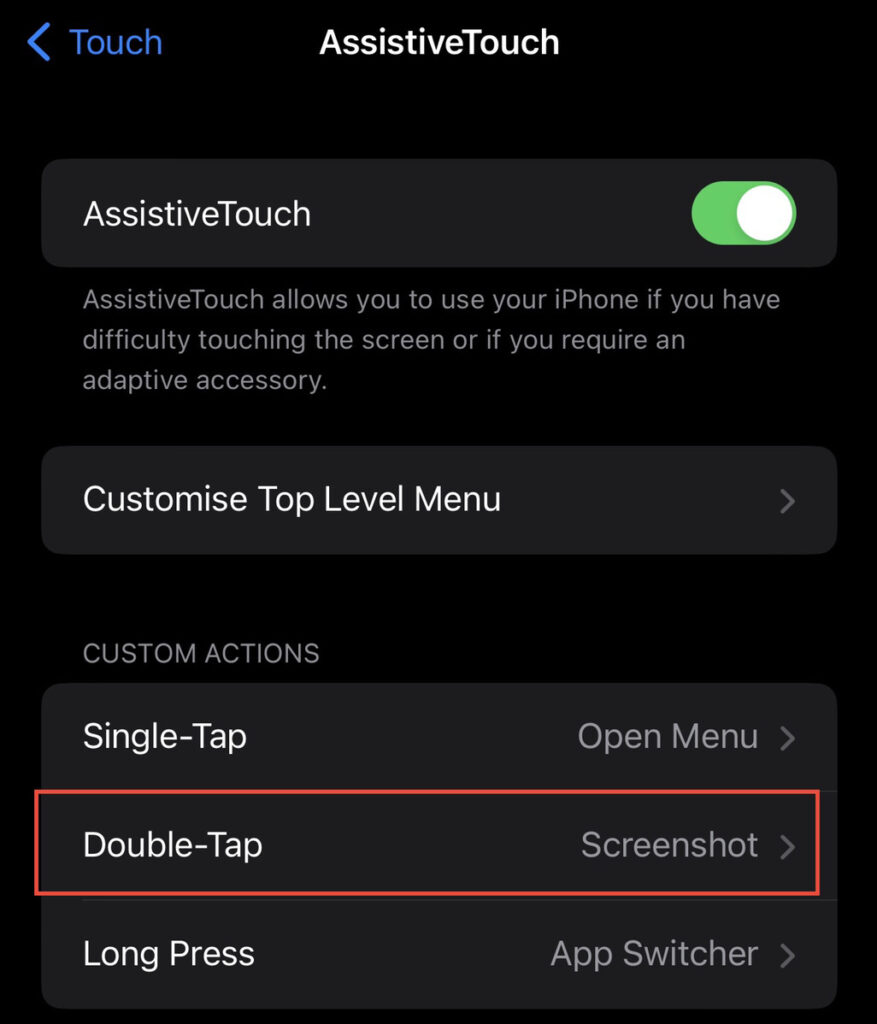
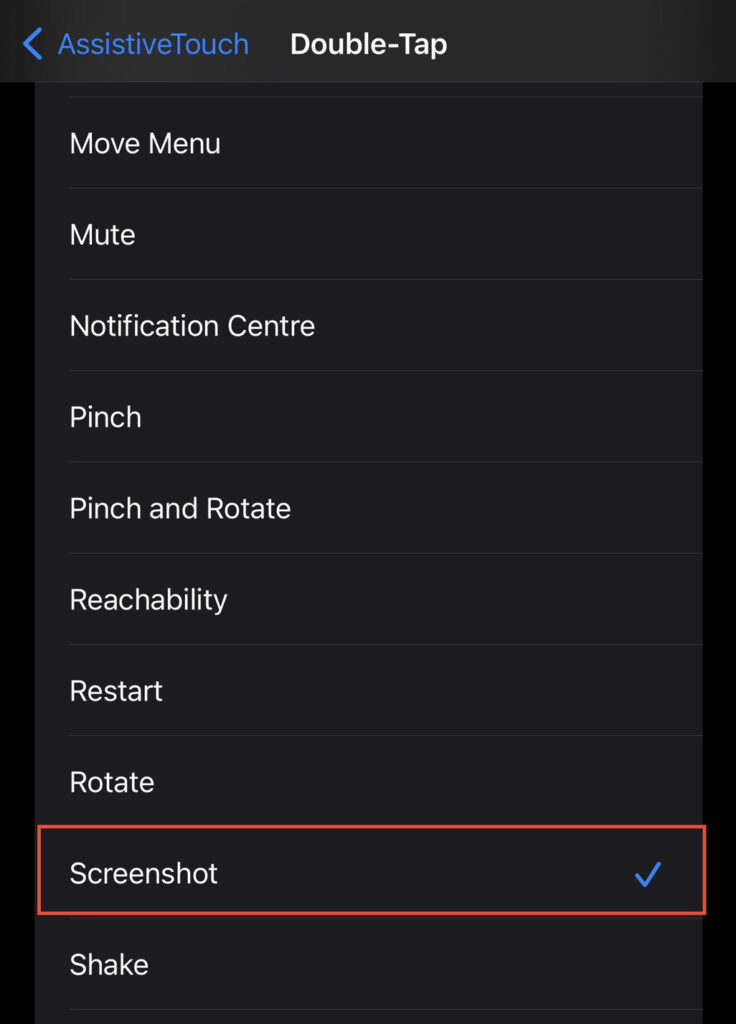
Step 3. Now, add the “Screenshot” action for the “Double Tap” on the Assistive Touch feature. This will let you take a screenshot by double tapping on the AssistiveTouch button.
Method 5. Ask Siri to take a screenshot
Step 1. Enable “Siri” by saying “Hey Siri” on your iPhone. Alternatively, you can click the “Power” button to bring up Siri.
Step 2. Now, simply ask Siri to take a screenshot, and Siri will do it immediately. Here are some examples of the commands:
- Hey Siri, Capture a screenshot
- Hey Siri, Screenshot Please
Final Words
That’s it! These are five easy ways to capture screenshots on your new iPhone 14. Finally, if you have any questions or comments on taking a screenshot on the latest models of the iPhone (which do not include the home button), please let us know in the comments section below.
Read also:
How to Turn On/Off Flashlight On iPhone 14, 14 Pro, & 14 Pro Max
