
AirPods Max deliver immersive, high-fidelity audio. From the canopy to the cushions, every part has been carefully made to fit just right. Outside noise is blocked by industry-leading Active Noise Cancellation, while Transparency mode allows it in. Spatial audio combined with dynamic head tracking creates a theater-like surround sound experience. If you have one and want to know how to pair and use it with your Windows PC, this guide is for you. This guide will show you how to connect and pair your AirPods Max with your Windows 10 or 11 computer.
Table of Contents
How to Pair or Connect AirPods Max to Windows 10/11 Laptop or PC
Here is the process for pairing AirPods Max with Windows:
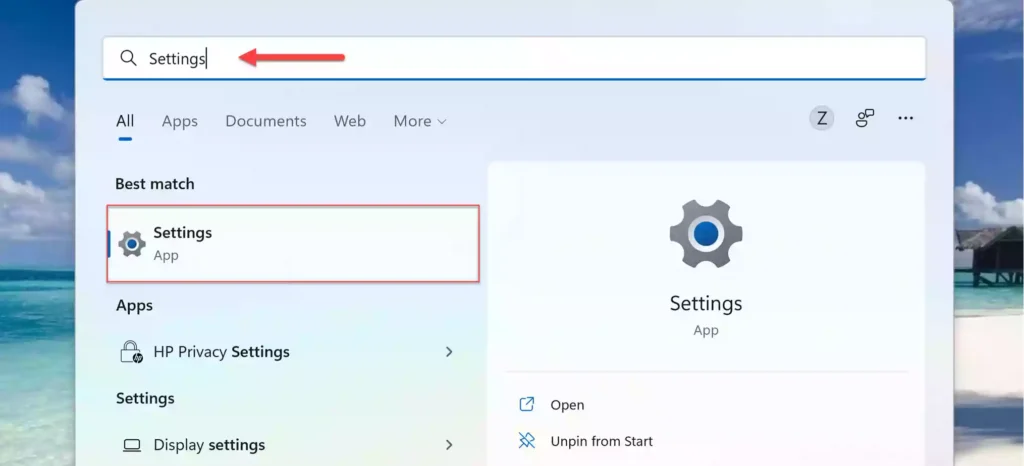
Step 1. Open the Settings app by searching for it in the Start Menu or using the “Windows key + I” shortcut keys.
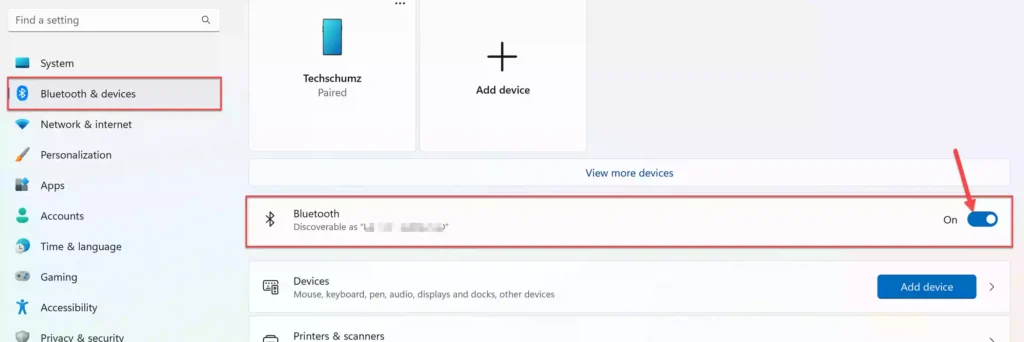
Step 2. Choose “Bluetooth & devices” in the right pane of Windows Settings, and then click the Bluetooth toggle to enable it.
Step 3. After turning on the Bluetooth, put your Nothing AirPods Max in pairing mode. To do so, press and hold the noise-canceling button on your AirPods Max until the white status light starts flashing. This indicates that your headphones are in pairing mode.
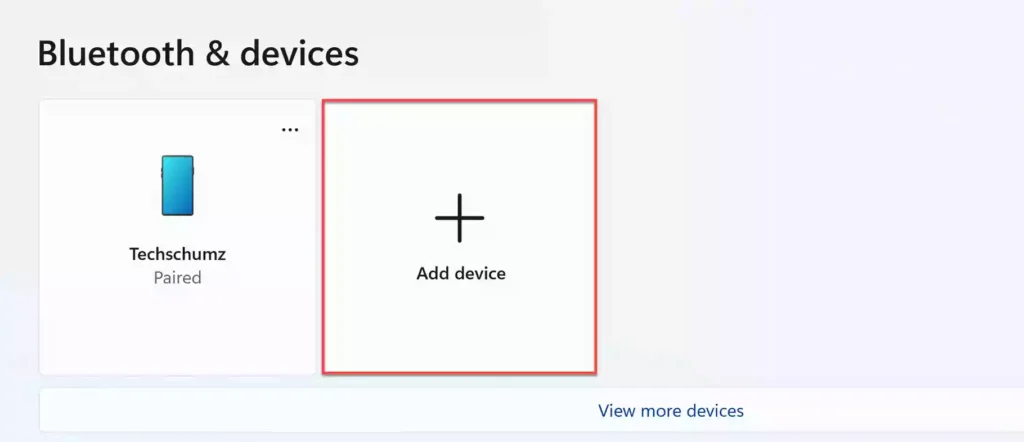
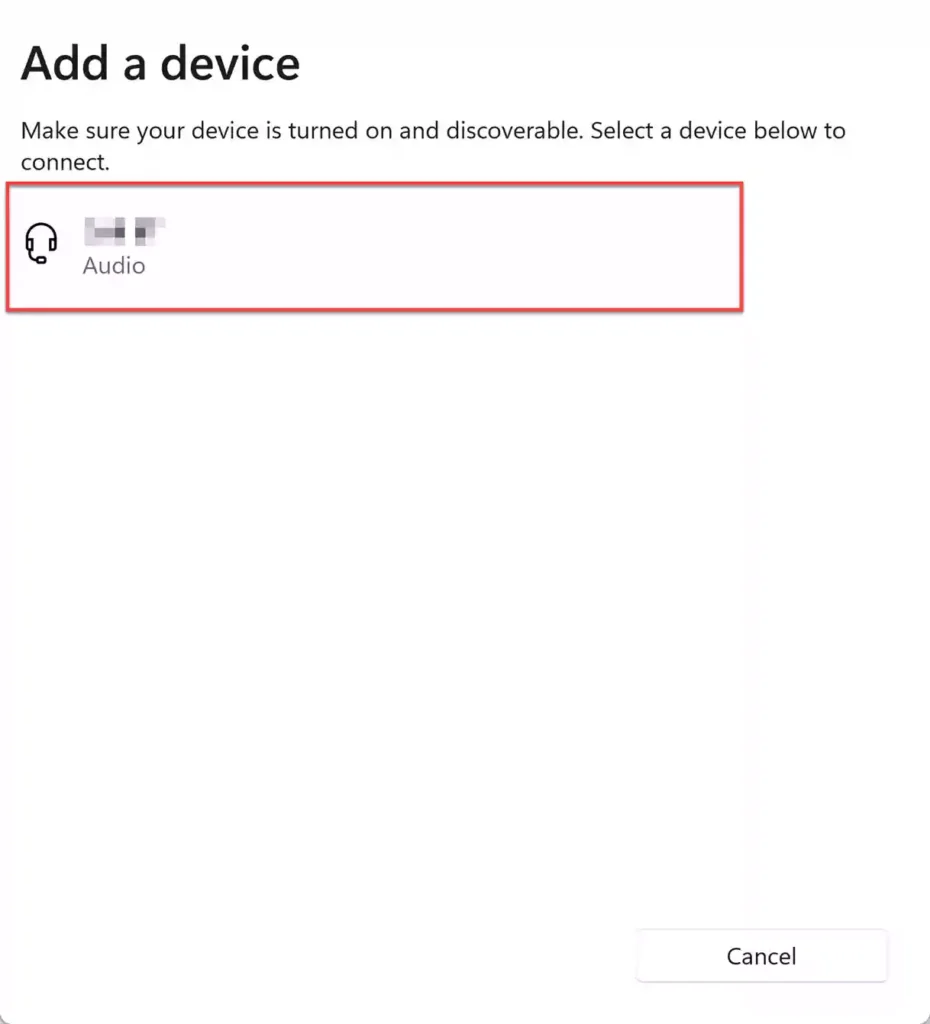
Step 4. Now, click on the “Add device” option to continue.
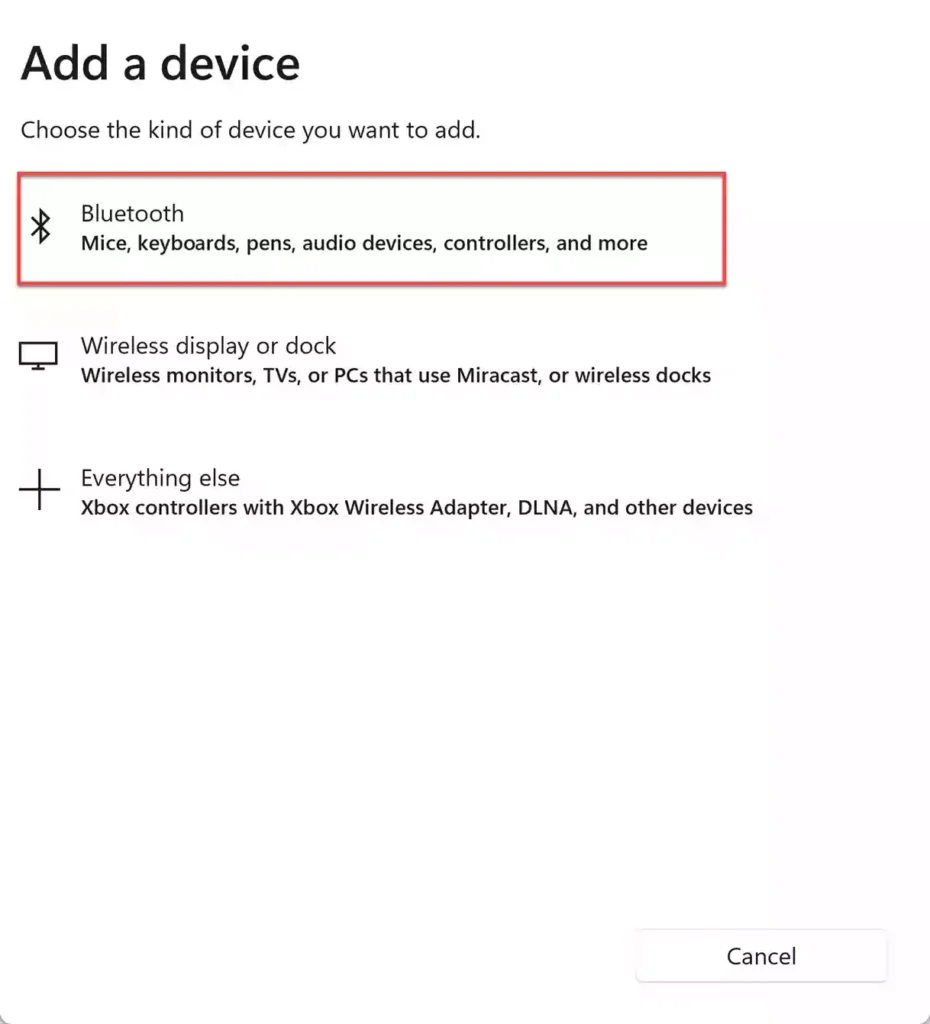
Step 5. Then, from the three options presented, select “Bluetooth.”
Step 6. Finally, let your Windows 10 or 11 PC search for available devices. When you see your AirPods Max listed, click on it to connect it to your PC.
Frequently Asked Questions
Read also: