You may need to convert a basic disk to a dynamic disk for future usage if necessary. But, do you know how to do that without losing data? In this guide, we will show three simple methods how to convert Basic Disk to Dynamic Disk on Windows 11 PC or laptop. We will also explain what they are and how they function.
Table of Contents
What are Basic Disk and Dynamic Disk on Windows 11
Windows 11 Computer hard drives are classified into two types: basic disks and dynamic disks. Basic disks are the most common storage medium utilized by Windows. They include partitions such as primary partitions and logical disks that are generally formatted with a file system. Dynamic disks can generate fault-tolerant volumes that can span several drives, while Basic disks cannot.
The majority of home PCs are set up with Basic disks. However, IT experts often favor Dynamic disks since they provide greater functionality as well as better stability and speed. While Windows Home editions offer Basic Disks, Windows Enterprise/Pro/Ultimate editions also support Dynamic Disks. Microsoft has provided a list of the operations that can be carried out on each of these kinds.
Things you can do with both Basic and Dynamic disks
- Check disk properties.
- Check partition properties.
- Check volume properties.
- Support both MBR and GPT partition styles.
- Change the drive letters for disk volumes or partitions.
- Convert a basic disk to a dynamic disk or a dynamic disk to a basic disk.
Things you only can do with dynamic disks
- Extend a spanned or simple volume.
- Remove a mirror from a mirrored volume
- Devide the mirrored volume into two volumes.
- Simple, spanned, striped, RAID-5, and mirrored volumes can be added and deleted.
- Repair mirrored or RAID-5 volumes.
Three Ways to Convert Basic Disk to Dynamic Disk on Windows 11 PC/Laptop
Let’s look at the three methods for converting a basic disk to a dynamic disk in this part. However, before going through the processes required in the various methods, create a backup of your data to an external disk. This is done because there is a possibility of data loss as a result of this process.
Method 1. Using Disk Management
To convert to Dynamic Disk on Windows 11 using Disk Management, follow the below steps:
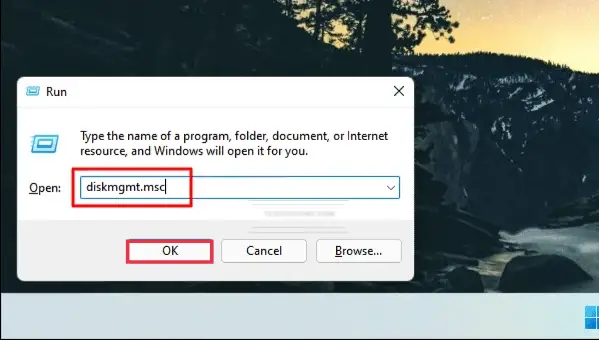
Step 1. First, you need to open the Run window by using the “Windows + R” shortcut keys.

Step 2. Next, type diskmgmt.msc, and hit Enter.
Step 3. When the Disk Management window appears, right-click on the basic disk you want to modify and select “Convert to Dynamic Disk.”
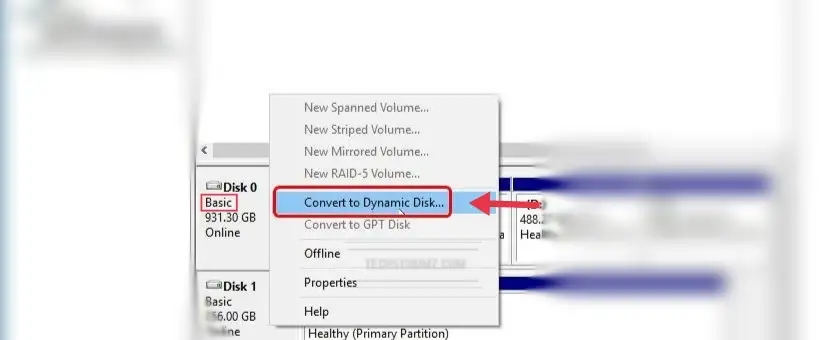
Step 4. A pop-up window appears; check the box next to the basic disk and click OK.
That’s it! you are all set now. The next thing you need to do is to Double-check the basic disk you want to convert to a dynamic disk. Because I only have one disk here, it is picked by default.
Method 2. Using Command Prompt
You can also use Command Prompt (CMD) to convert Basic Disk to Dynamic Disk on Windows 11. For that, follow the below steps:
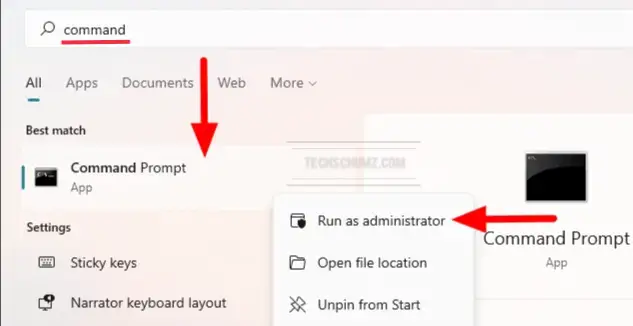
Step 1: First, open the command prompt by searching for it in the Start Menu.
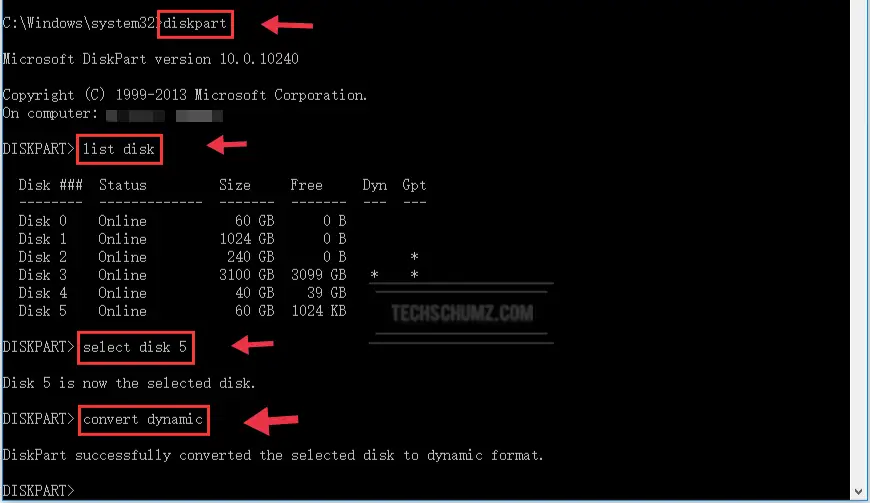
Step 2. When the command prompt window opens, type “diskpart” and hit Enter.
Step 3. After that, type “list disk” type and hit the Enter button. Make a note of the disk number you wish to change to Dynamic.
Step 4. Now, type select “diskn” and hit Enter.
Step 5. After selecting your disk, type “convert dynamic” and press Enter.
Step 6. When you’re finished converting, type “exit” and press Enter to finish the disk conversion procedure.
That’s it! Now you can close the Command Prompt window. This is likewise an easy method that results in no data loss.
Method 3. Using AOMEI Partition Assistant Professional
AOMEI Partition Assistant Professional is a more reliable and flexible method to convert a disk from basic to dynamic without losing data. It is a comprehensive and sophisticated Windows software for managing dynamic or basic disks and dynamic volumes. To convert Basic Disk to Dynamic Disk on Windows 11 using AOMEI Partition Assistant software, follow the below steps:
Note: Make sure to backup all of your data on your primary drive in case your data is lost due to unforeseen issues.
Step 1. First, download the software from its official site, and Install AOMEI Partition Assistant Professional on your Windows 11 PC or laptop.
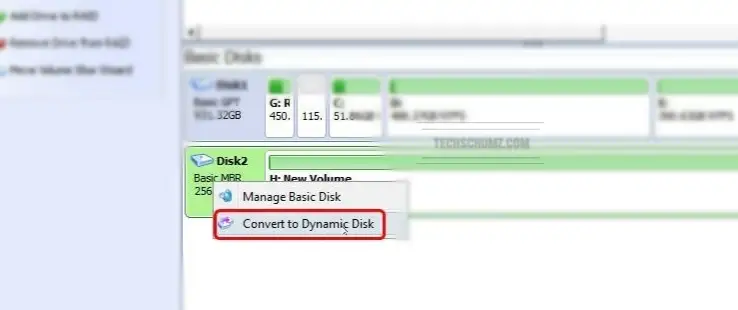
Step 2. Open the software, and click Dynamic Disk to open its Dynamic Disk Manager wizard.
Step 3. Now, right-click on a basic disk, select “Convert to Dynamic Disk.”
Step 4. Next, check the Basic disk, and then hit OK
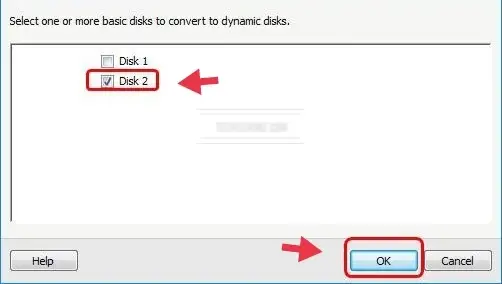
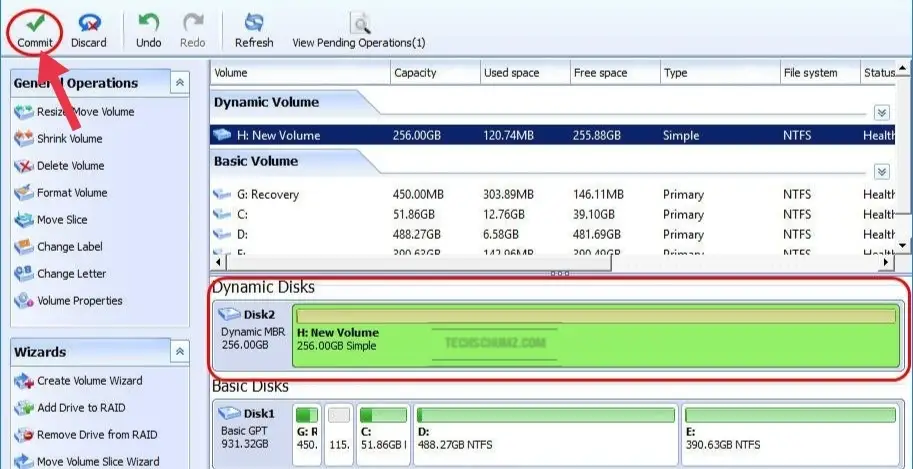
Step 5. Click “Commit” to convert to Dynamic disk.
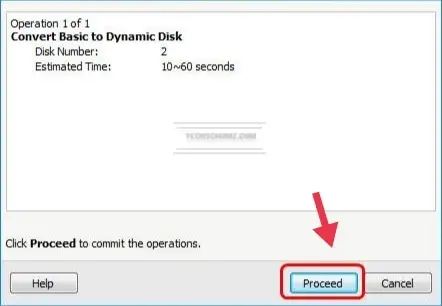
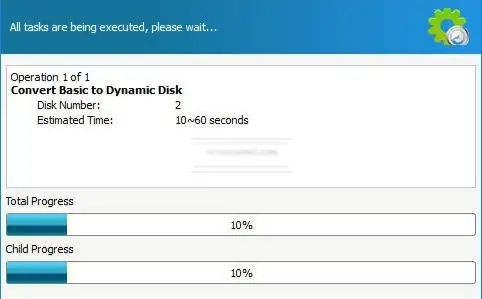
Step 6. Press “Proceed“, and wait for some moments until the process is completed.
That’s it! You are all set! That’s how you convert a basic disk to a dynamic disk using third-party software.
Note: You can use AOMEI Partition Assistant Professional to convert a dynamic disk to a basic disk without data loss:
- Open the software, and click Dynamic Disk.
- Right-click on a dynamic disk, select Convert to Basic Disk.
- Click OK.
- Click Commit.
- Click Proceed, and you are all set! Just wait for the process to be completed.
How to Change the Volume of a Dynamic Disk
You can extend or shrink your dynamic disk volume using Disk Management. For that, follow the below steps:
- Open Windows 11 built-in Disk Management.
- Select the volume you want to resize and right-click, choose “Extend Volume” or “Shrink Volume” to resize the dynamic disk.
- Type the volume size that you want to resize in MB. Then click Next.
- Click Finish and you will find the dynamic volume has been resized.
Can’t convert to Dynamic Disk?
Switching from basic to dynamic disk will increase the speed of your Windows operating system. However, there are several scenarios in which you would be unable to convert to a dynamic disk:
- When downgrading your Windows operating system.
- If you have more than one operating system, converting will cause issues (You may have installed Ubuntu along with Windows 11)
- Unknown partitions such as OEM partitions.
- Dynamic disks are not supported by your Windows operating system.
Final Words
Converting from a basic to a dynamic disk will increase the speed of your Windows operating system, and this article showed you three ways to convert Basic Disk to Dynamic Disk on Windows 11. Also, how you can change the dynamic disk back to a basic disk. We hope you find this article useful. If you find any questions, please let us know in the comments section below.
Read also: