This guide will show you how to create macOS Ventura Bootable USB on Windows 10 or Windows 11 PC or laptop.
During its annual Worldwide Developers Conference, Apple unveiled macOS Ventura, the latest version of its desktop operating system. This fall, macOS Ventura, also known as macOS 13, will be launched, bringing a bevy of new features to desktops and laptops. (Normally, macOS updates are published in September.) So, if you want to install macOS Ventura on your Mac by creating a bootable USB, you’ve come to the right place. Here, you will learn how to create a macOS Ventura Bootable USB installer on your Windows PC.
Table of Contents
How to Create macOS Ventura Bootable USB on Windows 10/11
Below, we will use an app called TransMac to create a bootable USB installer for macOS Ventura. It is a valuable storage management tool that allows Windows users to obtain direct access to the file system used by Mac systems. With TransMAc, you can view Mac files and control them by renaming, copying, moving, and deleting them. This app will allow you to quickly access Mac storage formats on Windows PCs. It has the potential to be an excellent tool for managing your documents, images, media, and other items. Below, you will find the steps to create a bootable USB drive for macOS Ventura on a Windows computer:
Things Required:
- macOS Ventura DMG File
- Transmac for Windows PC.
- A 16GB or more USB drive.
- A Windows PC.
Step 1. Download and Install TransMac on your Windows PC
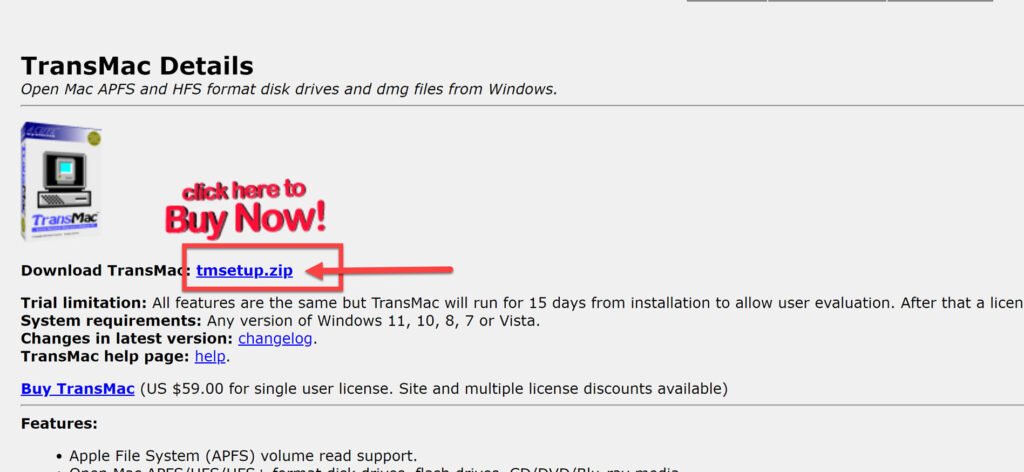
- To begin, download TransMac on your Windows system from here.
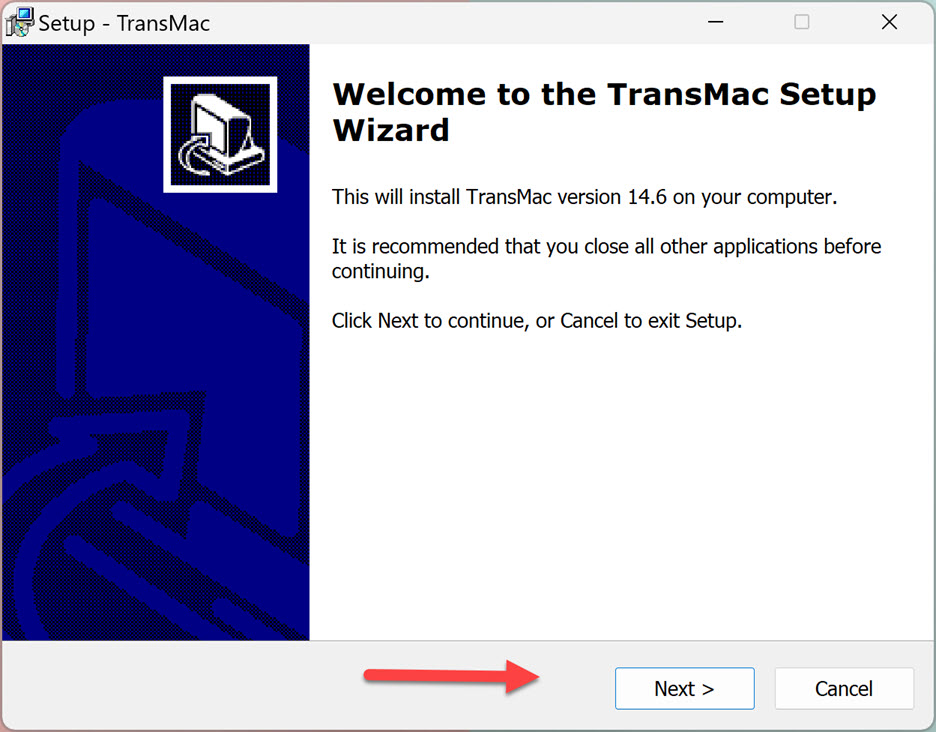
- Then, open the TransMac installer and click “Next” on the Wizard Welcome Page to start the installation.
- Next, select “I accept the agreement” and click “Next.”

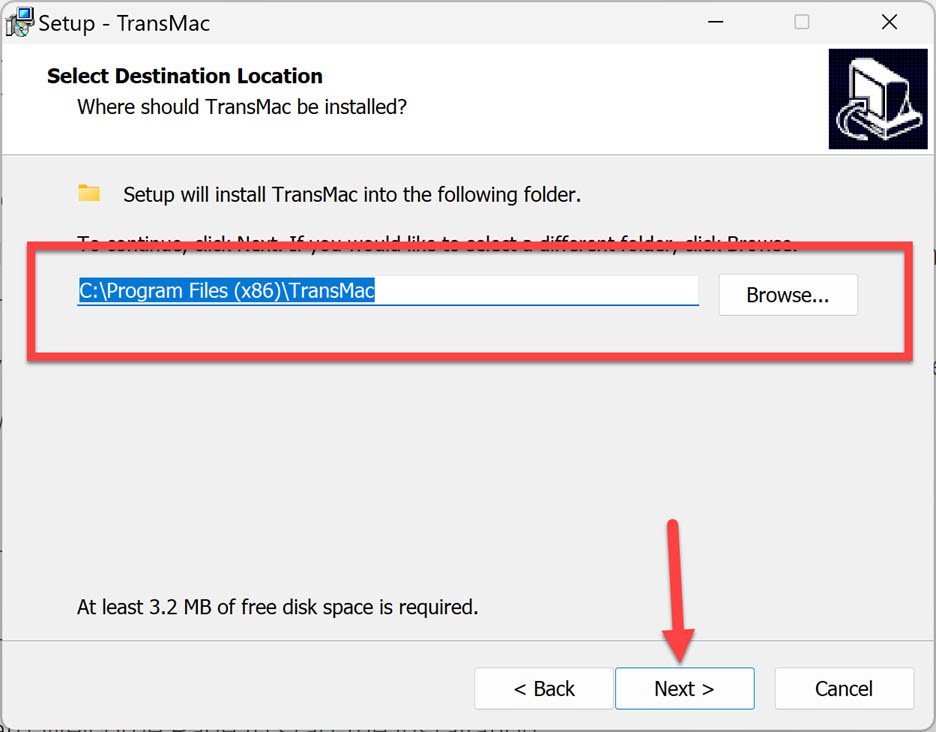
- Select the location you want to install TransMac in and click “Next” to continue.
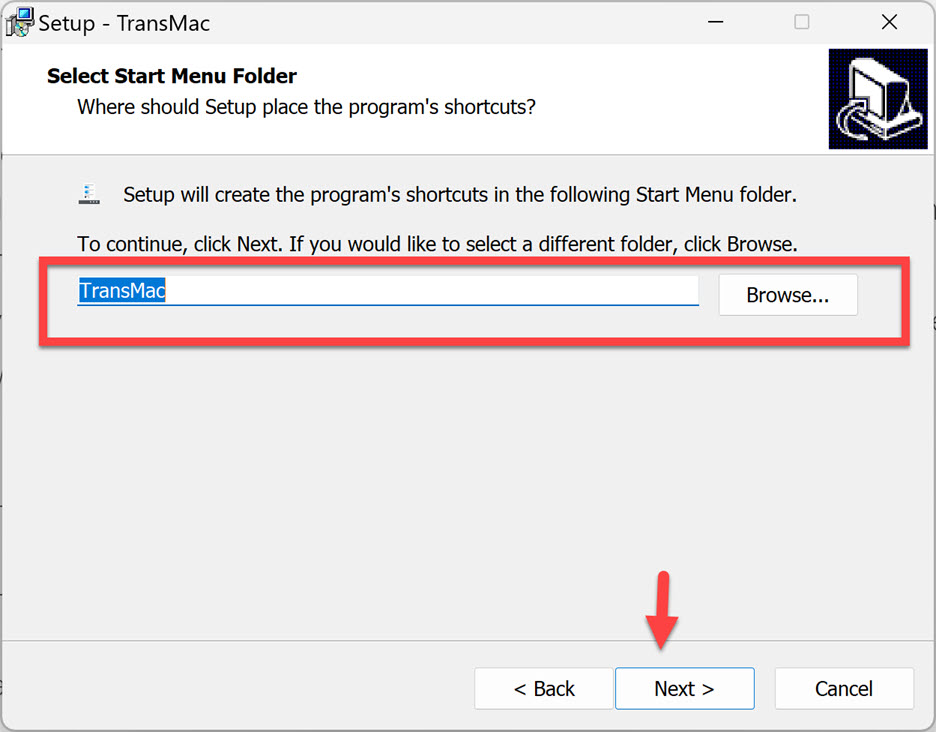
- Select a Start Menu folder, and click “Next.”
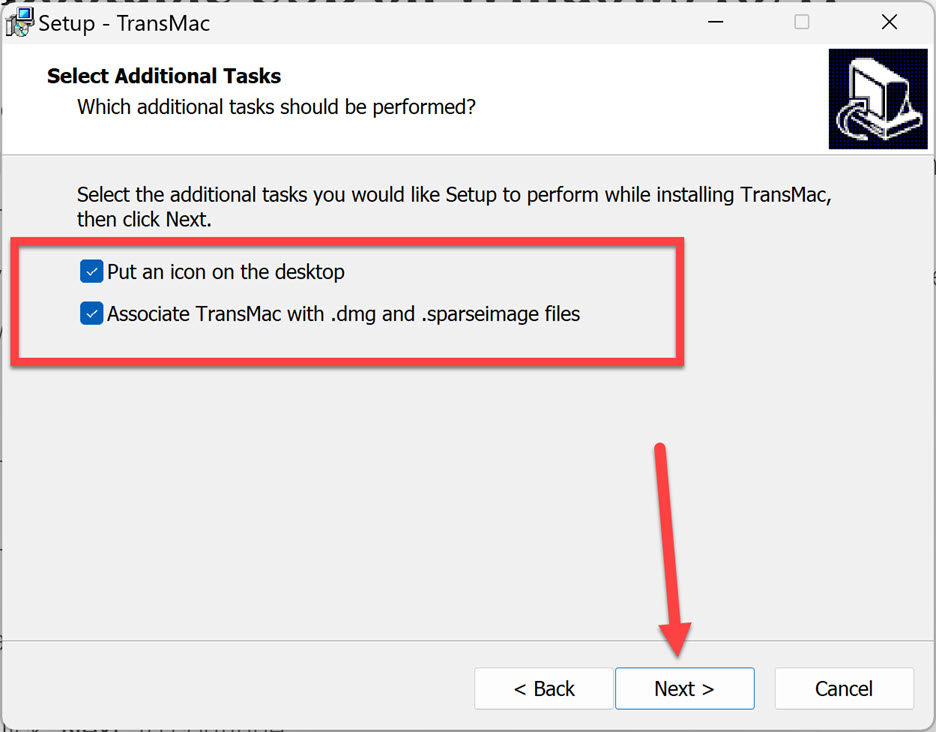
- Select the additional task you would like the setup to perform while installing TransMac on your PC.
- Finally, click on the “Install” button to start the installation.

- That’s it! Wait for some moments for the installation to complete and click “Finish.”
Step 2. Create macOS 13 Ventura Bootable USB using TransMac
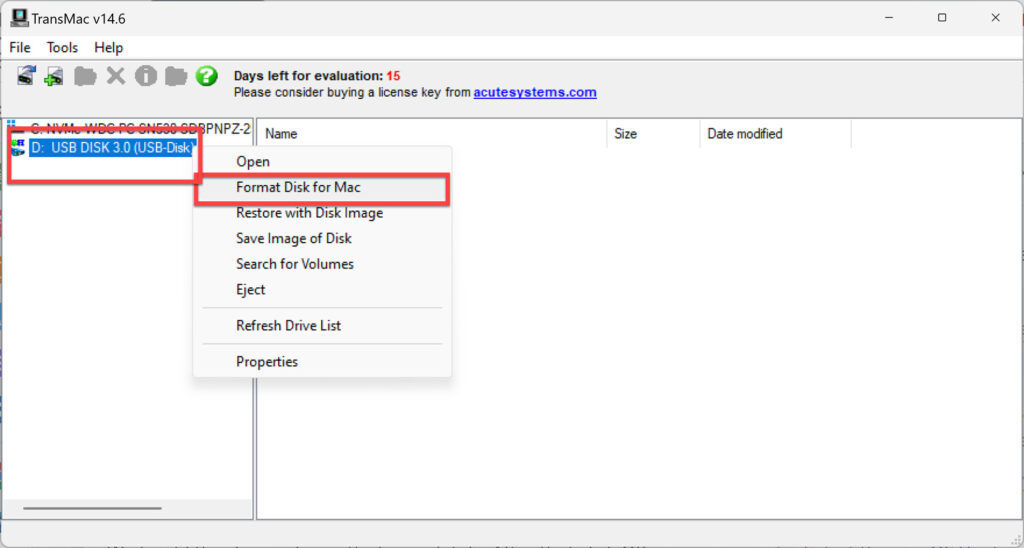
- Connect the USB drive (at least 16 GB) to your computer first.
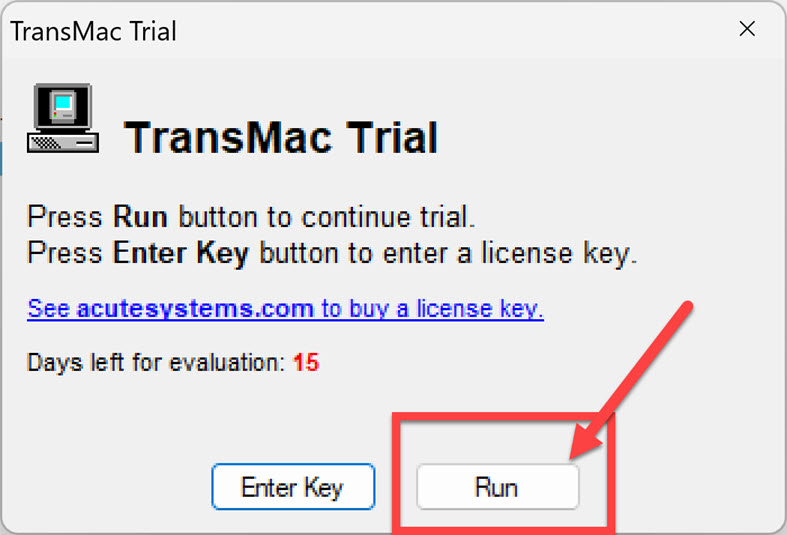
- Then, launch the Transmac app, wait a few seconds, and select “Run” to continue.
- Next, right-click your USB device on the left side and choose “Format Disk for Mac.”
- Then, when prompted, click “Yes.”
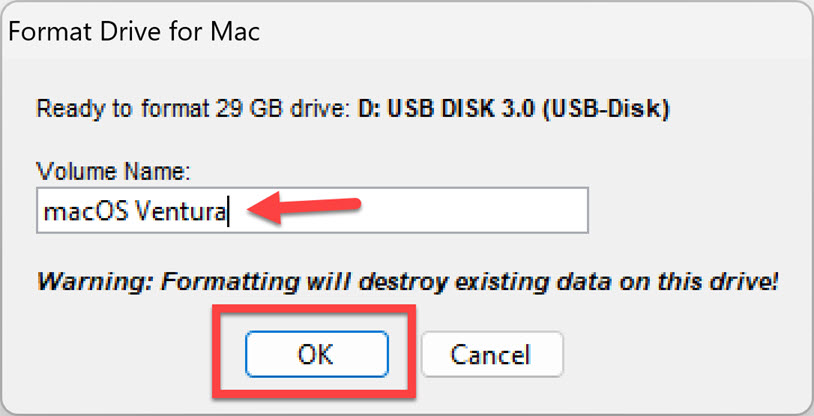
- Now, enter the “Volume Name” and click the “OK” button.
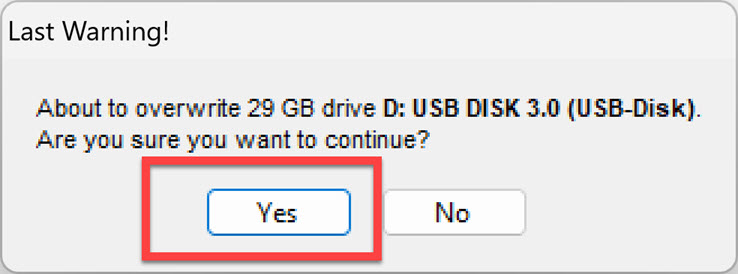
- To proceed, click “Yes.”
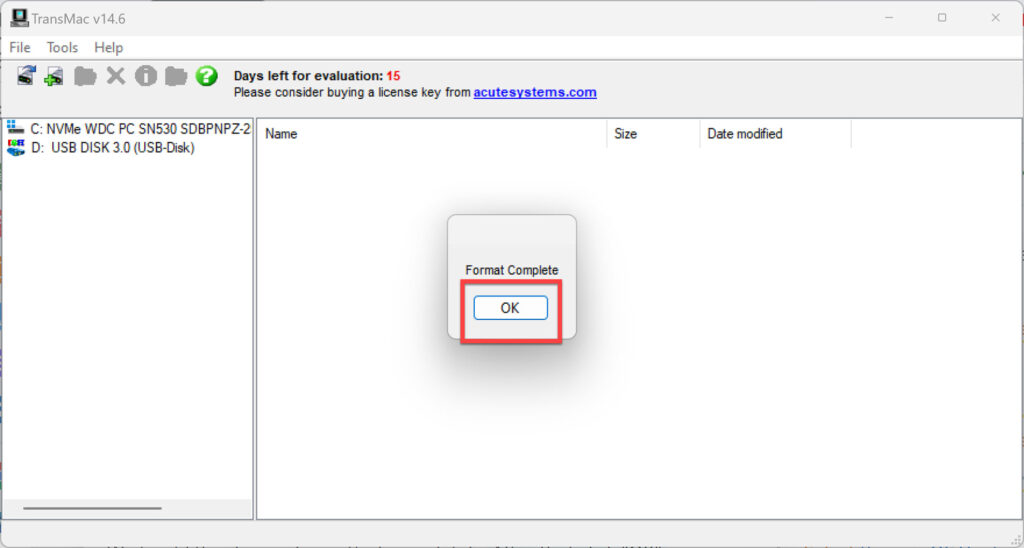
- After the drive has been completely formatted, click “OK.”
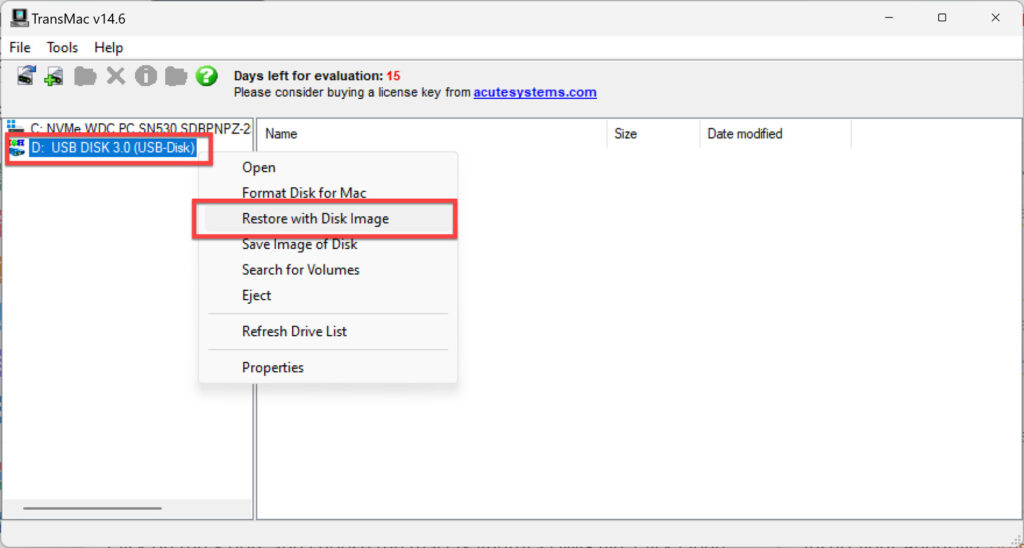
- Then, right-click your USB device again and choose “Restore using Disk Image.“
- In response to the warning, click “Yes.”

- Click the “3 dots,” choose the macOS Ventura DMG file, and click “Open.”
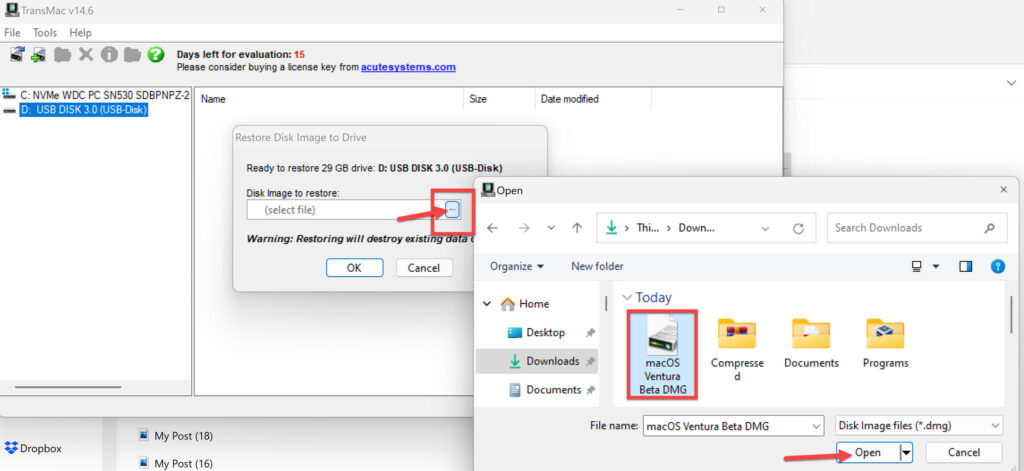
- When you’re finished, click the “OK” button.
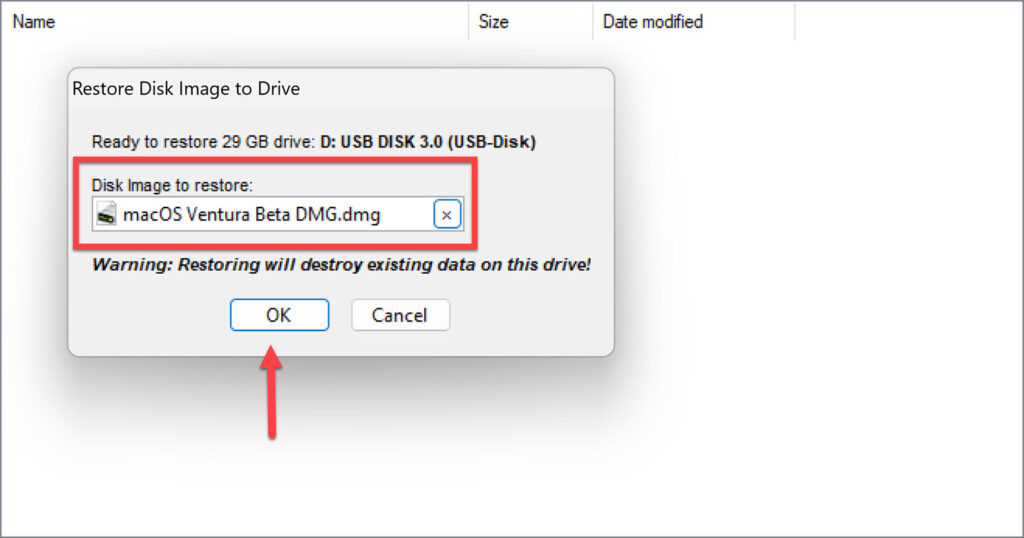
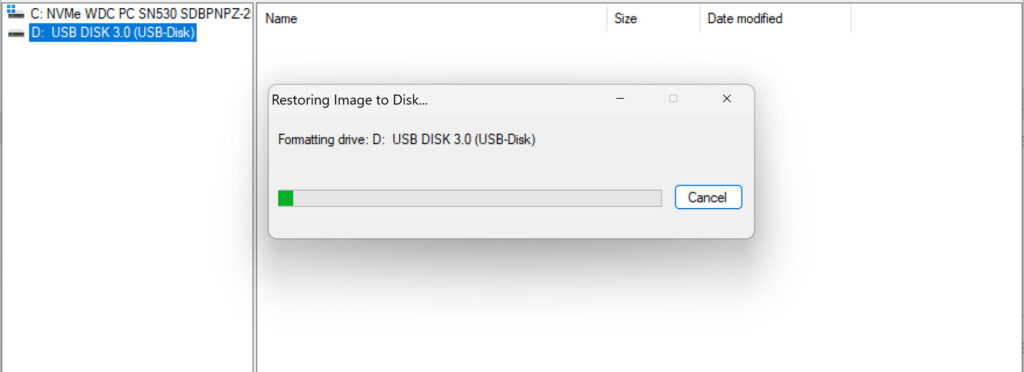
- Read the warning and click “Yes.”
- After some time, you should have a bootable macOS Ventura USB ready.
- Insert the USB, press the options button, restart your Mac, and install macOS Ventura Beta on your Mac.
Final Words
That’s all! I hope this guide on how to create a bootable USB drive for macOS Ventura on your Windows system was helpful and that you found it simple and valuable. Finally, if you have any problems, please leave them in the comment section below.
Read also: