Have you yet heard about the new Mac operating systems, macOS Ventura or macOS 13? Do you want to install it on your Windows 10 or 11 PC? If that’s what you’re looking for, you’ve come to the perfect place. This article will show you how to install macOS Ventura on VMware on a Windows 10/11 PC or laptop.
At its annual Worldwide Developers Conference, Apple unveiled macOS Ventura, the latest version of its desktop operating system. This fall, macOS Ventura, also known as MacOS 13, will be released with a slew of new features for desktop and laptop computers. The following are some of the features:
- Rich Results in Spotlight, a new feature in macOS Ventura, enables you to do actions directly from search results.
- Apple has also released an update to Safari. Using Tab Groups, friends and relatives can see what other people are looking at in real time.
- Apple has also implemented more secure passwords in the form of “Passkeys.”
- One such feature is Stage Manager, which allows you to focus entirely on your app.
- Messages sent recently can be edited or unsend; unread messages can be marked; mistakenly deleted messages can be restored with the latest upgrade to macOS Ventura.
- The Mac Mail app has also seen significant improvements. In macOS Ventura, you can undo a sent email a few seconds later, schedule emails, and set follow-up reminders in one spot.
There are many more features like these available. However, you need to know that macOS Ventura is now only available as a developer beta; testing it on a virtual machine is advised first. Below, we will show you to the steps install it on your Windows PC using VMware:
Table of Contents
Steps to Install macOS Ventura on VMware on Windows 10/11
We will show you how to install and use macOS Ventura with your Windows PC using VMware Workstation Pro/Player in seven simple steps. The steps are as follows:
- Download and install the required software.
- Enable virtualization on your Windows PC.
- Download and install Workstation Pro/Player on your PC.
- Unlock VMware to Install macOS Ventura on Windows.
- Create a New Virtual Machine for macOS Ventura.
- Edit the macOS Ventura VMX file.
- Install macOS Ventura on VMware on a Windows PC and finally do some basic settings.
Note: macOS Ventura should only be installed on a computer with a solid-state drive (SSD); otherwise, it will run slowly. Also, increasing your computer’s RAM can improve its performance.
Step 1. Download and install the prerequisites
It would help if you did a few things before installing and using macOS Ventura on your Windows PC or laptop. Later on in this tutorial, you’ll be using them. If you’ve already completed the following, you can skip this step. To get started, you’ll need to get the following files:
Step 2. Enable Virtualization on Your Windows PC
Hardware virtualization features present in modern CPUs allow VMware-created virtual machines to run faster than they would otherwise. You must, however, first enable this feature on certain PCs before taking advantage of it. To install macOS Ventura on VMware, you must have virtualization enabled on your PC. Otherwise, you will get the error message “Can’t open a session on the virtual machine.” See the link below to learn more about it and how to enable it on your Windows PC.
=> Enable virtualization on your Windows PC
Step 3. Download and Install VMware Workstation Pro or Player
Before installing macOS Ventura on your Windows 10 or 11 system, you must first install VMware Workstation Pro or Workstation Player on your PC or laptop. VMware Workstation Pro or Workstation Player is a popular hypervisor or virtualization software. It lets professional system administrators or power users run many virtual PCs simultaneously on a single physical computer. We have step-by-step instructions for you if you don’t know how to install them. Please click on the link below.
=> Download and Install VMware Workstation Pro/Player on your PC
Note: You can skip this step if you already have VMware Workstation Pro or VMware Player installed on your computer. However, make sure it is compatible with your system.
Step 4. Unlock VMware to Install macOS Ventura on your Windows PC
As macOS does not show in the guest operating system list by default, we should install the unlocker we downloaded previously. This enables macOS in the list of guest operating systems.
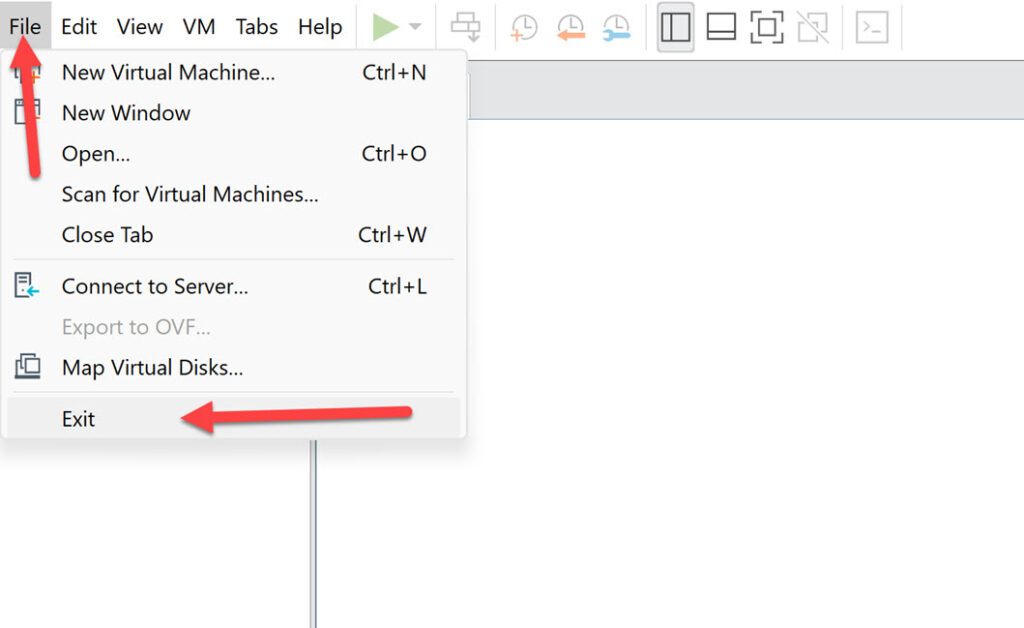
- First, ensure that VMware Workstation Pro/Player is entirely closed; otherwise, the VMware unlocker will not work. To do so, go to the “File” menu and click “Exit.”
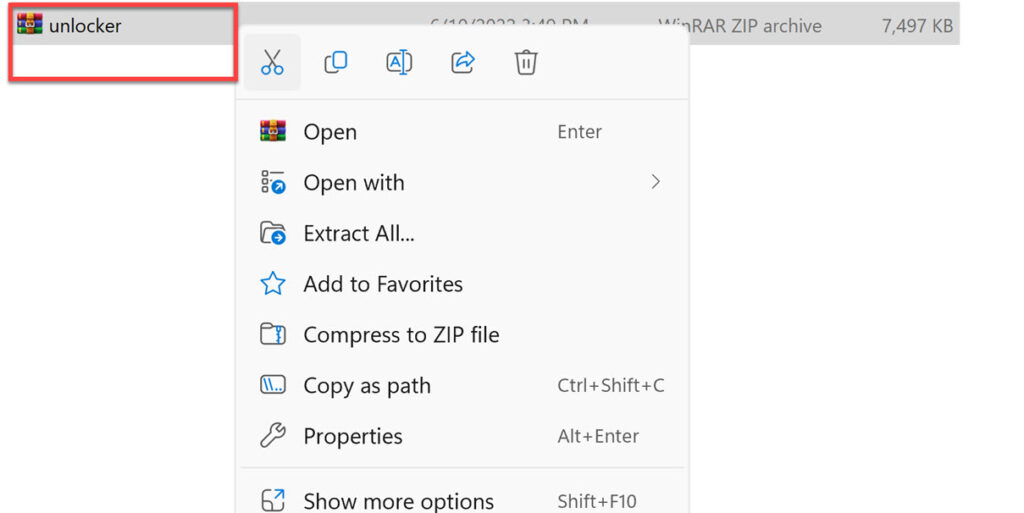
- Next, open and extract the unlocker file.
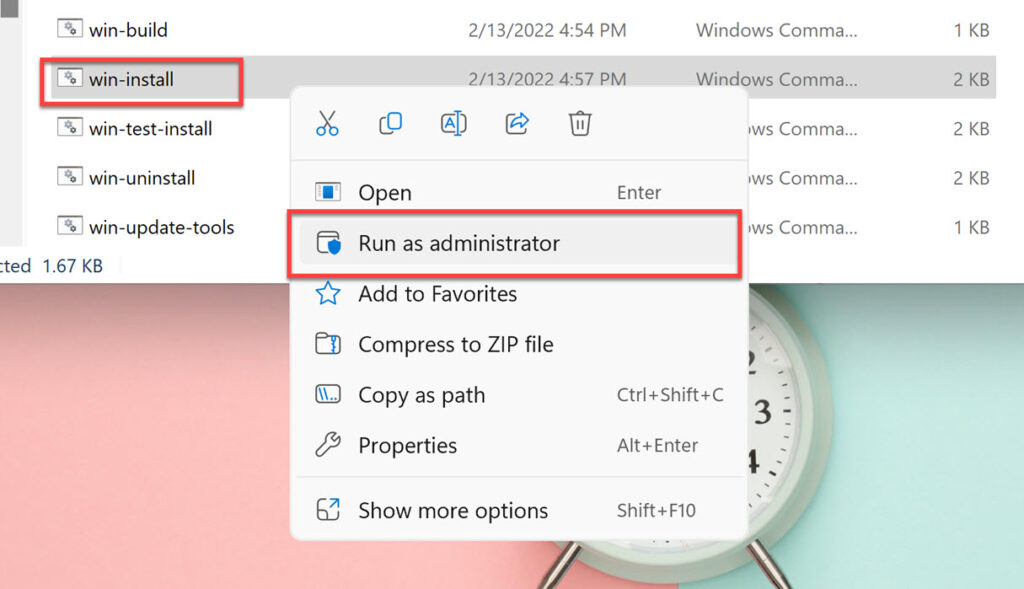
- Right-click “win-install.cmd” and select “Run as Administrator.“
Step 5. Create a New Virtual Machine for macOS Ventura on VMware
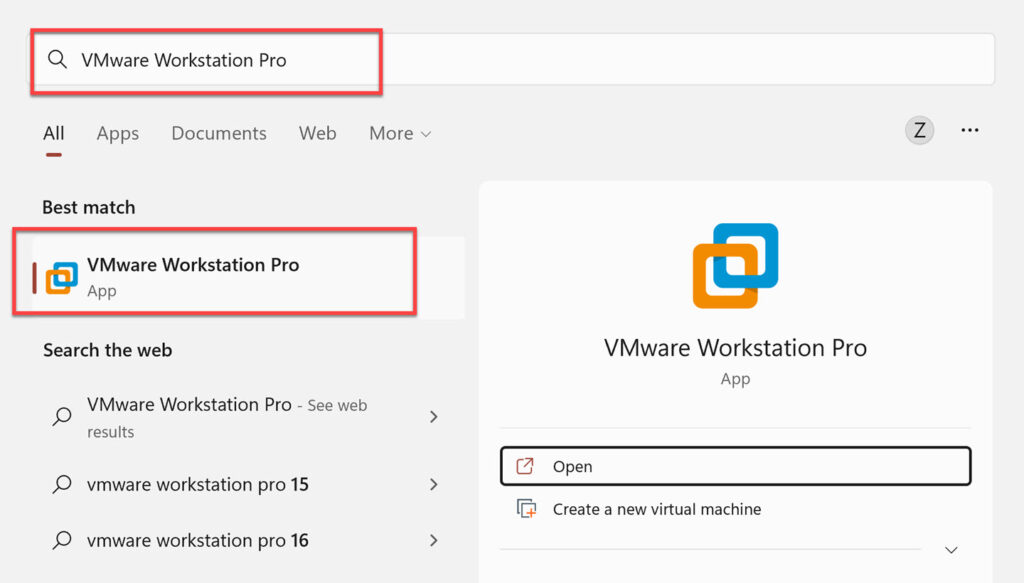
- First, open “VMware Workstation” by searching for it in the Start Menu.
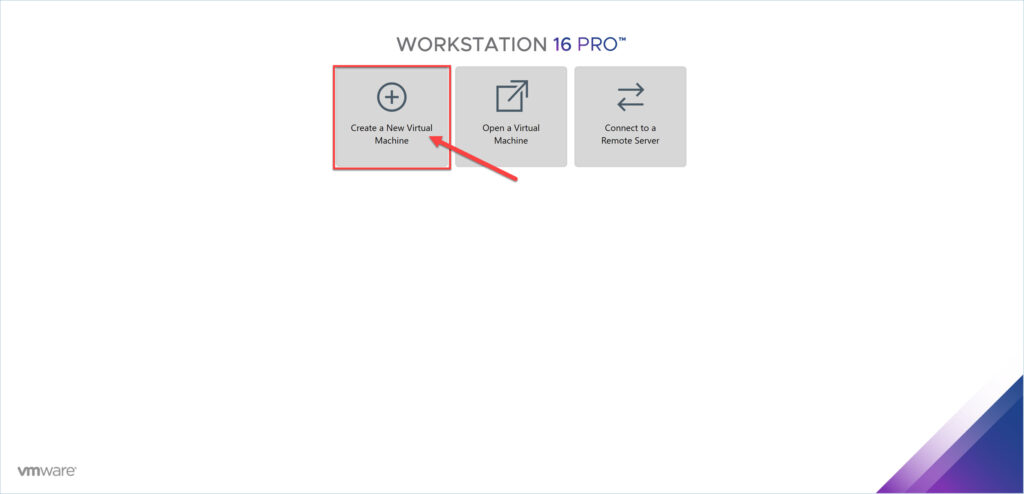
- Next, tap “Create a New Virtual Machine,” or you can use “Ctrl + N” to get to it.
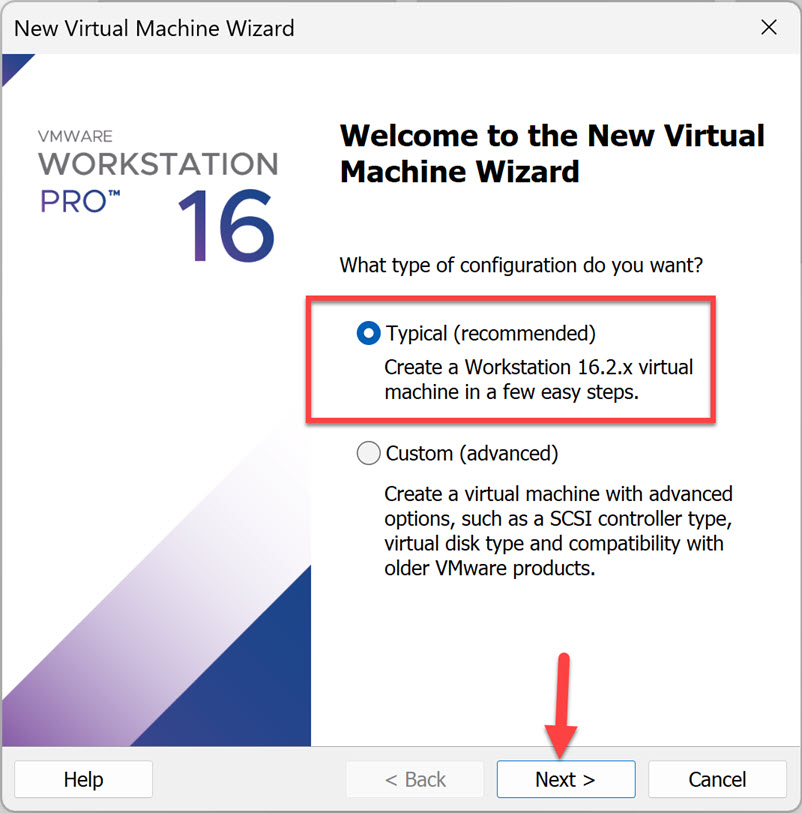
- Then, click on “Typical (recommended)” and tap on “Next” to continue.
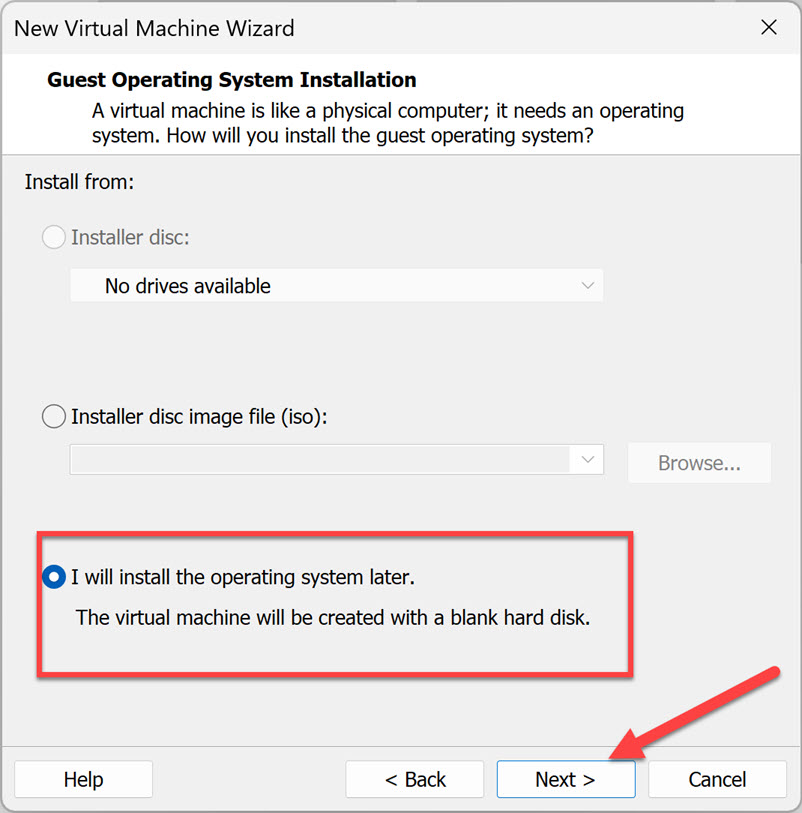
- Here, check “I will install the operating system later” and tap on “Next.”
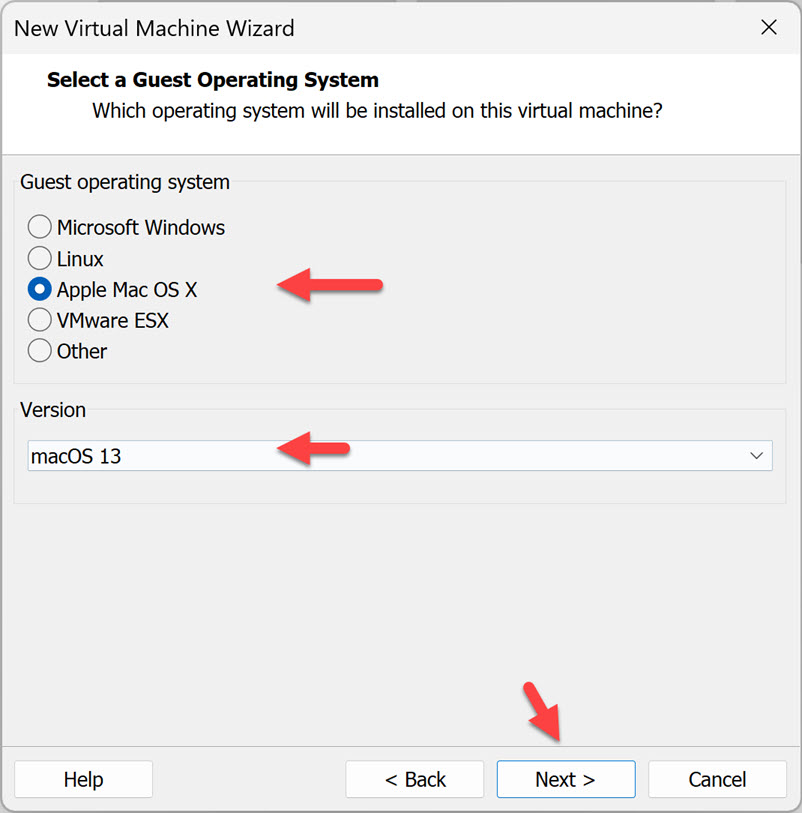
- Now, select “Apple Mac OS X” from the operating system list, tap on macOS 13 from the version drop-down list, and tap “Next.”
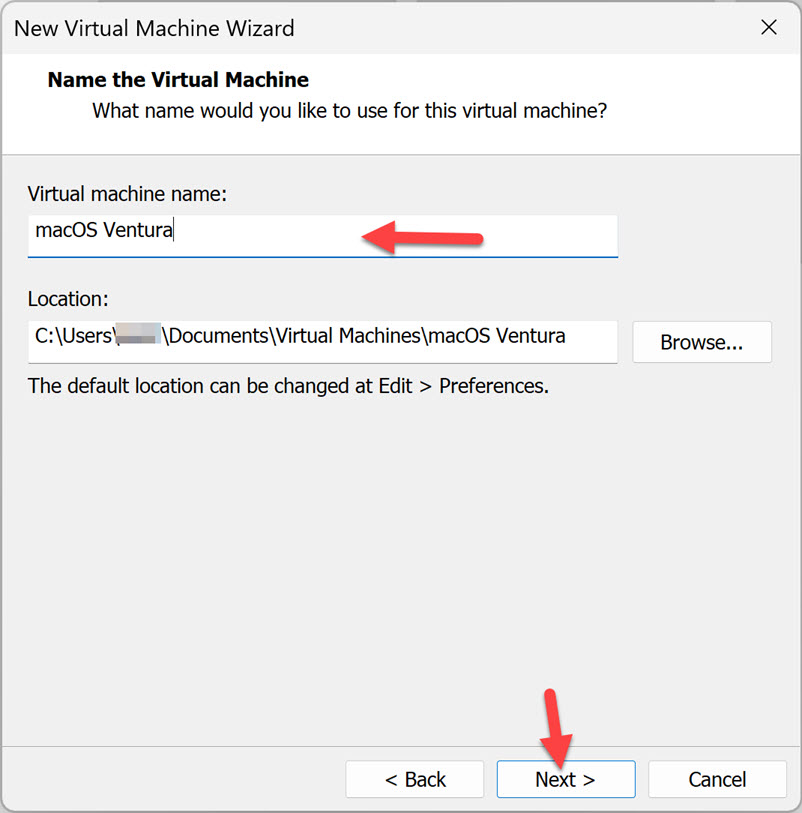
- Now, give your virtual machine a name, such as “macOS Ventura.” Tap “Browse” to pick a place to store virtual machine files, tap “Next,” or leave it as the default.
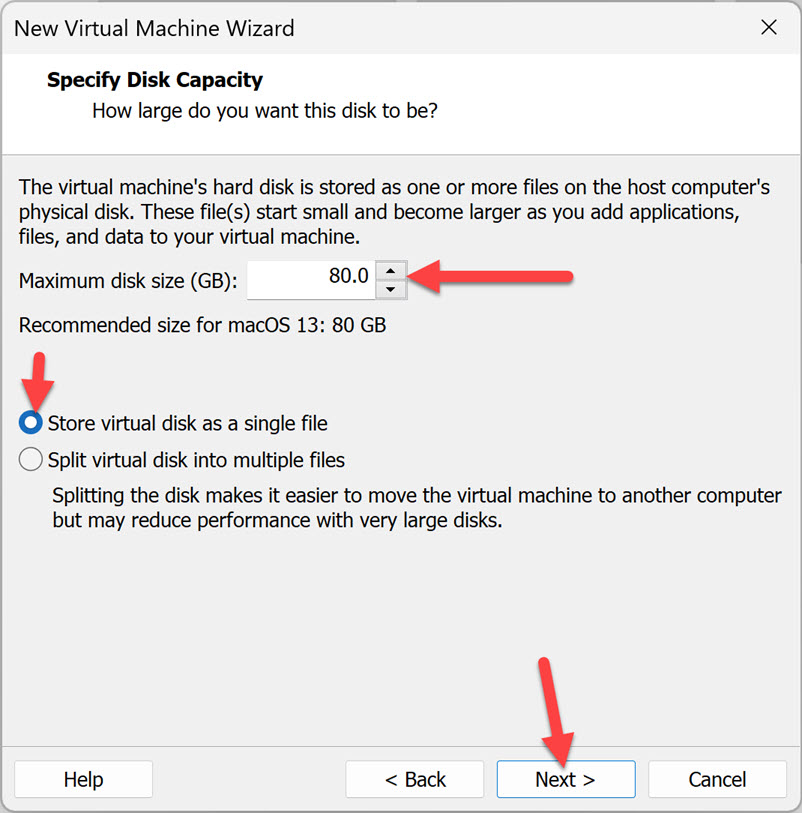
- Next, choose a disk capacity of 80 GB or more, check “Store the virtual disk as a single file,” and tap “Next” to continue.
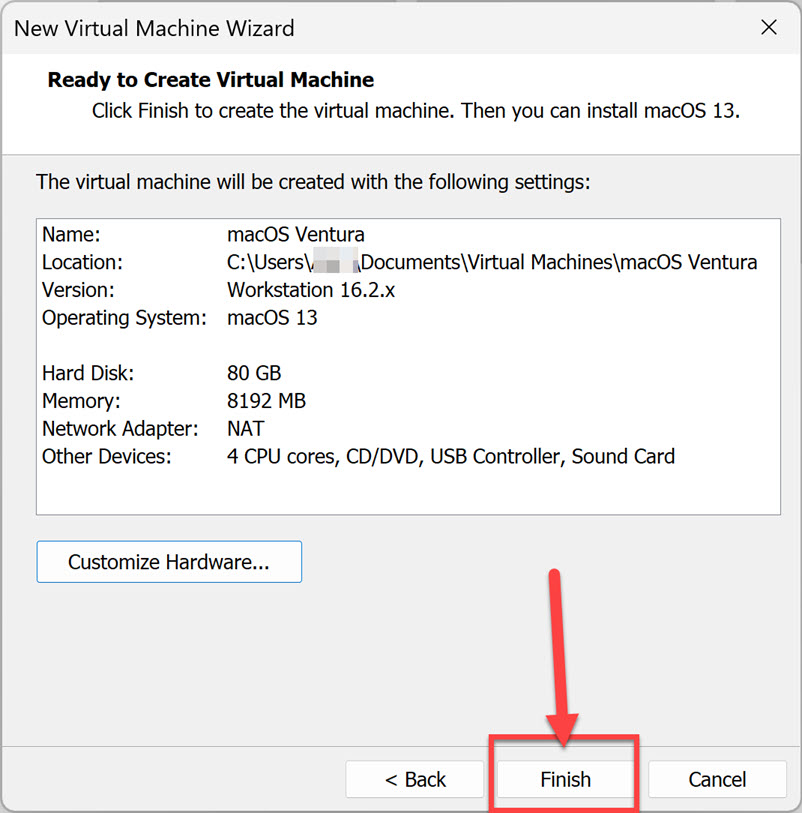
- Then, tap “Customize Hardware” on the Ready to Create Virtual Machine page.
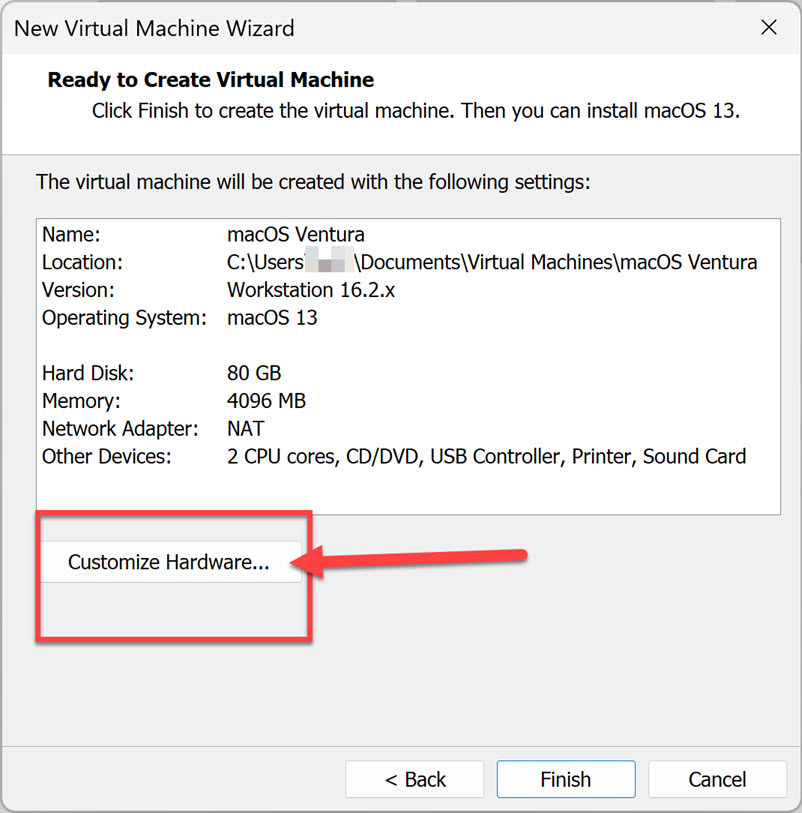
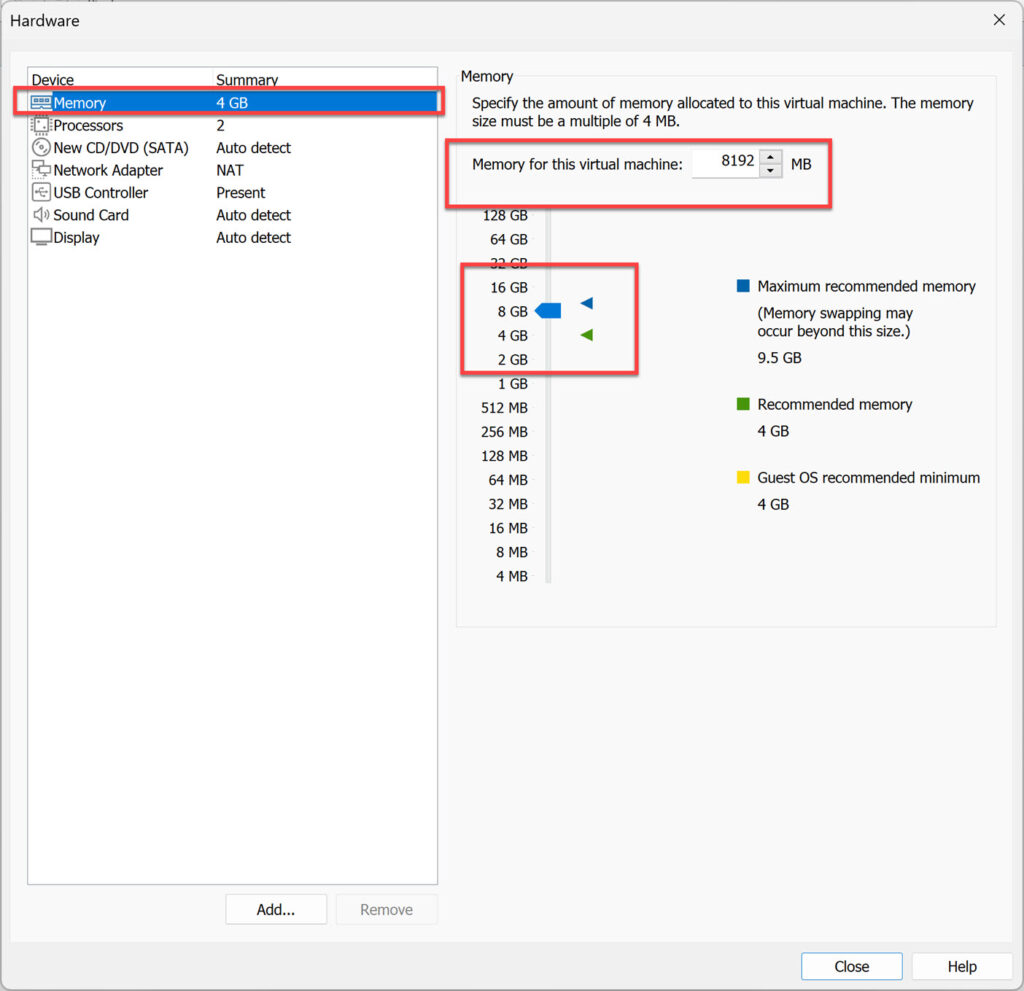
- Here, increase the memory from 4 GB to 8 GB or higher for better performance.
- Next, go to the Processors menu. Then, increase the CPU processor core from 2 cores to 4 or higher cores for better performance for macOS Ventura.
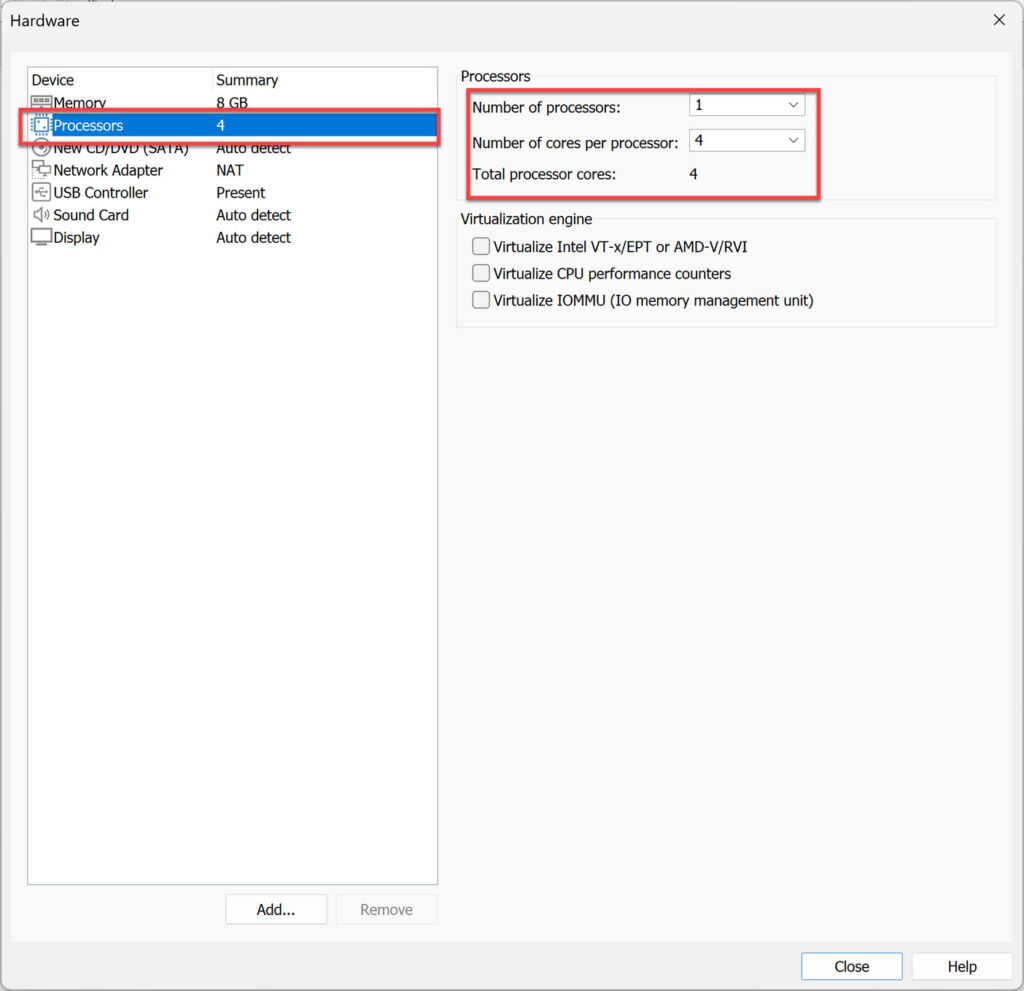
Note: If you want to run macOS Ventura on a Windows PC using VMware, the minimum memory and processor requirements are 4 GB and two processor cores.
- Now, on the left menu, select “New CD/DVD (SATA),” then “Use ISO image file” and “Browse.”
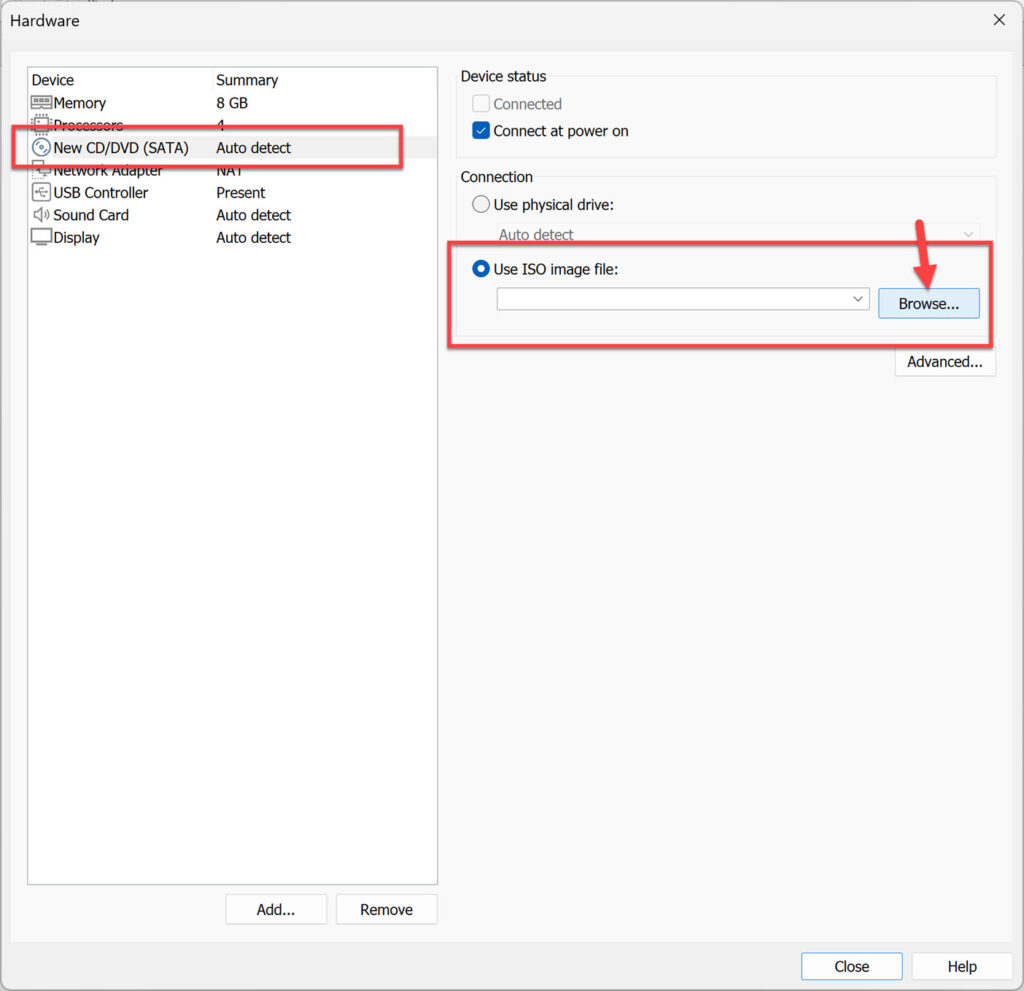
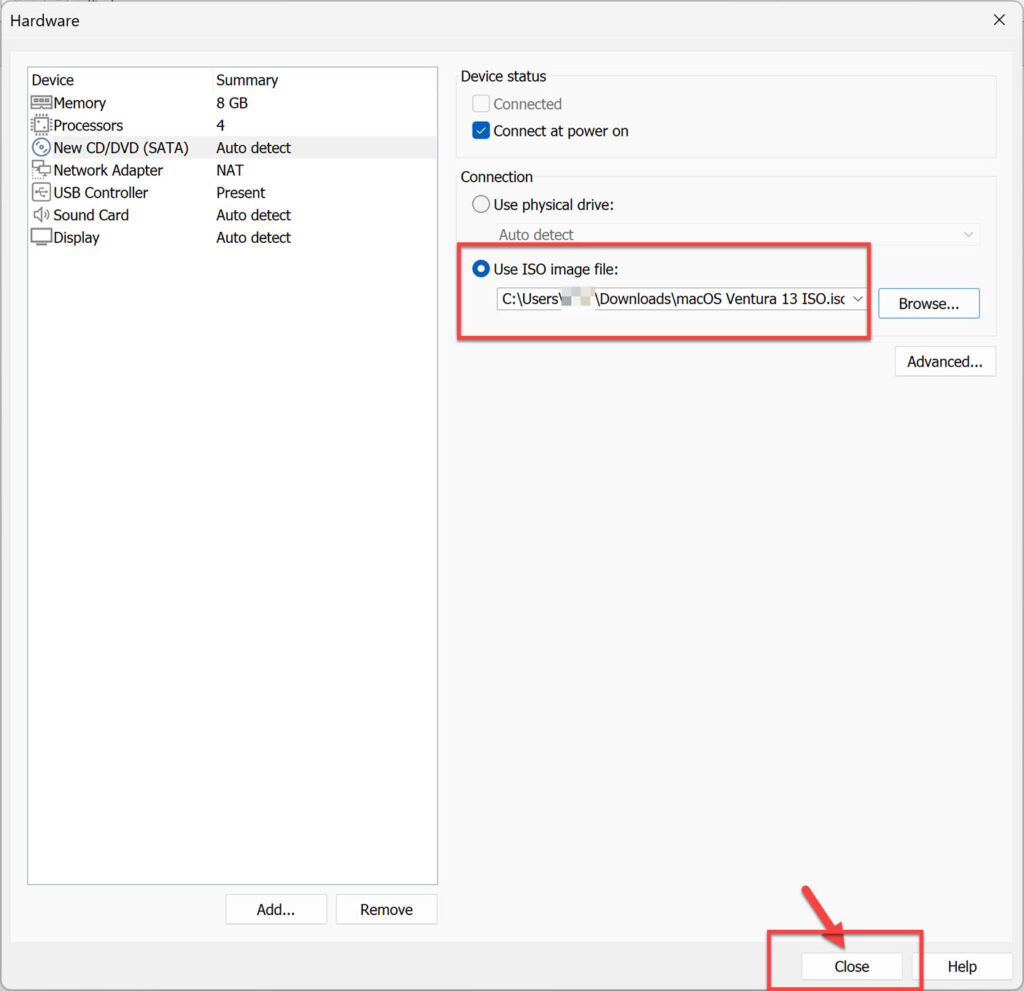
- Find the macOS Ventura (macOS 13) iso file, then click “Open.”

- After adding the macOS Ventura ISO, click “Close” to save all changes.
- Finally, tap “Finish” on the New Virtual Machine Wizard Window.
Step 6. Modify the macOS Ventura VMX file
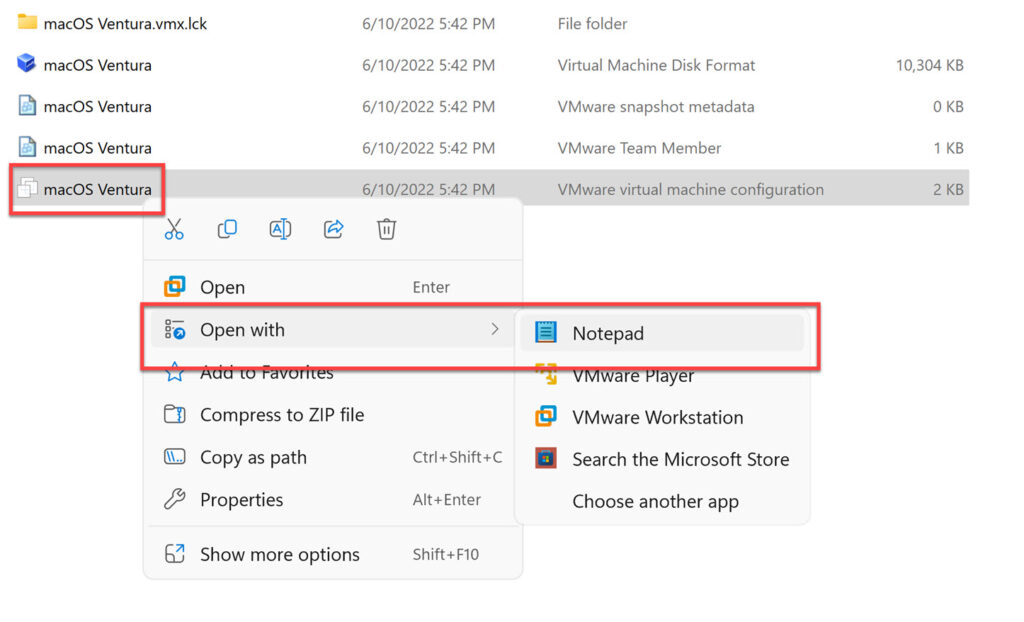
Go to the virtual machine folder you selected earlier in this instruction to edit the VMX file. If you haven’t specified a new location, the default is Document > Virtual Machine.
- Now, right-click on “macOS13.vmx” and choose “Notepad” or another text editor.
- Add the following code at the bottom of the text.
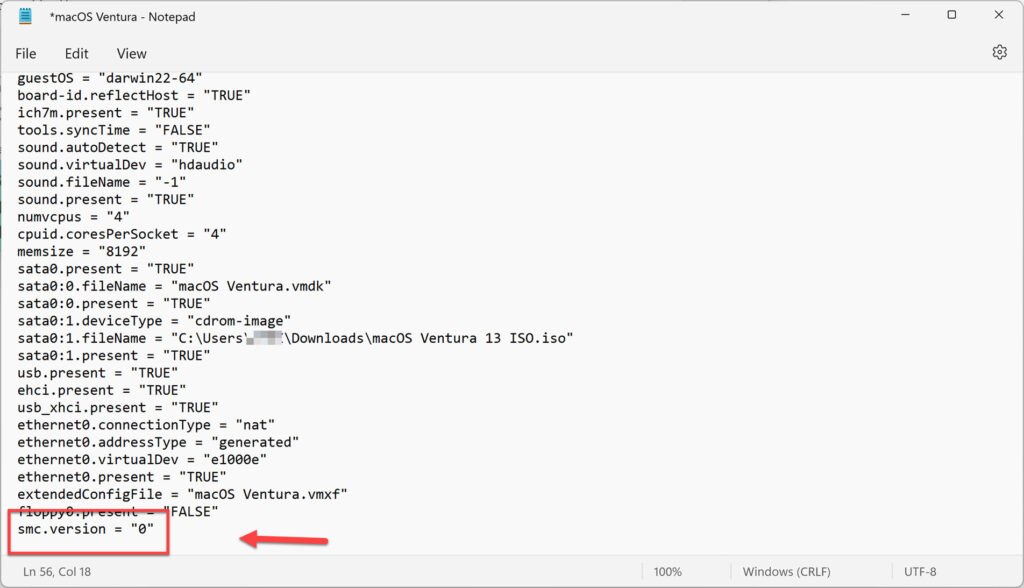
smc.version = "0"
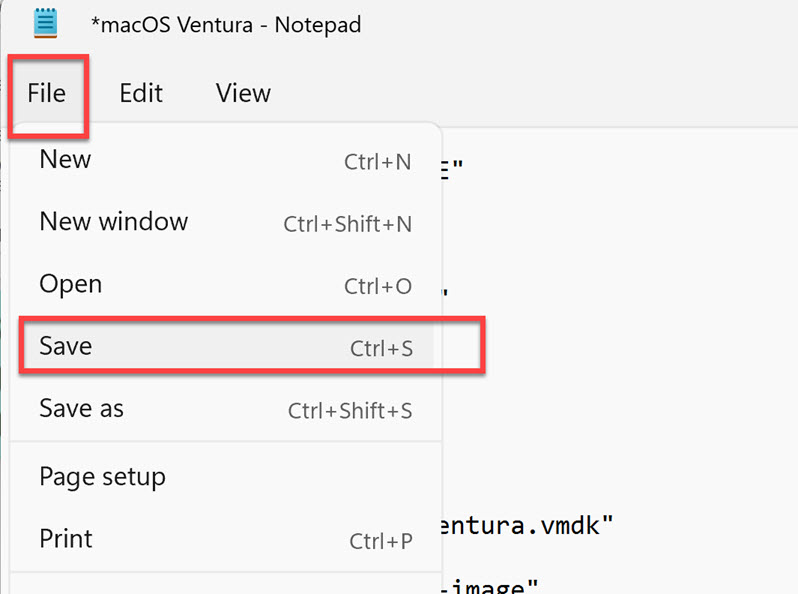
- Finally, go to “File,” and select “Save.” You can close the Notepad now.
Step 7. Install macOS Ventura on VMware on Windows PC
After completing the previous six stages, this is the last step in installing and running macOS Ventura with Windows through VMware. It is now time to install macOS Ventura from scratch on VMware Workstation Pro or Player. So let’s get this installation underway. Follow the steps below to do this:
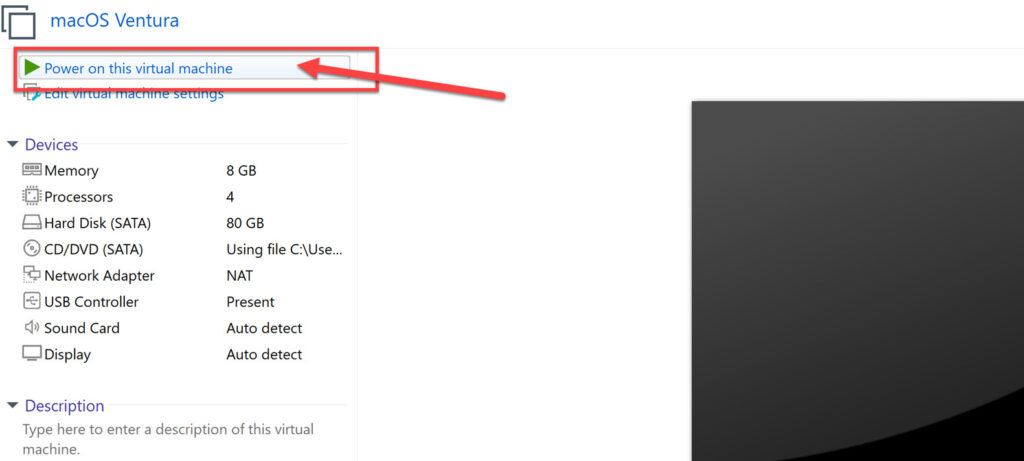
- Start VMware, then choose “Power on this Virtual Machine” in the macOS Ventura VM panel and wait for it to start.
- Next, on the language screen, choose your preferred language.
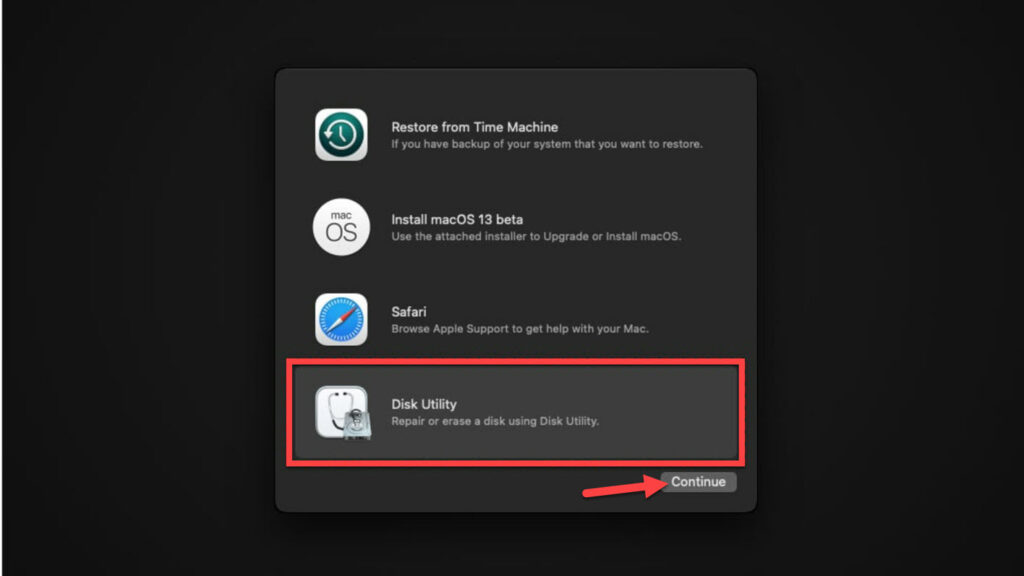
- Now, tap on the “Disk Utility” and select “Continue.”
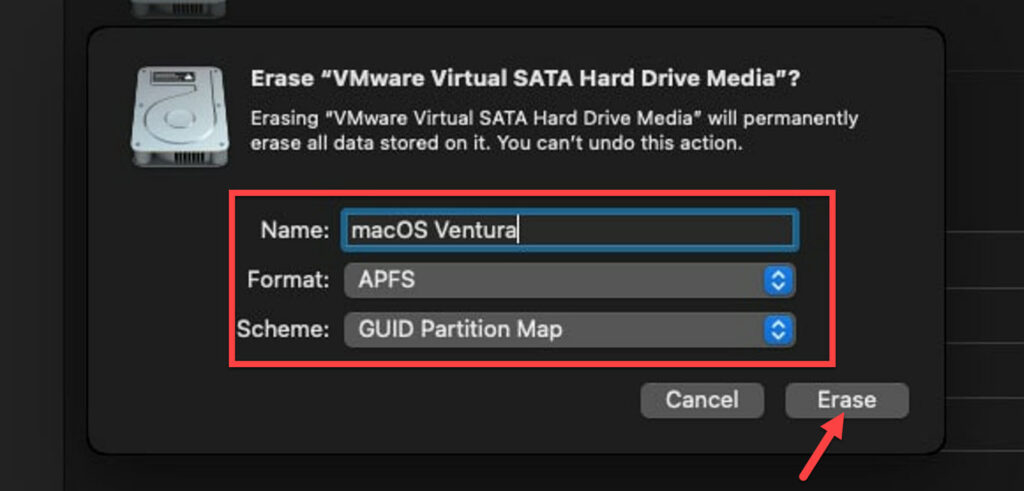
- Next, select “VMware Virtual SATA Hard Drive Media” and click “Erase.”
- Now, type “macOS13HD” for the name, then choose “APFS” from the Format drop-down menu and click “Erase.”
- Tap on “Done” to close the dialogue box.
- Tap “Quit Disk Utility” from the Disk Utility Tab.
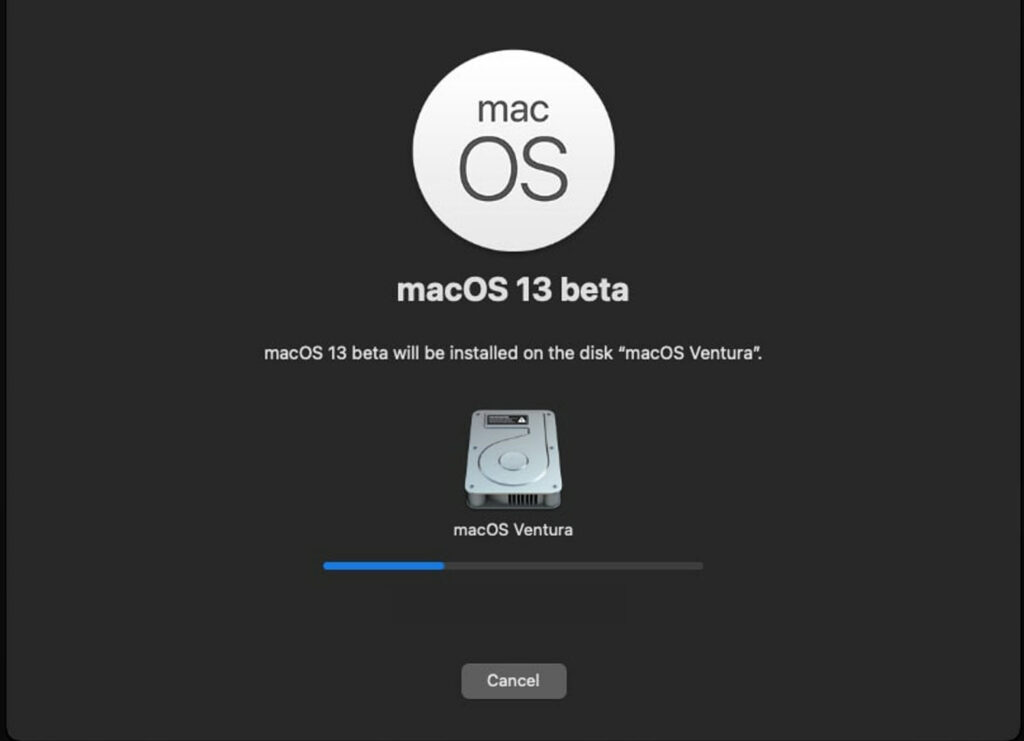
- Tap on “Install macOS 13 Beta” and tap on “Continue” twice.

- You must accept the software licensing agreement’s terms and conditions.
- Tap on the available disk, then click “Install.”
- The installation of macOS Monterey will be finished after two or three restarts. Depending on your system, it might take 15 to 30 minutes.
After successfully installing macOS Ventura on VMware on a Windows 10 or 11 PC or laptop, you must configure some basic account settings according to your preferences.
- To begin, choose your chosen language.
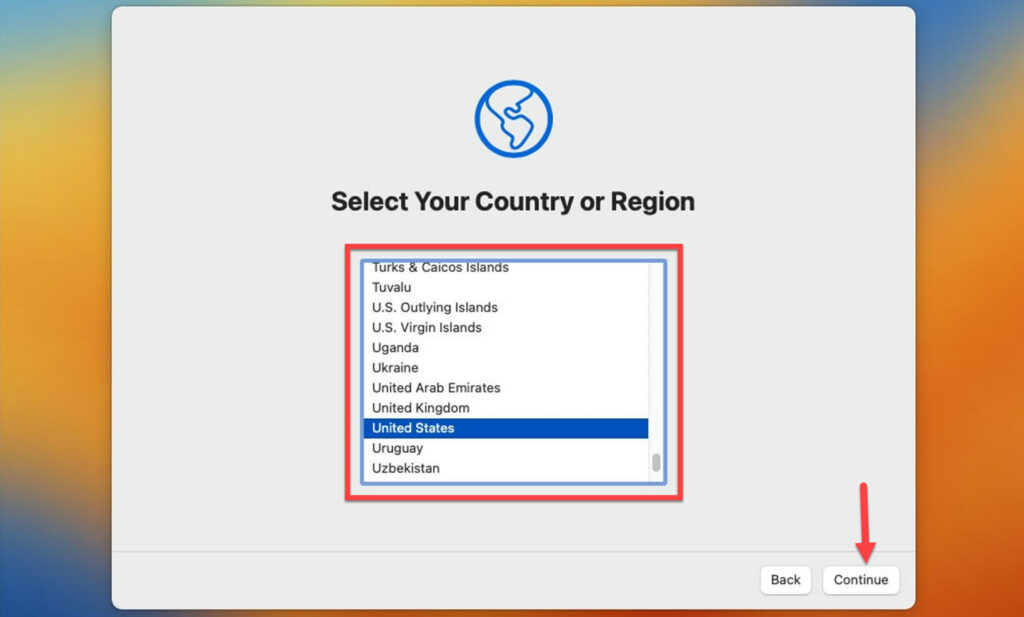
- You may now pick your country of residence. Select it so the country’s language can be used with the keyboard.
- With accessibility, you may customize the Mac to your liking. If you need it, enable it; otherwise, skip it.
- Choose “My computer does not connect to the internet” and disregard the internet warning.
- After reading Data & Privacy, click “Continue.”
- We don’t need the migration tool since we are performing a clean installation. You can tap on “Not now.”
- Now, click “Agree with the terms and conditions.“
- Next, create a computer account with a strong password for your privacy concerns and click “continue.”
- Click “Continue” in the Make This Your New Mac window.
- You can go for the “Screen time” option to keep track of your weekly reports, app downtime, or uptime. If you don’t want this feature, hit “Setup later” and go to the next step.
- If you wish to use Siri on your Mac, press “Continue.” Otherwise, uncheck the box next to “Siri.”
- Finally, choose a theme for your macOS Ventura or macOS 13, click “Continue,” and you are all set!
Pro tip: if you want your macOS Ventura to work smoothly and quickly on VMware on your PC, we recommend installing VMware Tools.
Final Words
That is how you can easily and step-by-step install macOS Ventura on VMware on a Windows 10 or 11 PC or laptop. If you have any queries or face any problems, please leave them in the comments area.
Read also:
Many thanks for this guide.
I just have one problem how do I connect to the internet? I just get the message you are not connected to the internet.
Many thanks
Hey Nigel, you’re very welcome.
Please follow the steps in this article. It may solve your network connection problem. fixchumz.com/network-connection-error-on-macos-ventura/
Fantastic that worked, thank you so much.
My CPU intel XEON E5620, i am installed macOS Ventura ISO (techrechard.com) on VMware workstation, but my VM always restart after finished installation (boot loop). I tried to change my VMware setting from macOS version 13 to Windows 10 X64 and the problem still exist.
Please help!!!
Thank,
I have the same issue here.
Remove CD/DVD from the virtual machine setting after installation. this may solve your problem.
Hello there, I’d like to start by thanking you ahead of time for taking the time to publish this tutorial. Unfortunately this is the 3rd tutorial I’ve been through without success and I’m hoping it’s just something simple. I’m getting stuck in a boot loop and I’m not sure what I’m doing wrong. I’m running Windows 11 with all the latest updates and VMWare 17. I used the most recent unlocker from github and I’ve tried 2 different ISO images and one VMDK file and all have had the exact same result. Everything goes smoothly until the OS is done installing and it does it’s final boot into the OS in which case I get the ” Your computer has restarted because…” and it is stuck in bootloop. I’m using a 6 core Ryzen 5 CPU with 16GB of RAM. One other piece of info, I don’t know if it’s important but may be a clue, When I’m configuring the guest hardware, it gives me a warning message that the guest OS may not run correctly with because i have configured it to use more virtual processor sockets than the guest supports. And it has done that on all 3 images I have tried to load. Each time I have tried a new method, I have started from scratch except for reinstalling VMWare itself. Well that’s all the pertinent info I can think of. Any help you could give me would be greatly appreciated.
Same bootloop here with Ventura, also with a different .iso. Installing Monterey, after SEVERAL attempts, was really smooth and working fine m(also upgrade from within the OS failed and resulted in booloop).
Hope it helps