Kali Linux is unquestionably a one-of-a-kind operating system since it is one of the only platforms that can be used freely by both good and bad guys. Both security managers and black hat hackers rely significantly on this operating system. The first detects and prevents security breaches, whereas the second identifies and may exploit security breaches. If you’re curious about it and want to try it out on your PC, this article is for you. This Techschumz guide will show you how to install Kali Linux in VirtualBox on Windows 11.
Table of Contents
What is Kali Linux?
Kali Linux is a Linux distribution based on Debian. It is an operating system designed specifically for network analysts and penetration testers. The existence of a slew of tools that come pre-installed with Kali turns it into an ethical hacker’s Swiss knife. Kali Linux promotes itself as a more refined replacement with more testing-centric capabilities, as opposed to Backtrack, which had many tools that served the same goal.
Kali Linux is mostly used for sophisticated penetration testing and security auditing. Kali includes hundreds of tools for diverse information security activities such as penetration testing, security research, computer forensics, and reverse engineering. It comes with over 600 preinstalled penetration-testing programs. Each software has its own set of flexibility and uses cases. Kali Linux performs a fantastic job of categorizing these important programs as follows:
- Reverse Engineering
- Reporting Tools
- Hardware Hacking
- Sniffing & Spoofing
- Password Attacks
- Stress Testing
- Web Applications
- Exploitation Tools
- Maintaining Access
- Information Gathering
- Vulnerability Analysis
- Wireless Attacks
Steps to Install Kali Linux on Your Windows 11 PC
Below you will find the step-by-step guide on how to install Kali Linux on VirtualBox on your Windows 11 PC or laptop. However, before going through the installation process, you need to make sure you have compatible hardware. Kali runs on i386, amd64, and ARM (ARMEL and ARMHF) systems. The hardware requirements are as follows:
- A minimum of 20 GB of disk space is required for the Kali Linux installation.
- RAM for i386 and amd64 architectures, a minimum of 1 GB (recommended 2 GB or more).
Step 1. Enable Virtualization on your Windows 11 PC
Before proceeding with the other steps, you must first ensure that virtualization is enabled on your Windows 11 PC. Otherwise, the warning “Can’t start a session on the virtual machine” will be shown. See the link below to learn more about it and how to install it.
—> Enable virtualization on your PC
Step 2. Install VirtualBox on your Windows 11 PC
Before you can install Kali Linux on your Windows 11 computer, you must first download and install VirtualBox on your system. If you don’t want to encounter any issues when installing Kali Linux, you need also to install the extension pack. If you don’t know how to install them, we have step-by-step instructions for you. Please see the link provided below.
—> Install VirtualBox and the extension pack on Windows 11
Step 3. Download Kali Linux on Windows 11
If you’re a newbie seeking to download Kali Linux for the first time, it’s recommended to try it on a virtual machine and check if it’s compatible with the way you want it to be. Kali Linux VirtualBox images are available for users who want to try it on a Virtual Machine To download the Kali Linux image for VirtualBox, follow the steps below:
- Go to kali.org/get-kali/.
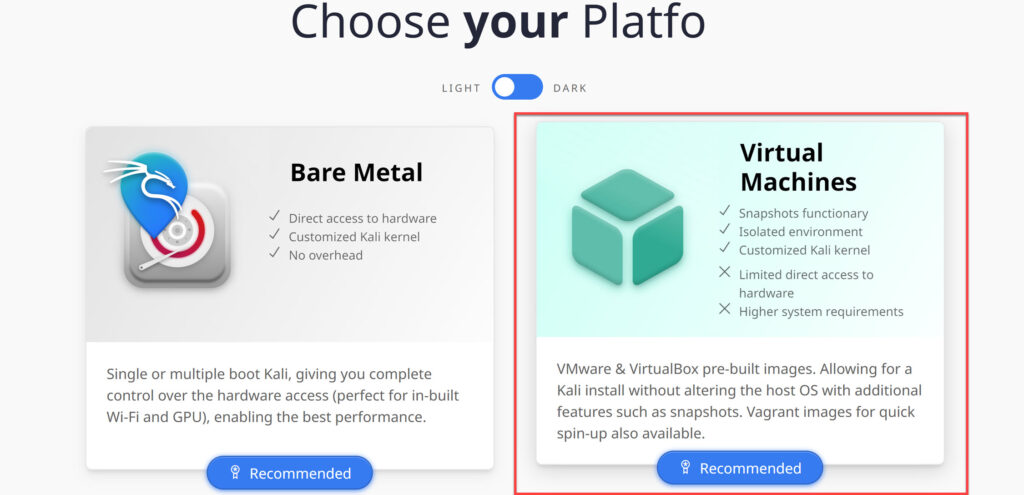
- Click on the “Virtual Machine” option and this will lead you to the section where the download links are given.
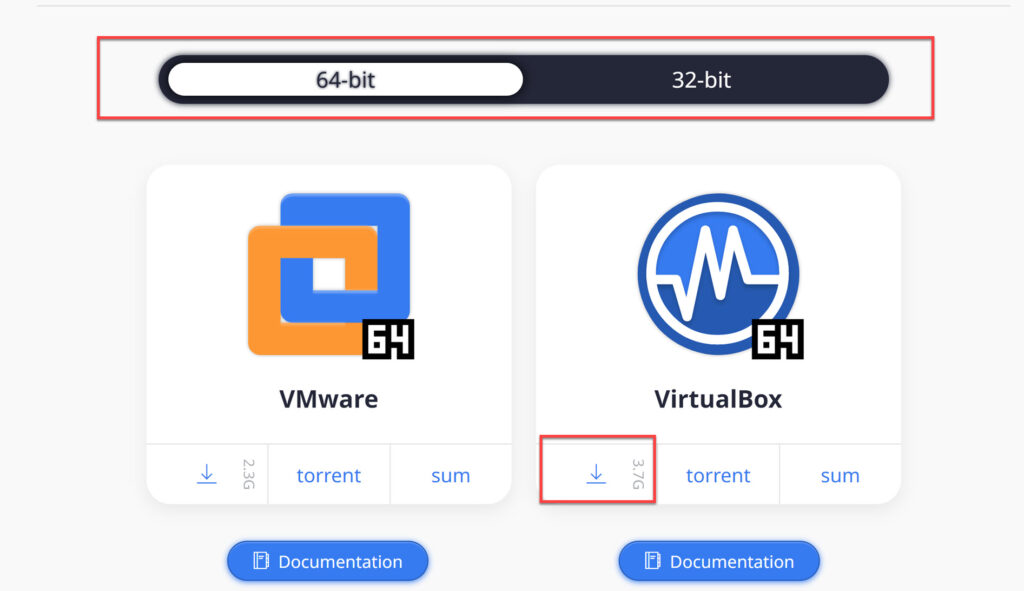
- Now, you can choose to download either 32-bit or 64-bit. Choose the version and click on the download button. This will download an OVA image, which can be imported into VirtualBox.
- After it’s downloaded, simply extract the file on your computer, and remember the location because you will need it later.
Step 4. Import Kali Linux OVA in VirtualBox on Windows 11
Finally, you can install Kali Linux in VirtualBox on Windows 11 by simply importing the Kali Linux image into VirtualBox. To do that, follow the below steps:
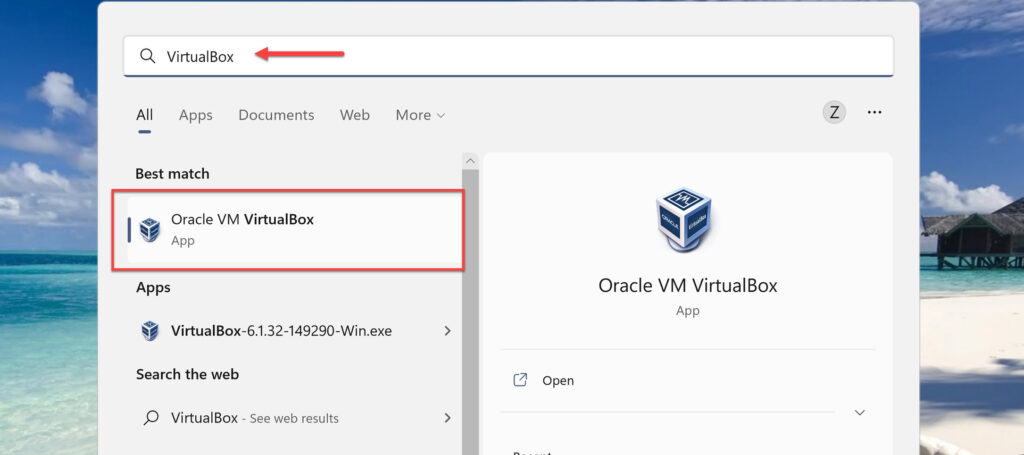
- Open the Oracle VirtualBox Application by searching for it in the Start Menu.
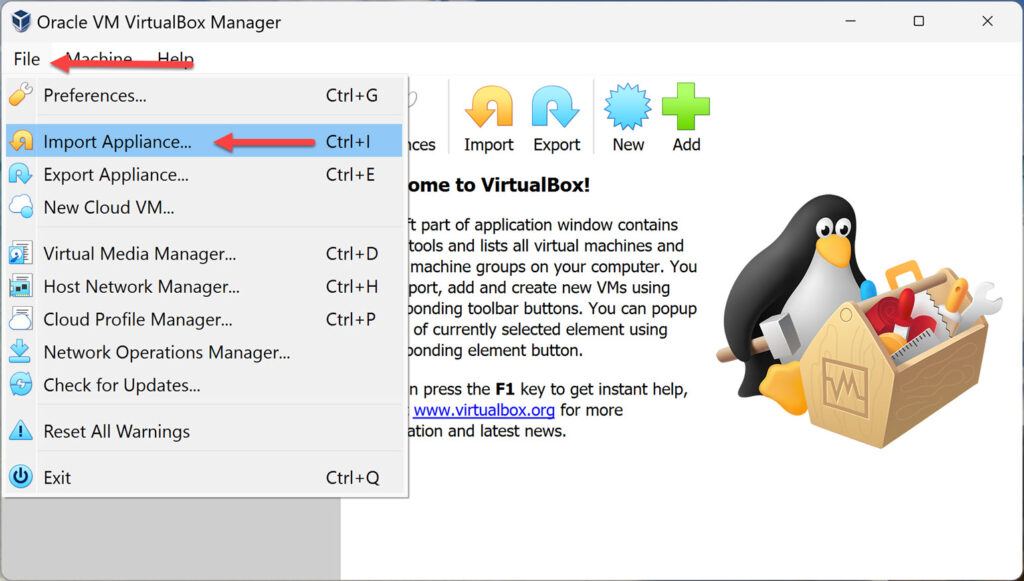
- Now, go to the “File” menu, and select “Import Appliance“.
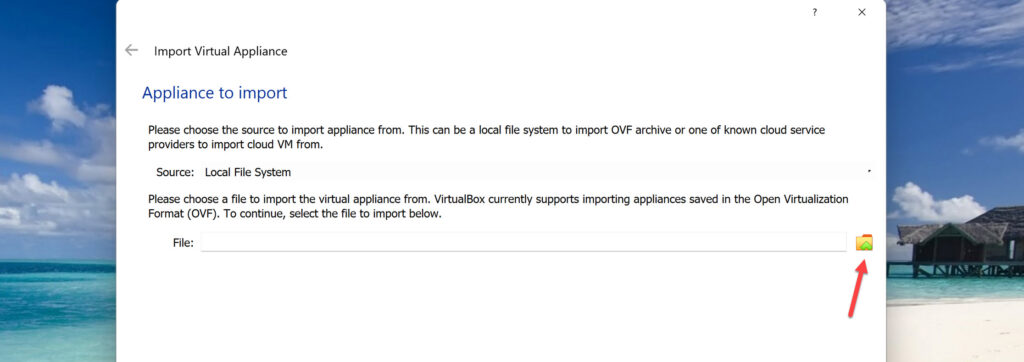
- Next, click on the little “folder” icon on the right side to import the Kali Linux OVA file.
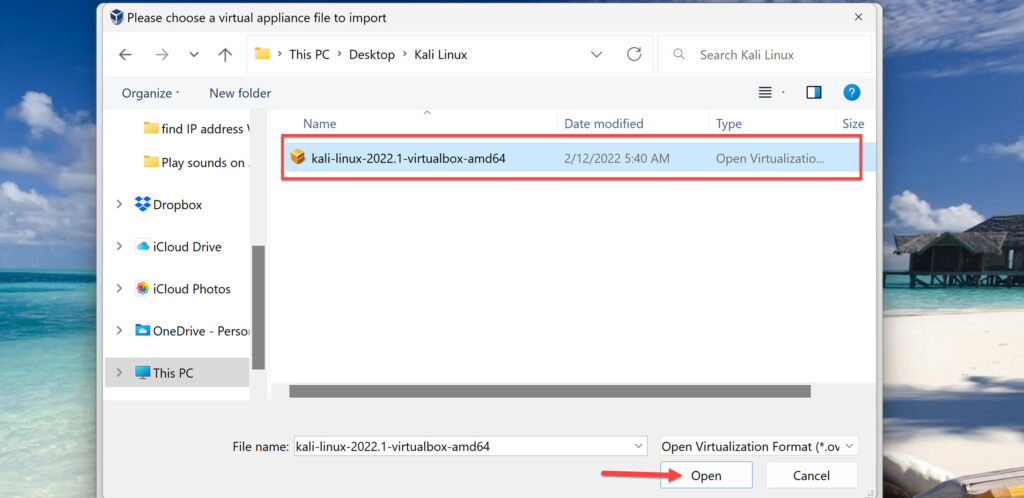
- Now, choose the Kali Linux OVA file and click “Open” to continue.
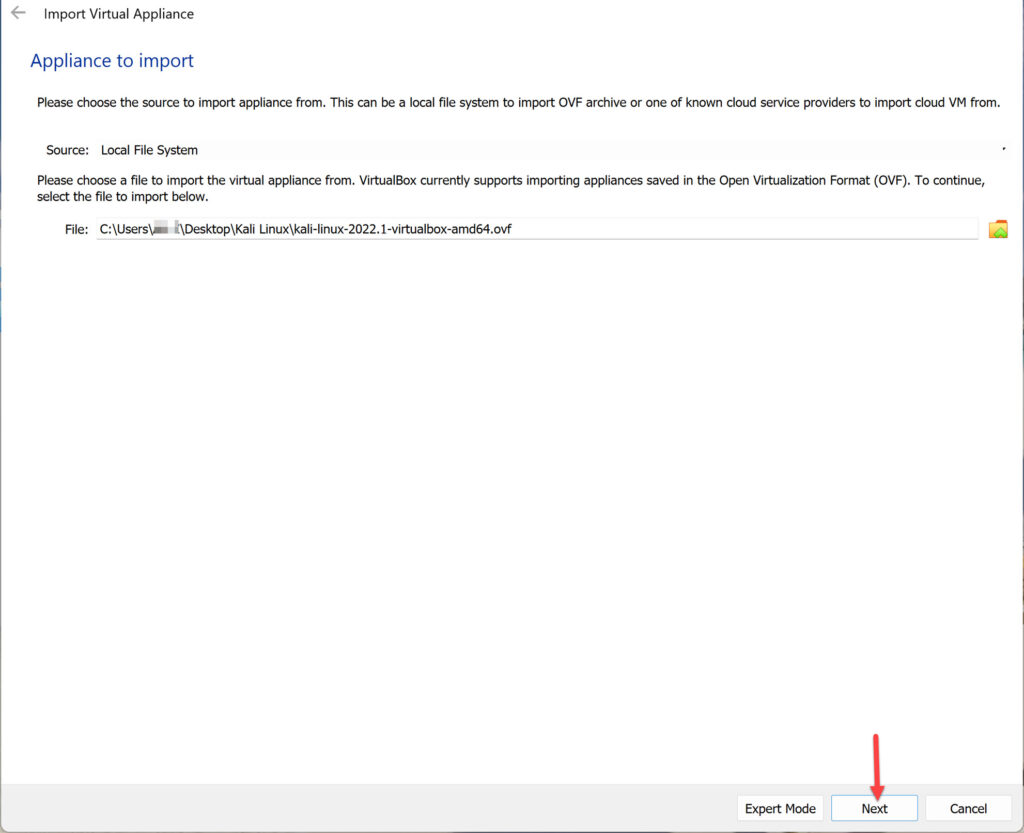
- Then, you will be taken back to the “Appliance to Import” window. Simply click “Next” to proceed.
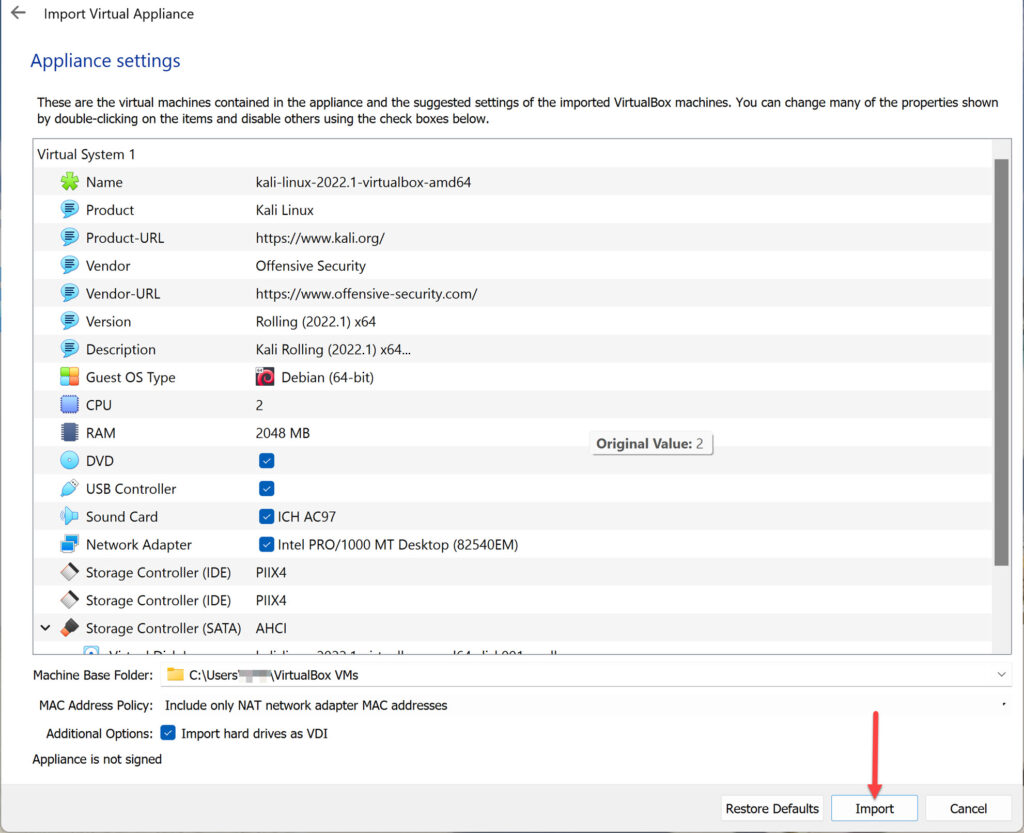
- In the “Appliance settings” window, you will see a summary of the settings of the system. Leave it as it is and click “Import“.
- Click “Agree” to Kali Linux Software License Agreement.
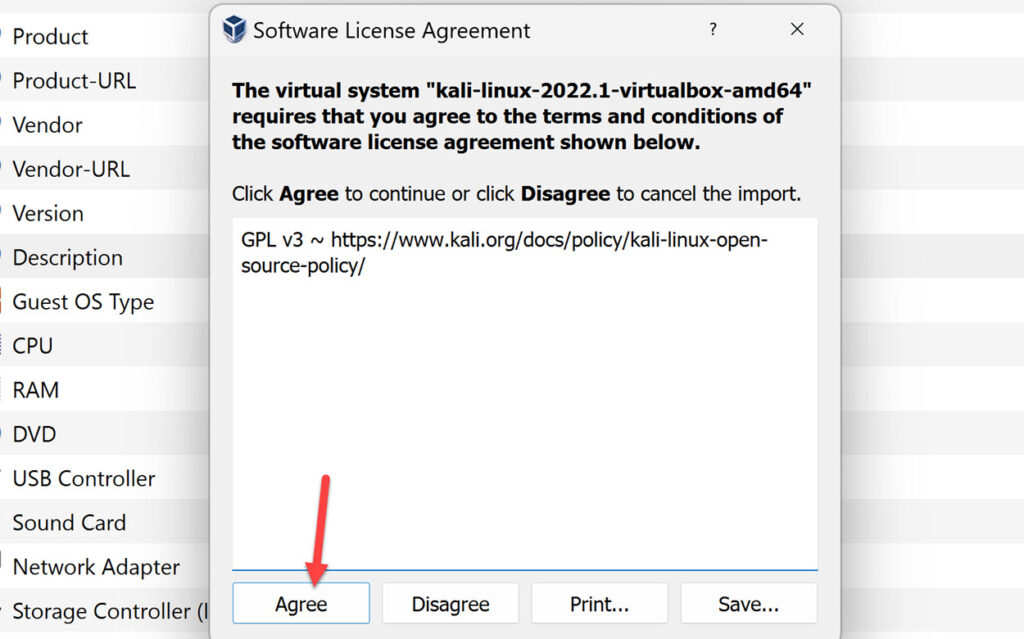
- VirtualBox will now start Importing the Kali Linux OVA appliance, and this could take anywhere from 5 to 10 minutes to complete.

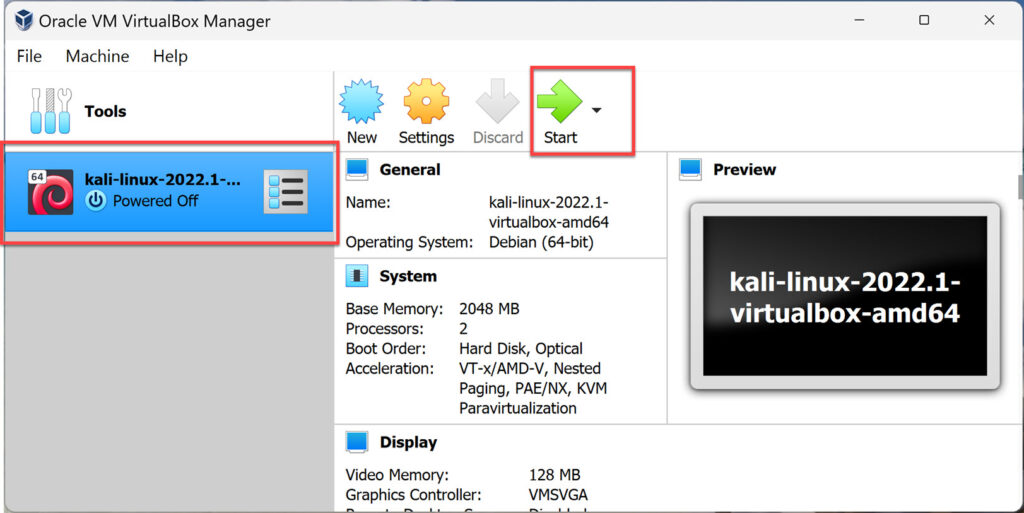
- Congratulations, Kali Linux has been successfully installed on VirtualBox. Next, click on the Kali Linux VM and click “Start” to boot up the Kali Linux Operating System.
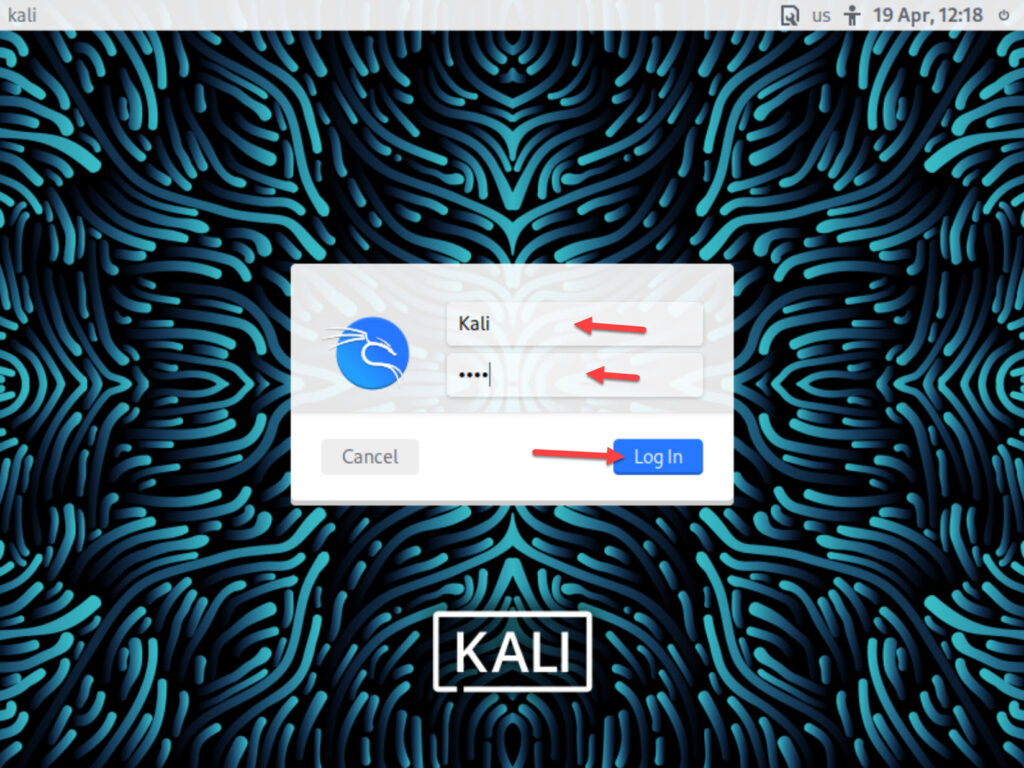
- On the login screen, enter “kali” as the username and password, and click “Sign in“.
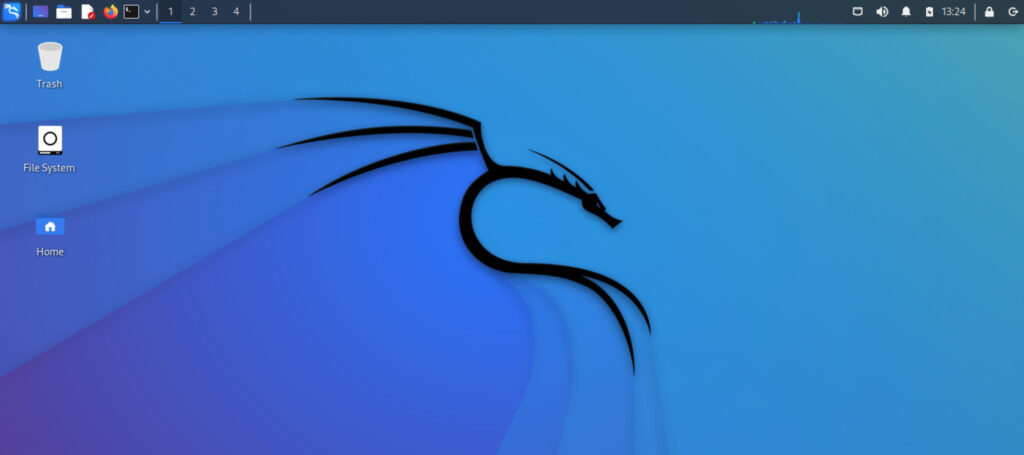
- You will now be presented with the Kali Linux GUI Desktop. Congratulations! You have successfully logged into Kali Linux.
FAQs
Why should I use Kali Linux?
There are several reasons why one should use Kali Linux. Kali Linux is a totally free operating system that includes over 600 distinct penetration testing and security analytics tools. It is also open-source software, and it adheres to the highly admired open-source concept. Their development tree is open to the public on Git, and all of the code is accessible for modification.
Furthermore, whereas most penetration tools are written in English, Kali has multilingual support, enabling more users to work in their local language and find the tools they need for the task. Finally, it is entirely customizable. It has been made as simple as possible for the more adventurous user to tweak Kali Linux to their taste, all the way down to the kernel.
Is Kali Linux illegal?
Kali Linux is just an operating system and installing and using it is not illegal but illegal if you are using as a black hat hacker. However, It is legal if you install it for useful purposes such as learning or teaching.
Is Kali Linux suitable for beginners?
Aside from security researchers, there is no indication on the project website that this is a good distribution for beginners. In fact, the Kali website expressly cautions visitors about the dangers of using the software.
Conclusion
To summarize, Kali Linux is a fantastic operating system that is widely used by professionals, ranging from security administrators to black hat hackers. It’s an operating system that everyone in the IT industry and computer enthusiasts should be familiar with because of its robust utilities, stability, and ease of use. This article showed you how you can install Kali Linux on your Windows 11 PC using VirtualBox. We hoped you’ve found this step-by-step guide helpful, and if you encounter any questions, please leave them in the comments section below.
Read also:
