While macOS Sonoma is currently only available as a developer beta, eager users can still get a taste of its capabilities by trying it out on a virtual machine. In this comprehensive guide, we will walk you through the enticing features of macOS Ventura and provide step-by-step instructions on installing it on your Windows PC using VirtualBox.
At the highly anticipated Worldwide Developers Conference (WWDC), Apple thrilled its audience by unveiling macOS Sonoma, the latest iteration of its desktop operating system. Set to be released in the fall, macOS Sonoma, also known as macOS 14, comes packed with a host of exciting new features for both desktops and laptops.
Table of Contents
MacOS Sonoma
Game Mode
MacOS Sonoma brings an exciting addition to Mac devices: Game Mode, crafted to take your gaming experience to the next level. Embrace smoother gameplay and minimal lag as this feature optimises system resources and prioritises performance. Easily customise your gaming preferences using the centralised hub that Game Mode offers, providing a seamless and immersive gaming environment. Discover Apple’s commitment to delivering an unparalleled gaming experience for all Mac users with the innovative macOS Sonoma’s Game Mode.
Safari and Passwords
Users can now divide topics like Work and Personal into separate profiles in Safari, which allows them to separate their browsing history, extensions, Tab Groups, cookies, and favourite items. This feature enhances privacy and security while giving users a more organised and productive browsing experience.
Video Conferencing Tools
Apple provides a variety of video conferencing tools in addition to gaming and browsing to improve collaboration and communication. Users can easily connect with coworkers, friends, and family members from anywhere in the world using apps like FaceTime and iMessage. They also provide high-quality video and audio capabilities.
Steps to Install macOS Sonoma on VirtualBox on a Windows PC
- Install VirtualBox and its Extension Pack on Windows 10 /11.
- Create a New Virtual Machine for macOS Sonoma.
- Customise Virtual Machine of macOS Sonoma.
- Running VirtualBox Codes on CMD
- Perform a clean macOS Sonoma installation.
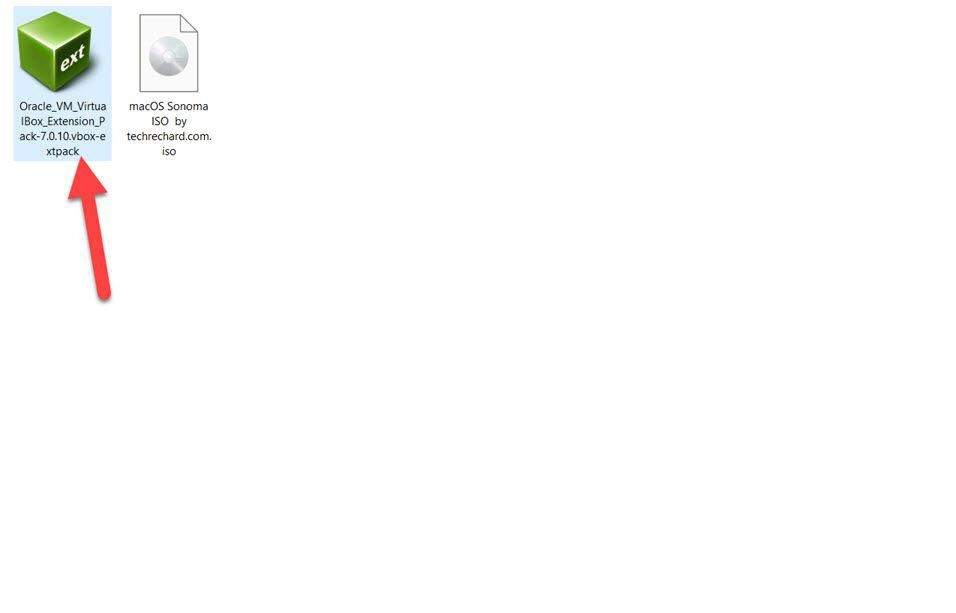
Before installing macOS Sonoma on VirtualBox, you need to download the below files:
1. Install VirtualBox and its Extension Pack on Windows 10/11
Installing VirtualBox and the VirtualBox Extension on your Windows operating system is one of the prerequisites for installing macOS Sonoma on Windows 10 or 11. You’ll be able to do this to create a virtual machine environment where macOS Sonoma can run.
To install VirtualBox and its’ Extension Pack on your Windows 10 or 11 PC, click on the link below.
Install VirtualBox and its Extension Pack on your Windows 10/11
2. Create a macOS Sonoma Virtual Machine
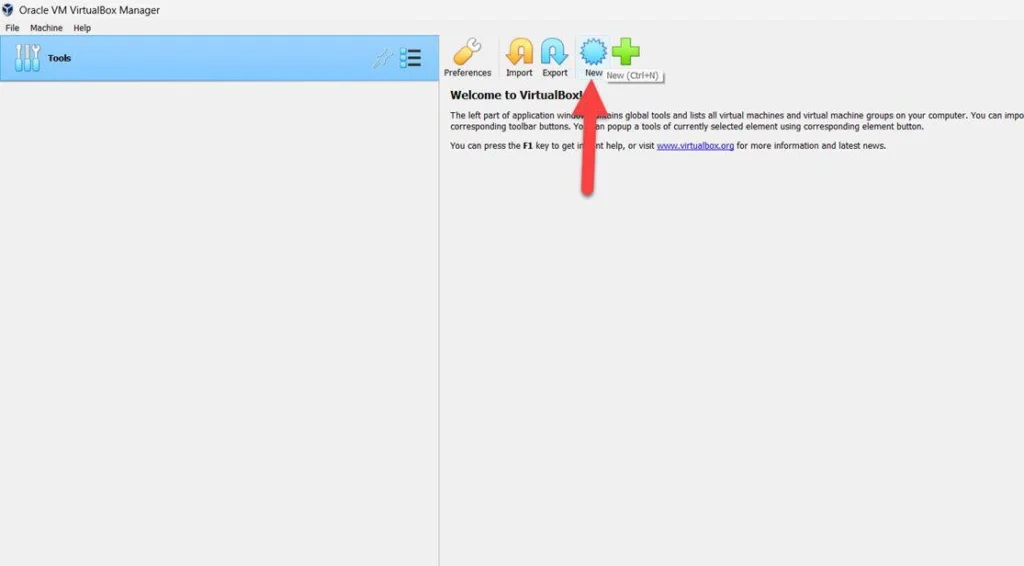
Step 1. To create the macOS Sonoma Virtual Machine, launch “VirtualBox VM” and tap “New.”
Step 2. Now from this window, select “Expert Mode.”
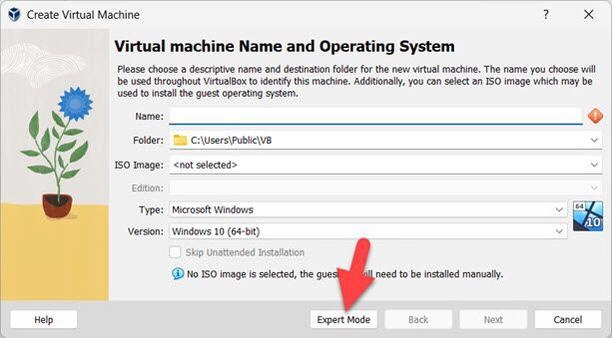
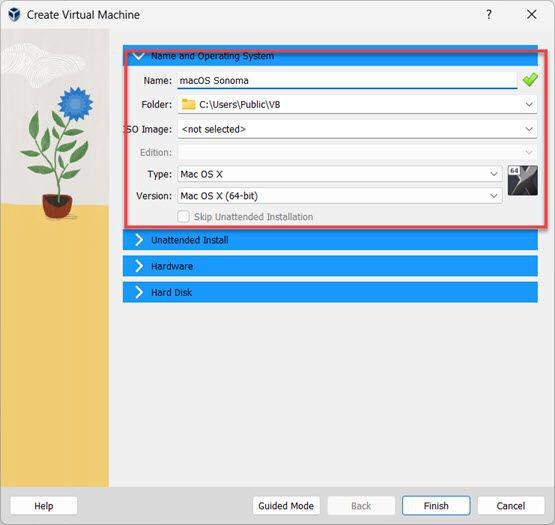
Step 3. Give your virtual machine a name and a location after that, and then click “Next” to continue. The name should start with “macOS.” Once macOS is typed, the VB will automatically select and type the macOS version.
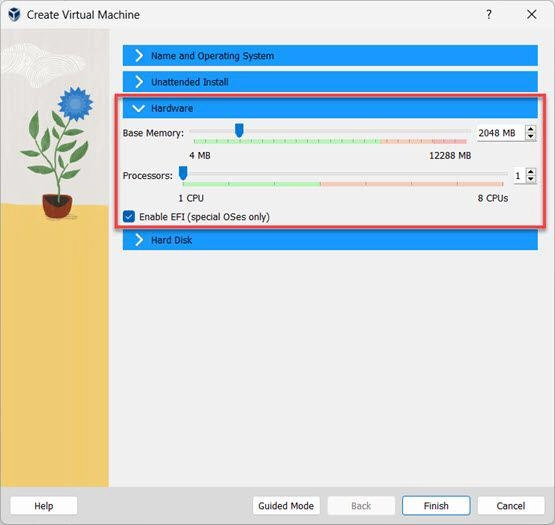
Step 4. Now increase the “Base Memory Size” and its “Processor.”
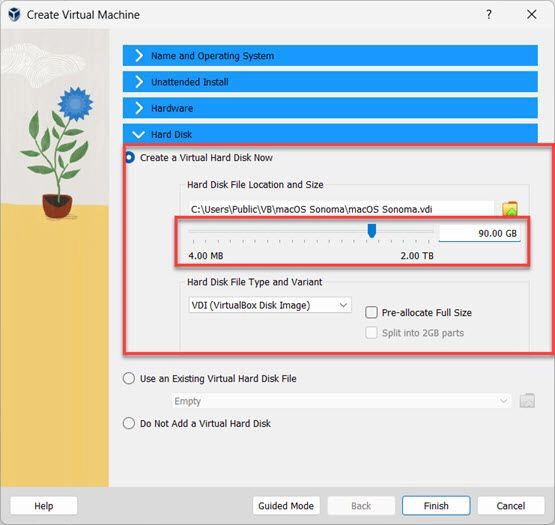
Step 5. Next, choose the “Disc Size” and specify the “Location,” then tap on the “Finish” button.
3. Customise the Virtual Machine of macOS Sonoma
There will be some customising you need to do after creating a new macOS Sonoma Virtual Machine on your Windows computer. To achieve this, follow the instructions listed below.
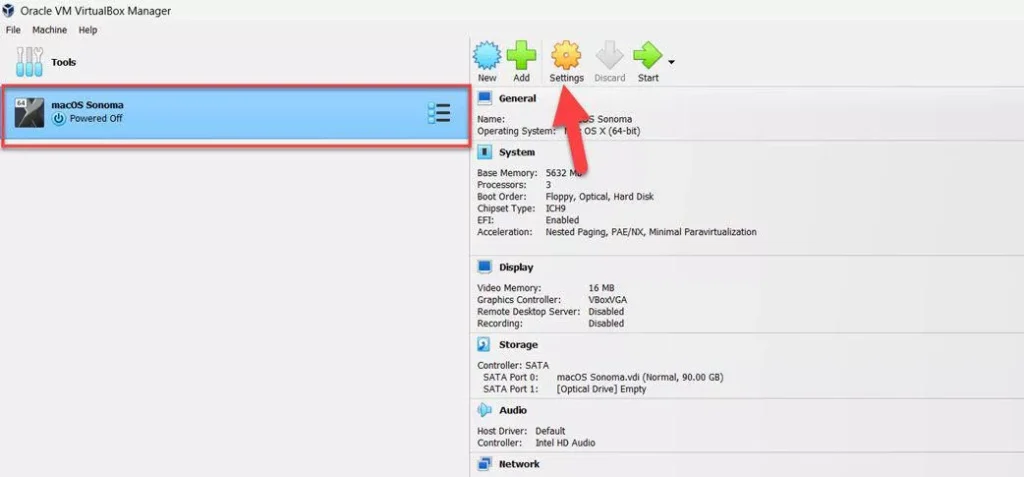
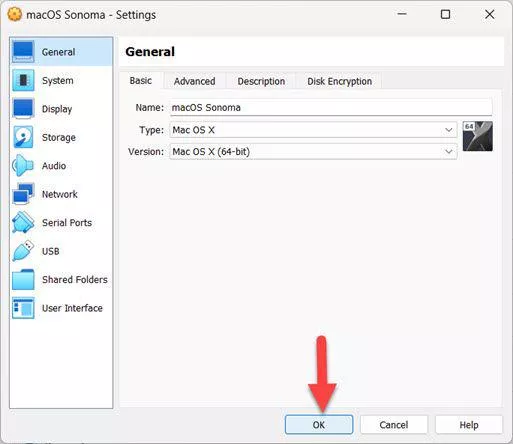
Step 1. To begin the customization, tap on “Settings” in the menu.
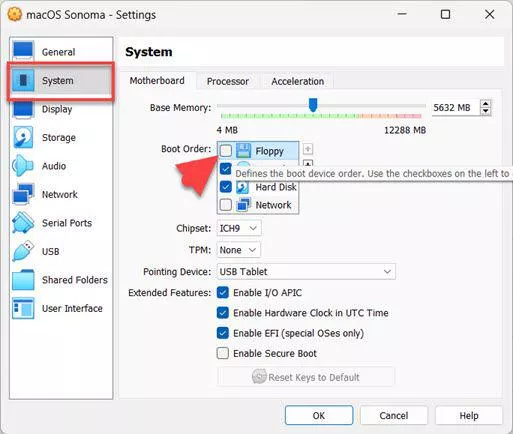
Step 2. Now from the Settings menu, tap on “System“, go to the “Motherboard” section, and uncheck the “Floppy” option.
Step 3. After that, navigate to the “Process” section in the System menu and change the Processor number to more than “one.” Remember that the more CPUs there are, the higher the performance.
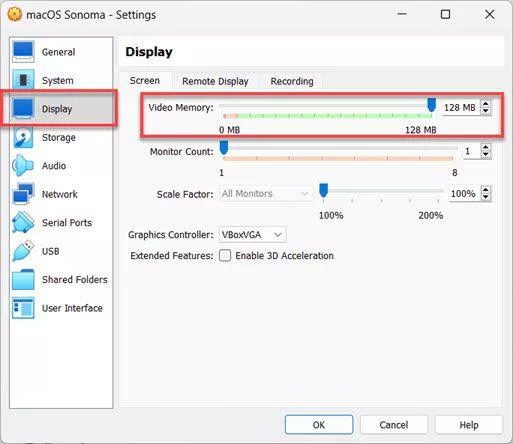
Step 4. Then tap on “Display” and increase the “Video Memory” to “128 MB.”
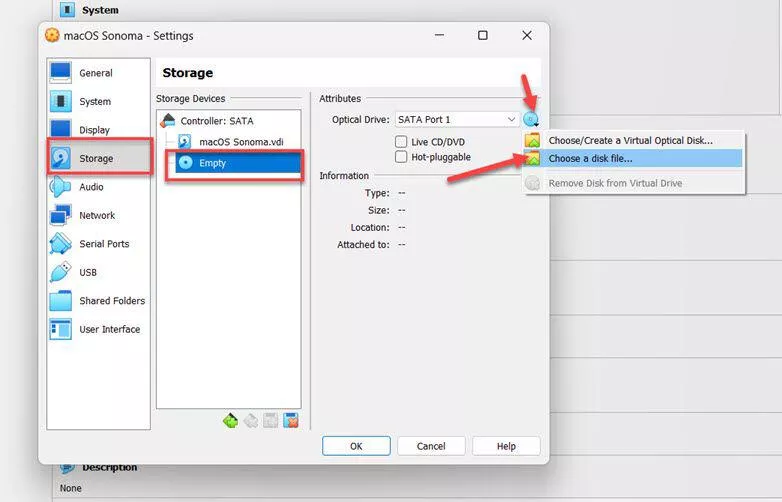
Step 5. The macOS Sonoma ISO image must then be attached to the machine, so Click “Empty” from “Storage,” then “CD icon,” and then “Choose a Disc File” from the menu that appears. Additionally, make sure the “Live CD or DVD” box is checked.
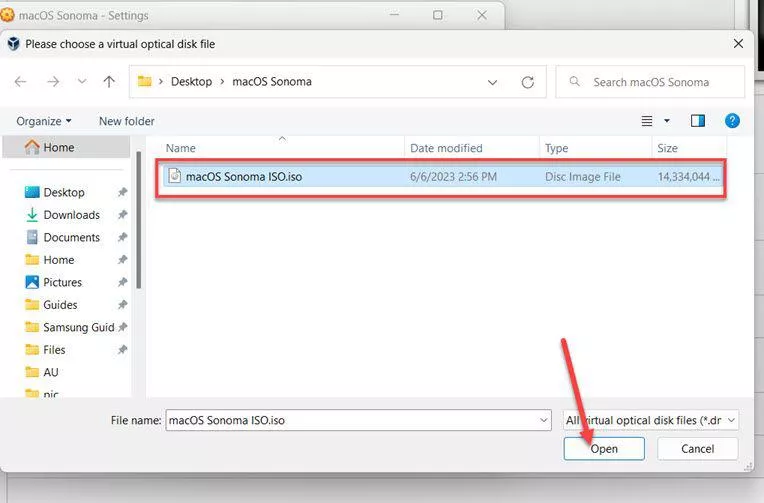
Step 6. Now from here, tap to find the “MacOS Sonoma ISO’ file and click to open it.
Step 7. Now to “Fix mouse & keyboard freezing,” enable USB 3.0 via the VirtualBox expansion pack.
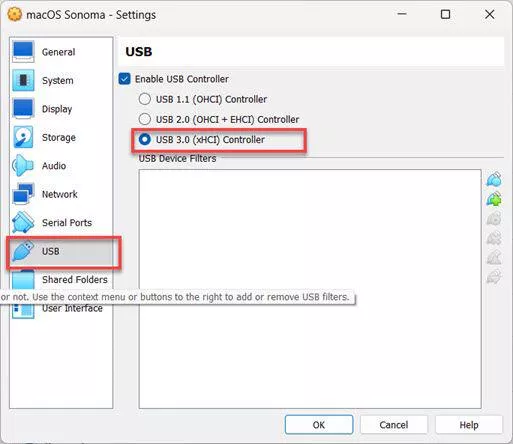
Step 8. Finally, tap “OK” to save the changes.
4. Run VirtualBox codes for macOS Sonoma on CMD
You must implement some code to install MacOS Sonoma on the virtual machine after you have customised it. The virtual machine running macOS will be in a loop if the code is not implemented or applied incorrectly. To do that, follow the instructions below.
Step 1. Before Entering the codes you need to “Quit” the VirtualBox Program so that the virtual machine proceeds with the installation.

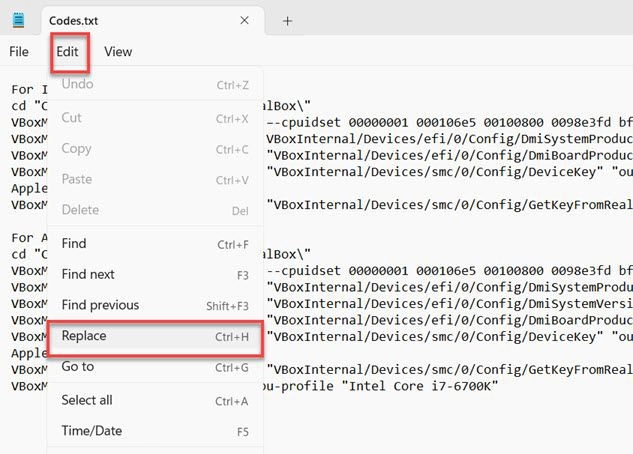
Step 2. To begin, open the download codes and tap on “Edit” and select “Replace.”
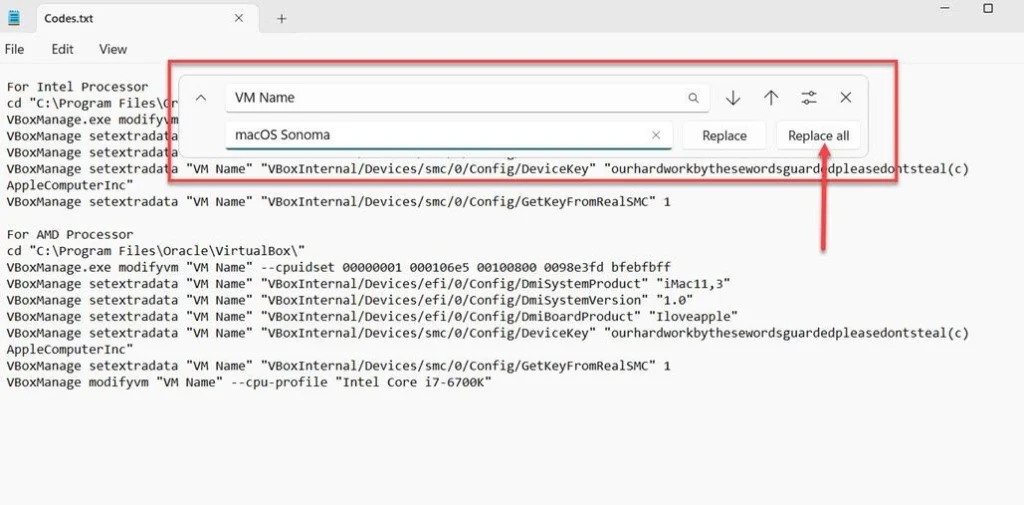
Step 3. Next, replace the “VMWare” name with the Virtual Machine name you created recently and tap on “Replace All.”
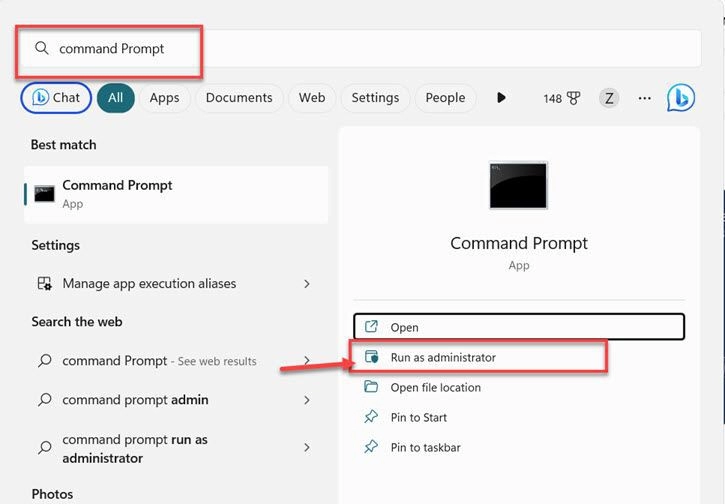
Step 4. Then open the “CMD” and select “Run as administrator.”
Step 5. And now copy the first line of code and paste it into “CMD,” then tap on “Enter.”
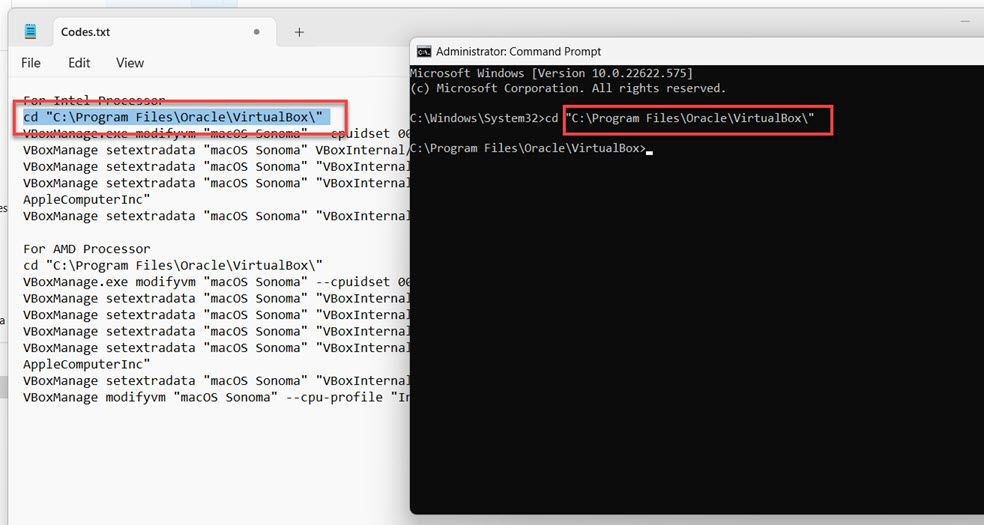
Note: But remember that you will see an “Error” if you paste the codes incorrectly.
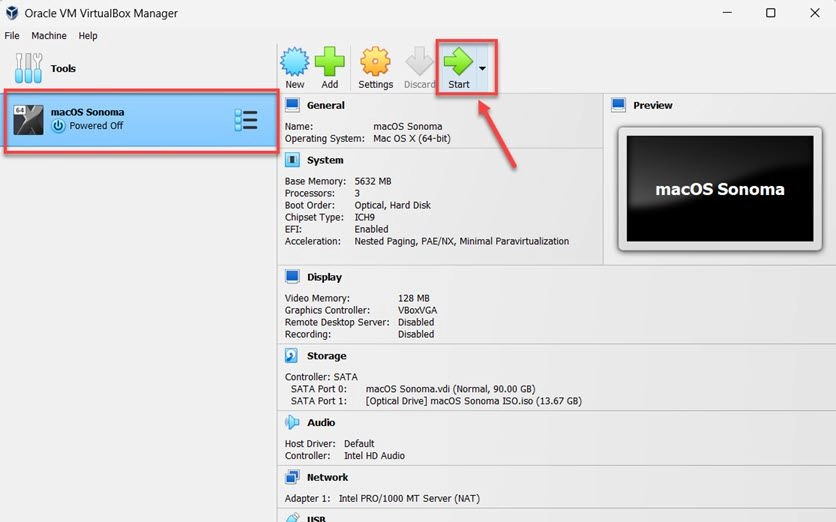
5. Install macOS Sonoma on VirtualBox
After the four steps you have completed, this is the final step to install and run macOS Sonoma on Windows 10 and 11 on VirtualBox. This time you need to perform a clean installation of macOS Sonoma on VirtualBox, so follow the guidelines below.
For a clean Installation, you would need to download the macOS Sonoma DMG file.
Step 1. First, Open VirtualBox, choose your recently created virtual machine, click “Start,” and watch the Apple logo appear after codes flash.
Step 2. Then select your “language.”
Step 3. And here, to install macOS Sonoma, you need to partition the storage, which you do by tapping on “Disc Utility” and choosing “Continue.”
Step 4. After creating the virtual machine, you must now select the storage. After that, choose “Erase” and create a partition to enable the installation of macOS Sonoma. and select “Done.”
Step 5. Now tap on “Disc Utility” and choose to “Quit the Disc Utility.”
Step 6. Next, select “Install macOS 14 Beta.” and tap on “Continue.”
Step 7. To continue with the installation, tap on “Continue.”
Step 8. Now tap “Agree” if you accept the terms and conditions, and for confirmation, select “Agree” once again.
Step 9. Here, select the “macOS Sonoma Hard Disc” and tap “Continue.”
Step 10. Now, macOS Sonoma will be installed in 40–60 minutes, and the speed depends on your PC speed.
That’s it. Once you finish the installation of macOS Sonoma on VirtualBox, you can set up macOS Sonoma on VirtualBox.
Final Words
These were the procedures to set up macOS Sonoma (macOS 14) on Windows 10 and 11 using VirtualBox. Before starting the installation, be sure to carefully read and comprehend the terms and conditions. Finally, please post any queries or recommendations in the comments section below.
Read also: