This Techschumz article will show you how to set a timer for the camera on the iPhone 14 series in iOS 16.
You can use the iPhone’s built-in camera app’s self-timer to snap photos of yourself and your friends or family without having to force everyone into a selfie. This is useful for self-portraits, solo images when traveling, and other situations where you need a helping hand but don’t want to bother others. The iPhone’s built-in photo timer gives you the flexibility to select a three-or ten-second delay, making it easy to get everyone in a group shot.
Set or Enable camera timer on iPhone 14, 14 Pro & 14 Pro Max
To enable the camera timer for taking photos yourself, follow the steps mentioned below.
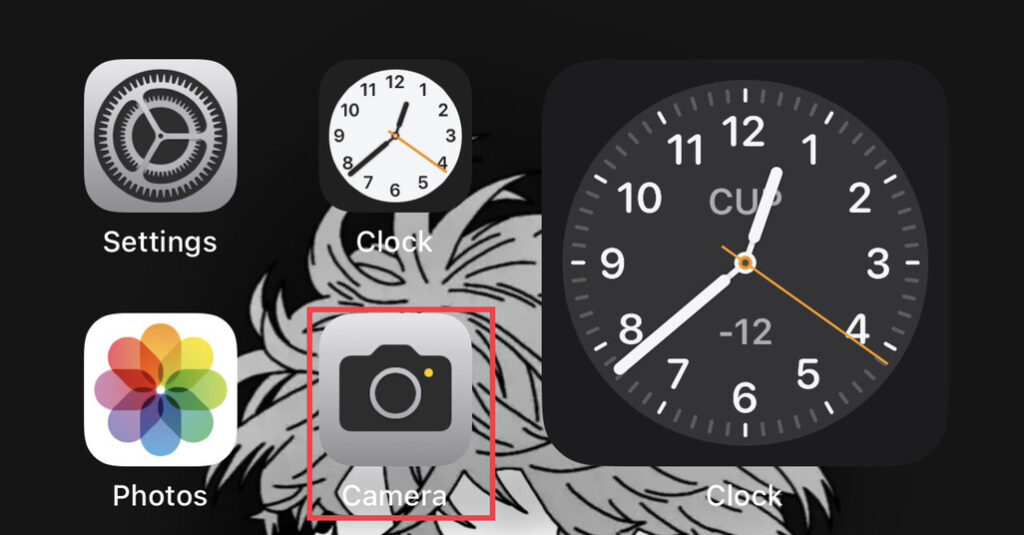
Step 1. To begin, launch the “Camera” app on your iPhone 14.
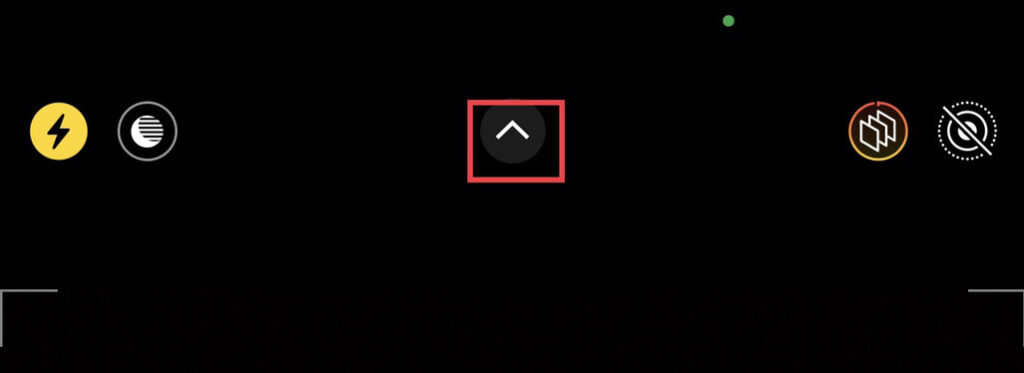
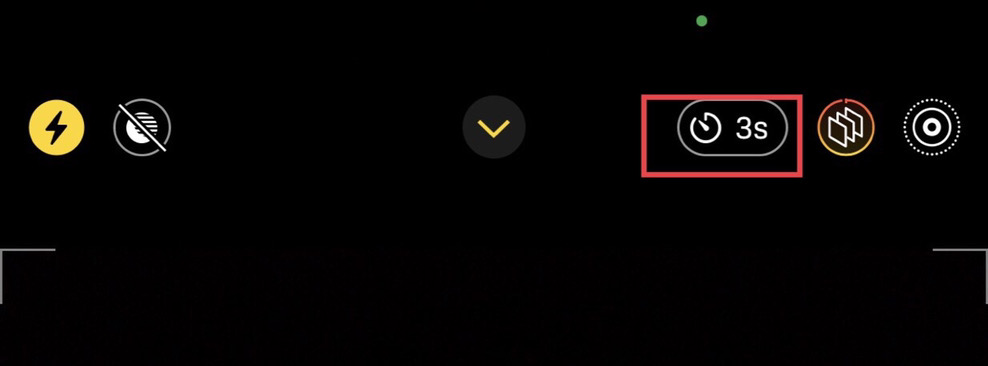
Step 2. Now, place your camera the way you want to take pictures, then tap on the “Down arrow” icon at the top of the app’s screen.
Step 3. Next, you will be provided with some options. Tap on the “Timer” icon to continue.
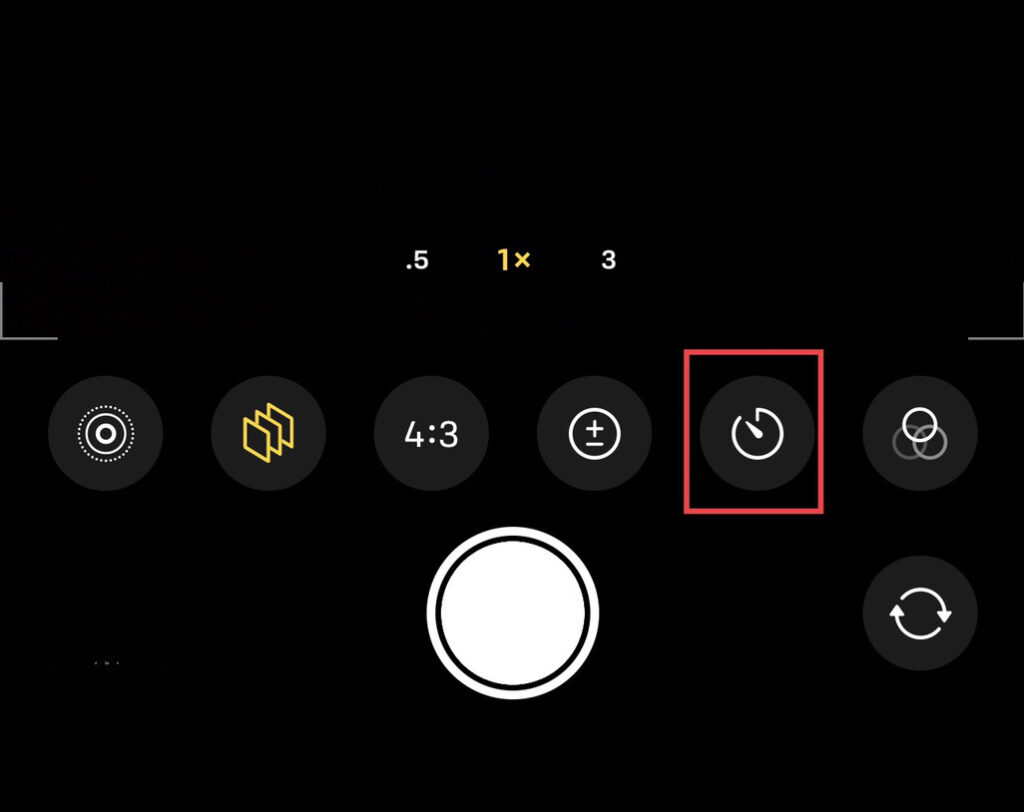
Step 4. Now, you will be provided a timer of 3 seconds and 10 seconds. These are the number of seconds that your iPhone camera will wait to take pictures.

Step 5. That’s it! The timer has been set successfully. You can now take photos using the built-in camera timer with your iPhone 14 Pro/Max camera.
Read also: